Installation, Xpres cut – Xpres Cut Lite User Manual
Page 4
To begin, unbox and place your cutter on a stable surface. Plug in the supplied power
cable and turn the cutter on (power button on the left hand side).
The
Lite system has two modes for installation:
- 32bit
- 64bit
We need to make sure the cutter is in the correct mode for the PC you are intending to install on.
Please note: You can find out whether your PC is 32 or 64bit by following the steps below:
- Click Start
- Right click on ‘my computer’ or ‘computer’ and select ‘properties’
- The required information will be within the specification shown in the properties window you have
opened
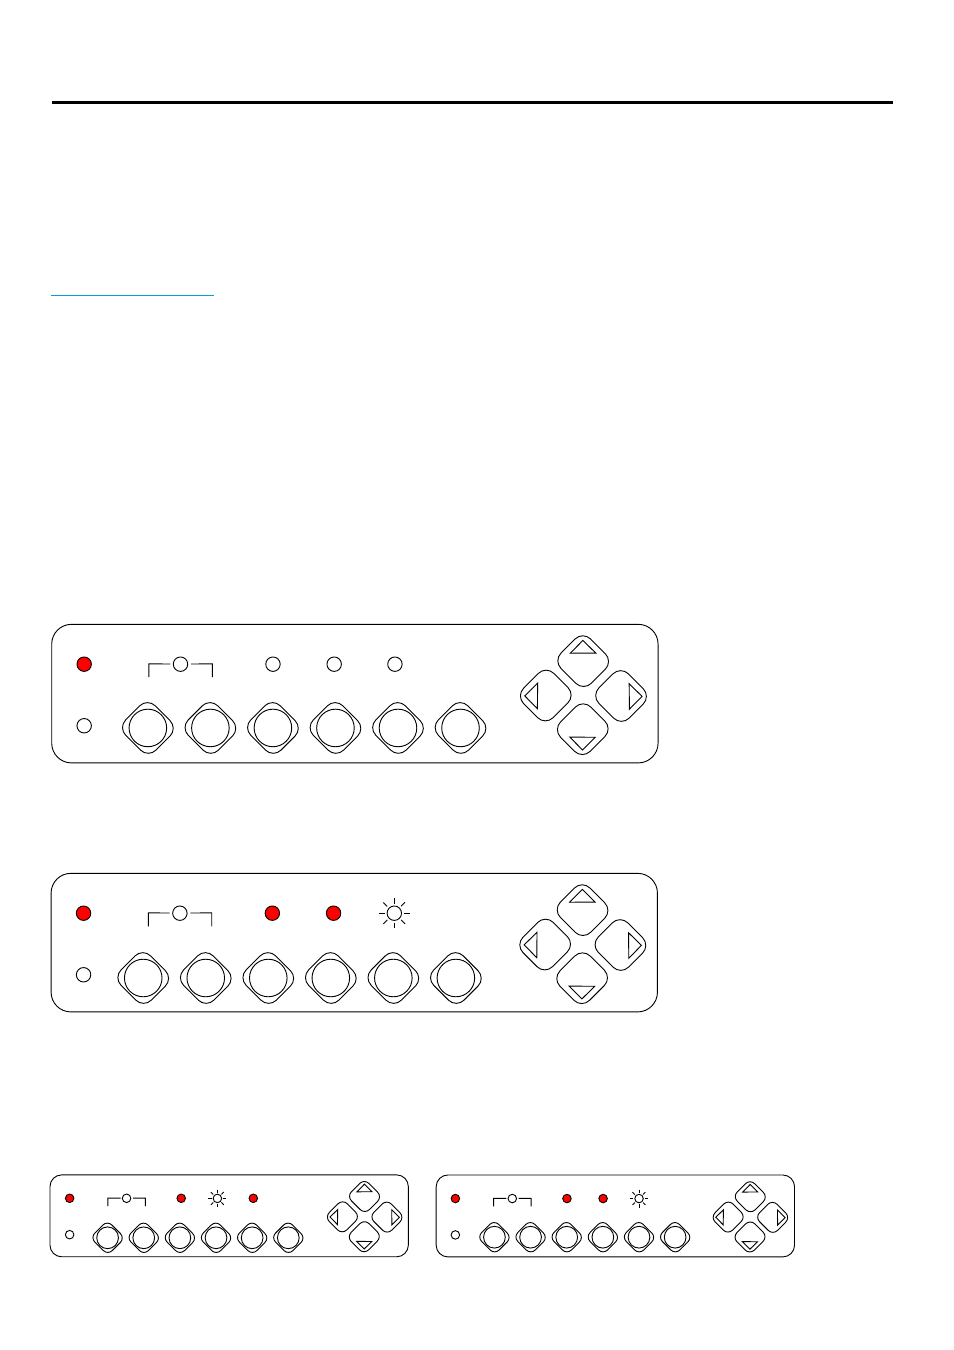
To check the cutter is running in the correct mode after being turned on, press the ‘On / Off Line’
button. You should now see lights shown as per the below (Power light on only):
Important: Before beginning the following installation guide make sure that the USB Cable is NOT
connected to the PC. You will be prompted to install the USB cable later.
Driver Installation
®
Xpres Cut
Installation
Power
On/Off Line Pause
Repeat Data Clear Cut Test Origin Set
Error
Now press the ‘Pause’ and ‘Origin Set’ button together, you should see the ’Power’, ‘Repeat’
& ‘Data Clear’ ON, and the ‘Cut Test’ icon Flashing (You may see the ‘Data Clear’ Icon Flashing
instead of ‘Cut Test’):
Power
On/Off Line Pause
Repeat Data Clear Cut Test Origin Set
Error
To install the cutter on a 32bit system you need to press ‘Data Clear’, the ‘Data Clear’ button will
Flash.
To install the cutter on to a 64 bit system you need to press ‘Cut Test’, the ‘Cut Test’ button will now
Flash.
Once the correct mode is set, press the ‘Origin Set’ Button to confirm the setting (the ‘Repeat’, ‘Data
Clear’ and ‘Cut Test’ lights will go out).
Power
Power
On/Off Line
On/Off Line
Pause
Pause
Repeat
Repeat
Data Clear
Data Clear
Cut Test
Cut Test
Origin Set
Origin Set
Error
Error
32bit
64bit
2