1 cleaning the printhead – Rice Lake Datamax-ONeil M-Class User Manual
Page 88
80
M-Class
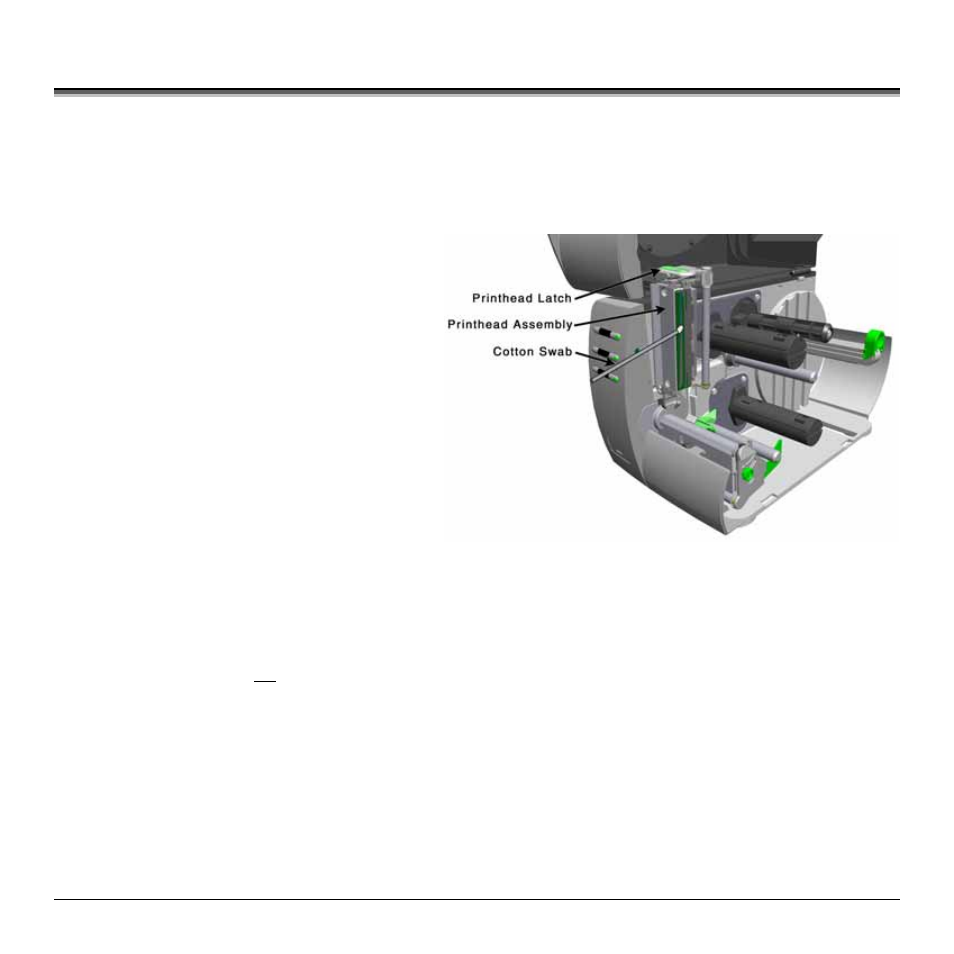
6.1 Cleaning the Printhead
If print quality declines (symptoms include non-compliant bar codes, print dropouts, streaks), the typical cause is debris
build-up on the printhead. Furthermore, when the build-up is not removed it may lead to element failure, greatly reducing
the life of the printhead. To clean the printhead:
1. Turn ‘Off’ and unplug the printer.
2. Open the cover. Unlock the Printhead Latch and
raise the Printhead Assembly. Allow the
printhead to cool before proceeding.
3. Move media and ribbon away from the printhead
as necessary.
4. Using a Cotton Swab moistened, not soaked, with
isopropyl alcohol gently wipe away any build-up
on the printhead surface, paying close attention to
the Burn Line. Allow the printhead to dry.
5. Replace the ribbon and media. Lower the
Printhead Assembly back to the locked position.
6. Close the cover. Plug in and turn ‘On’ the printer.
Feed several labels to normalize tracking.
6.1.1 Automated Printhead Cleaning (printers with display only)
1. Remove media and ribbon.
2. Place a Datamax Cleaning Card, part number 70-2013-01 under the printhead. Lower and lock the printhead. Ensure
that the Leveling Cam is not engaged (positioned in its left most position).
3. Press and hold the TEST Key for approximately four seconds.
The printer will begin the cleaning routine.
4. In cases of heavy build-up, or if high heat values are typically used for printing, flip the card over and repeat Step 3.
5. Reinstall your ribbon and media (if necessary, readjust the Leveling Cam, see Section 6.2). Lower and lock the
printhead. Close the cover.