0 using the serial ports, 1 setting the serial ports, 2 connecting a serial printer – Rice Lake Combination System - Precision Loads PL9710 Indicator User Manual
Page 16: Using the serial ports, Setting the serial ports, Connecting a serial printer
12
PL9710 Installation Manual
6.0 Using the Serial Ports
The rear panel of the
PL9710
indicator has connectors to provide RS232 serial output for printers, remote displays,
remote keypads, an on-board computer, or other peripherals. Two communication ports are available, COM1 and
COM3. Both COM ports have the following specifications:
• Baud rates: 1200, 2400, 4800, and 9600 baud
• Parity: None
• Stop bit: 1
• Data: 8 bits
Only the baud rates are selectable. The default baud rate is 9600.
COM1 is used for output to a printer or to accept input from a bar-code scanner or external keypad.
COM3 is used for a large-digit remote readout (scoreboard) or a wireless remote handheld display.
6.1 Setting the Serial Ports
Two options are available when setting the serial ports,
the baud rate and whether or not continuous output is
needed. If you are using the PL6050 printer, do not
change the default of 9600 baud.
1. Press the
Menu
key for about 10 seconds until the
information display shows Setup Serial Port.
2. After releasing the
Menu
key, the information
display will show Setup selection and the weight
display will show Setup.
3. To set the COM1 baud rate, press the
key
until the information display shows Select Baud
COM1.
If you need a baud rate other than the default
9600, press the appropriate softkey. The selected
baud rate will show at the end of the first line in
the display.
4. Press the
Cancel
softkey to complete the selection
and return to Setup selection.
5. To set the COM3 baud rate, press the
Up
key until
the information display shows Select Baud
COM3.
Select the proper baud rate.
6. To set up COM1 for continuous output, press the
Up
key until the information display shows
COM1 Send Continuous YES.
Press the appropriate softkey for YES or NO. The
selection will show at the end of the first line in
the display.
7. Press the
Cancel
key to complete the selection
and return to Setup selection.
8. To set up COM3 for continuous output, press the
Up
key until the information display shows
COM3 Send Continuous YES.
9. Press the
Cancel
softkey to complete the selection
and return to Setup selection.
10. Press the
Cancel
key again to return to normal
operation.
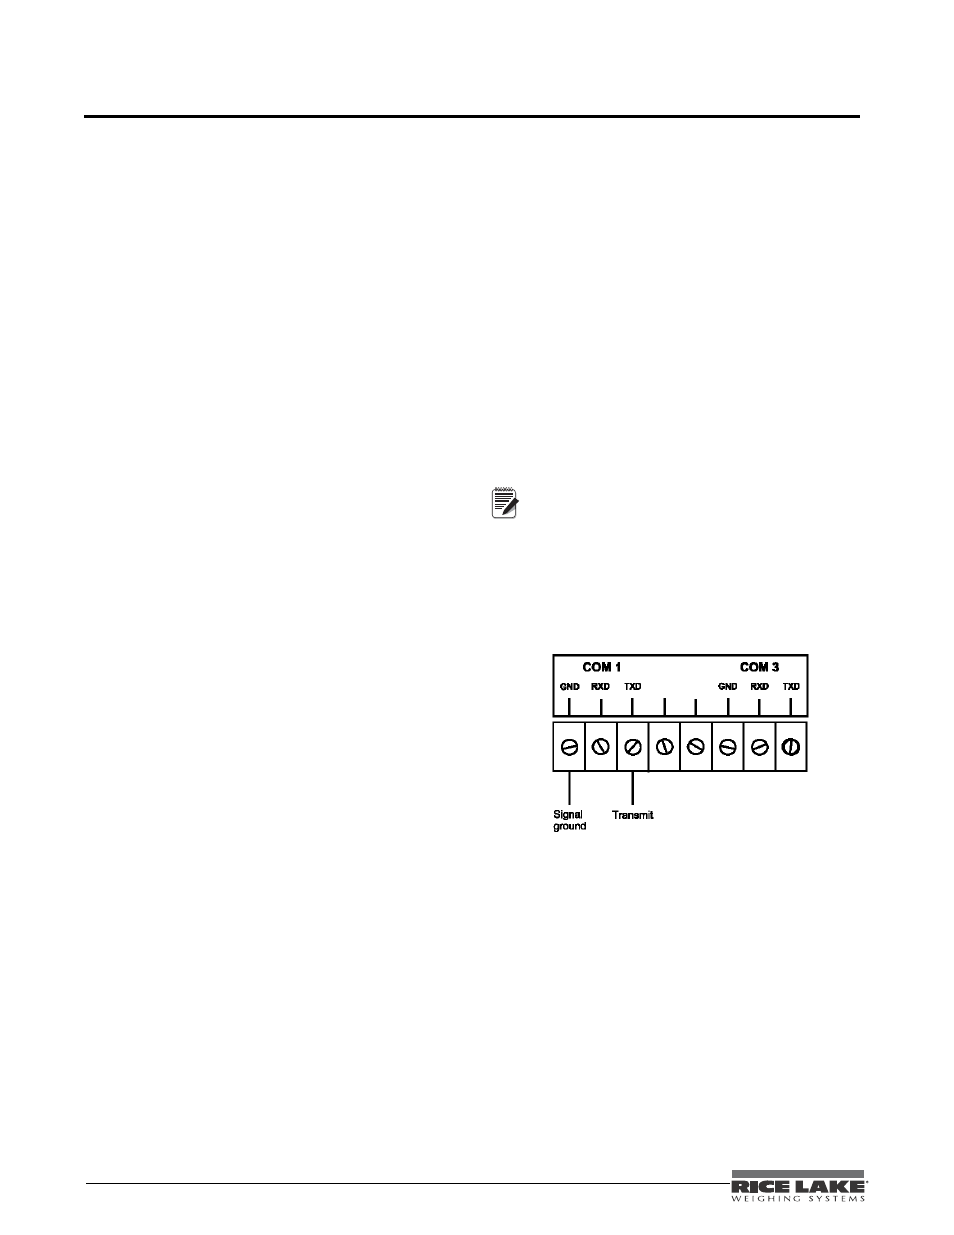
6.2 Connecting a Serial Printer
A serial printer has a two-wire cable, which connects to
the back of the
PL9710
indicator at the COM1 serial
port. The power wire attaches to the 12VDC positive
(+) terminal, the ground wire connects to the GND (-)
terminal, and the signal wire connects to the TXD
terminal. Consult the printer operator’s manual for the
ground and signal wire colors.
For the printer to operate properly, the COM1
baud rate must be set to 9600 baud (Step 3
above).
The COM1 serial port should not be set for continuous
output (Step 6 above) if a printer is connected. Continuous
output will cause the printer to print a ticket each time the
indicator’s weight display is updated. With continuous
output set to NO, the printer will print a ticket only when
the PRINT key is pressed on the indicator’s front panel.
Figure 6-1. Serial Printer Connections
Note