ETS-Lindgren 2181 Turntable User Manual
Page 22
22
| Assembly
and
Installation
The turntables have a quantity of floor flange pieces depending on the size of the
turntable. All flanges are pre-cut at the factory for a drop-in fit.
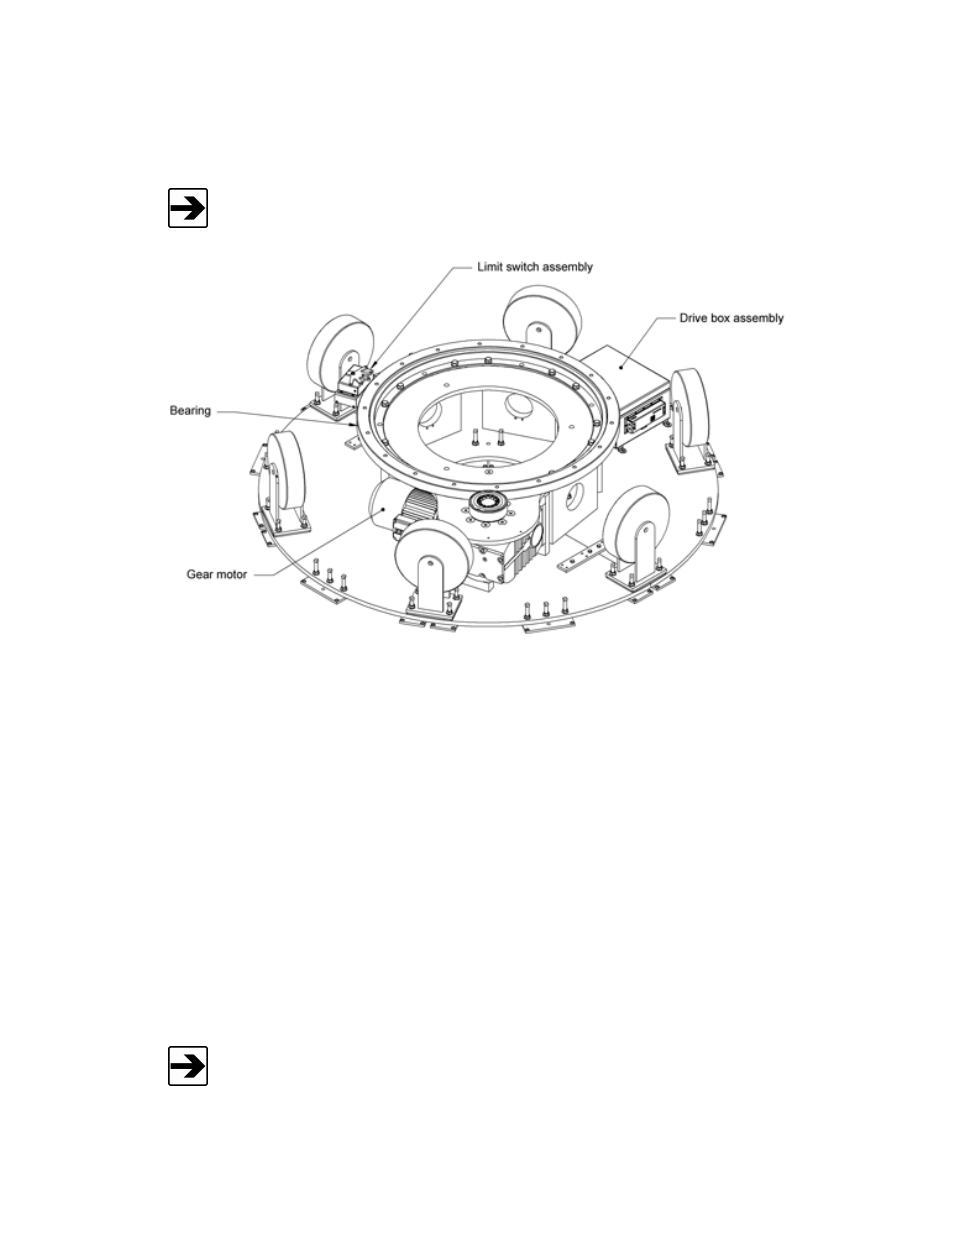
A 2-meter Model 2181 is depicted in the following. The turntable top is shown
as a partial cut-away to provide a view of internal components.
1. Lay the floor flange into the opening of the raised floor and push outward
to the diameter of the opening.
2. Attach the turntable top onto the center bearing with the hardware
provided.
3. Using a pipe clamp and 1/4-in Allen wrenches or 1/4-in pin, place a
spacer between the turntable and floor flange starting in three places in
the center or on the flange.
4. Once tension is placed on all three wrenches, drill a 5/32-in hole through
the counter-sunk holes in the floor flange. Drill completely through the
panel and place screws into the holes.
5. Continue working around the floor flange, completing two or three holes
at a time.
Make sure that a 1/4-in gap between the turntable top and the mounted brush
ring be held as close as possible so that the grounding brushes seat properly.
Also, make sure the flange ends are flush with each other.