ETS-Lindgren 2181 Turntable User Manual
Page 20
20
| Assembly
and
Installation
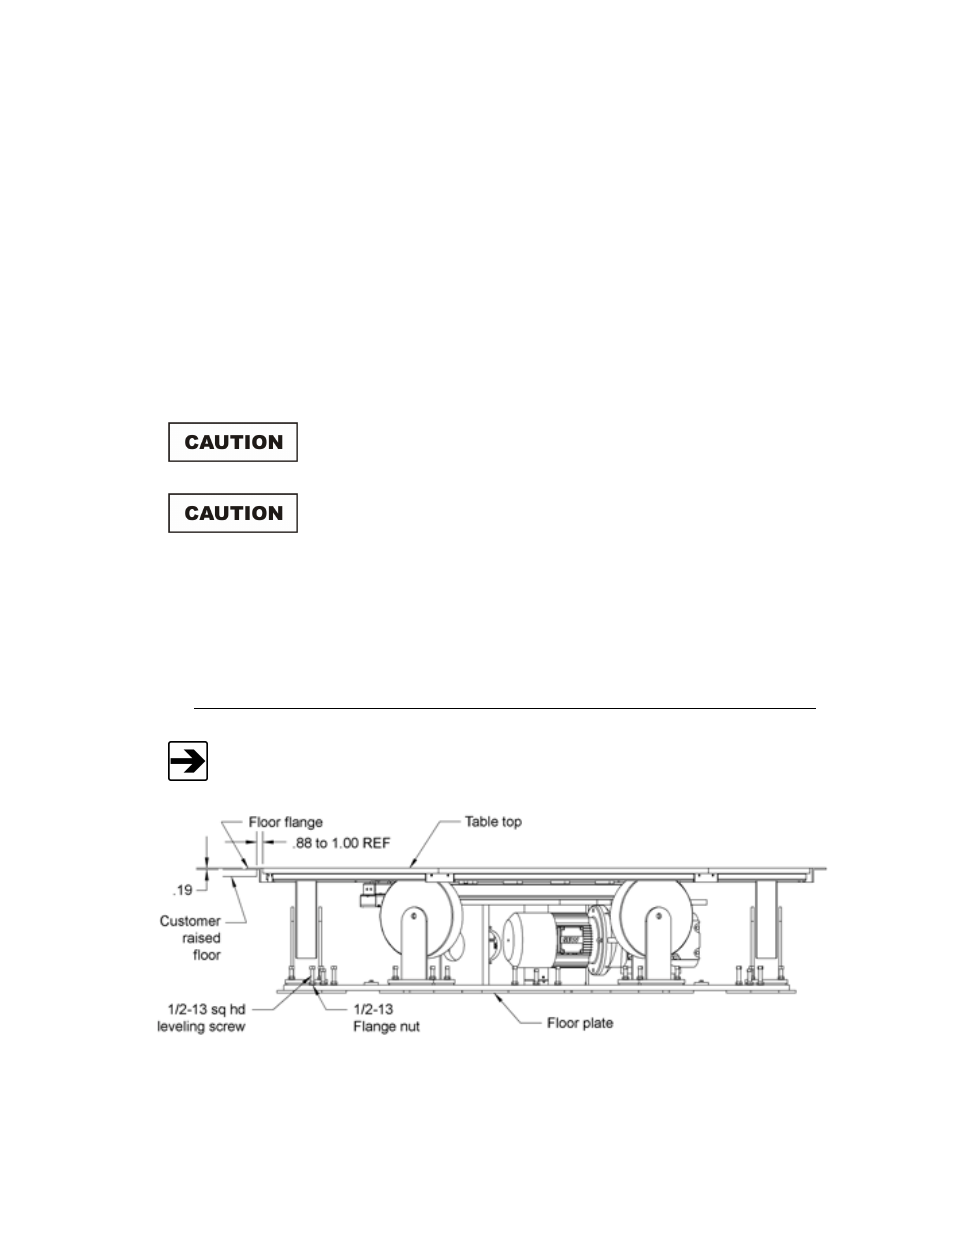
4. The drawings in the back pocket of this manual show the placement of
floor plates and leveling screws to anchor and level the turntable. Anchor
the turntable through the attachment holes using the concrete expansion
bolts provided. After installing the floor plates and leveling screws, level
the entire turntable by adjusting all the leveling screws between and
under the casters, and in the center section of the turntable.
5. Tighten all lock nuts accompanying the leveling screws to lock the height
of the turntable into place.
6. Connect the fiber optic control cable and install the power connection
according to local electrical code. The standard power configuration is
230 VAC 50/60 Hz.
Electrical connection is subject to local electrical codes, and
should only be performed by a qualified electrician.
Keep all body parts away from the drive pinion when the
turntable is energized.
7. Follow the instructions in the next section, Floor Flange Installation in a
Paneled Floor, to install the ground ring assembly.
8. Reinstall the top section removed in step 3 of these instructions.
Floor Flange Installation in a Paneled Floor
A 2-meter Model 2181 Turntable is depicted in the following illustrations.