Installation procedure, Parts included, Removing the top cover – Elecraft KXV3A User Manual
Page 6
6
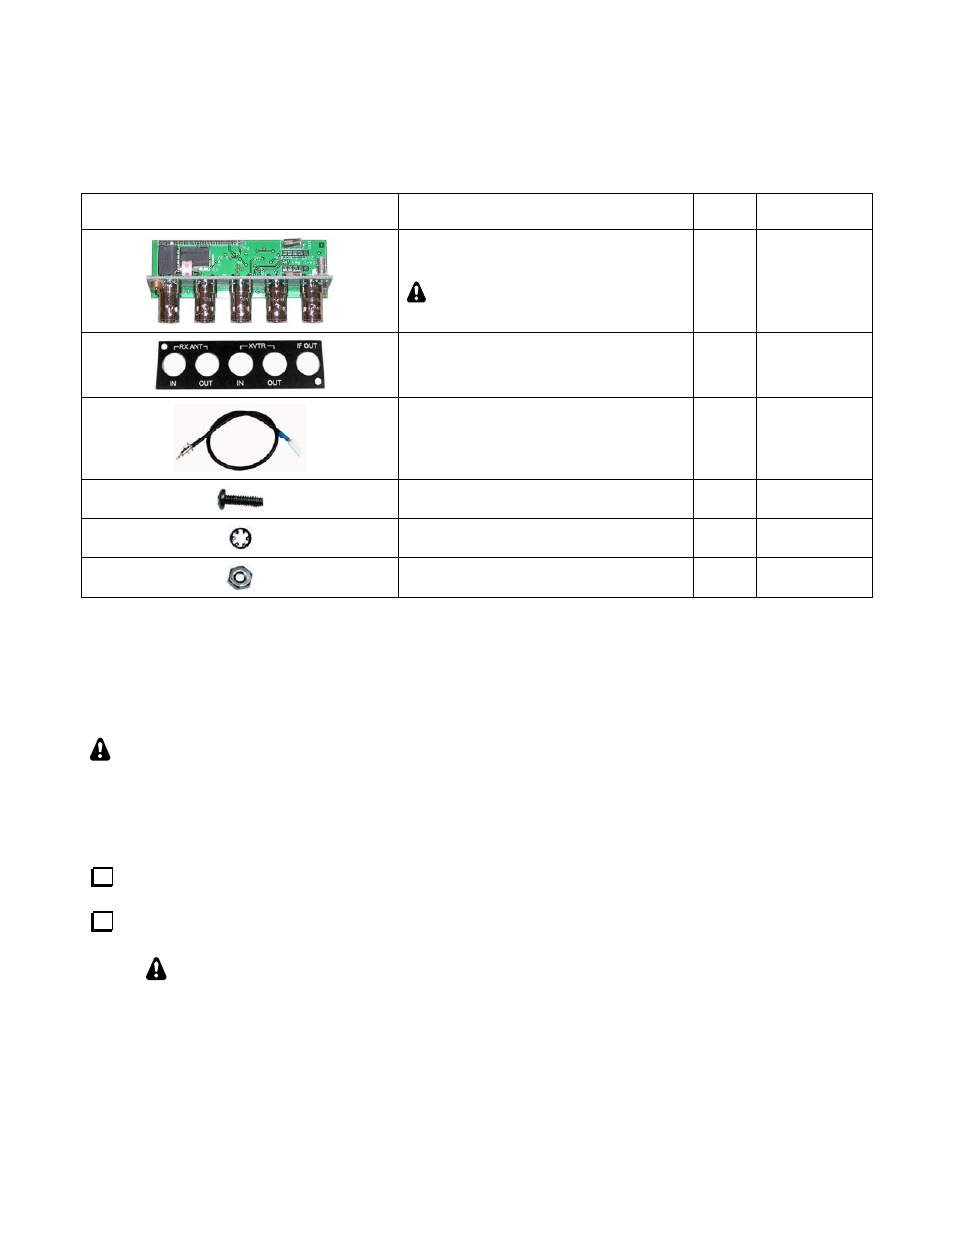
Parts Included
The following parts should be included in your kit. Check to ensure you have them all. If any parts are damaged
or missing, contact Elecraft for replacements (see Customer Service and Support, page 3).
ILLUSTRATION DESCRIPTION
QTY.
ELECRAFT
PART NO.
KXV3A Printed Circuit Board Assembly
ESD Sensitive.
1 E850244
XV3 Connector Panel
1
E100224SS
KXV3A TMP
Cable Assembly
1
E850292
Screw, 4-40, 1/2” (13 mm)
2 E700030
Lockwasher, 4-40, inside tooth
2 E700010
Nut, 4-40
2 E700011
Installation Procedure
SPECIAL NOTE FOR K3 KIT BUILDERS:
If you were directed here by the K3 Kit
Assembly Manual to install your KXV3A Module, inventory the parts in this kit against the list under
Parts Included on page 6 then begin installation at the step indicated on page 10.
Removing the Top Cover
Disconnect power and all cables from your K3.
Remove the nine screws to free the top cover as shown in Figure 1. After the cover is open, lift it gently to
reach the speaker wire connector. Unplug the speaker then set the top cover aside in a safe place.
Whenever you remove screws from a panel, if one screw seems too tight to loosen
without damaging it, first loosen the other screws then try again. Sometimes one screw
binds in its hole when the other screws are tightened.