Elecraft KXAT100 Installation Manual User Manual
Page 17
17
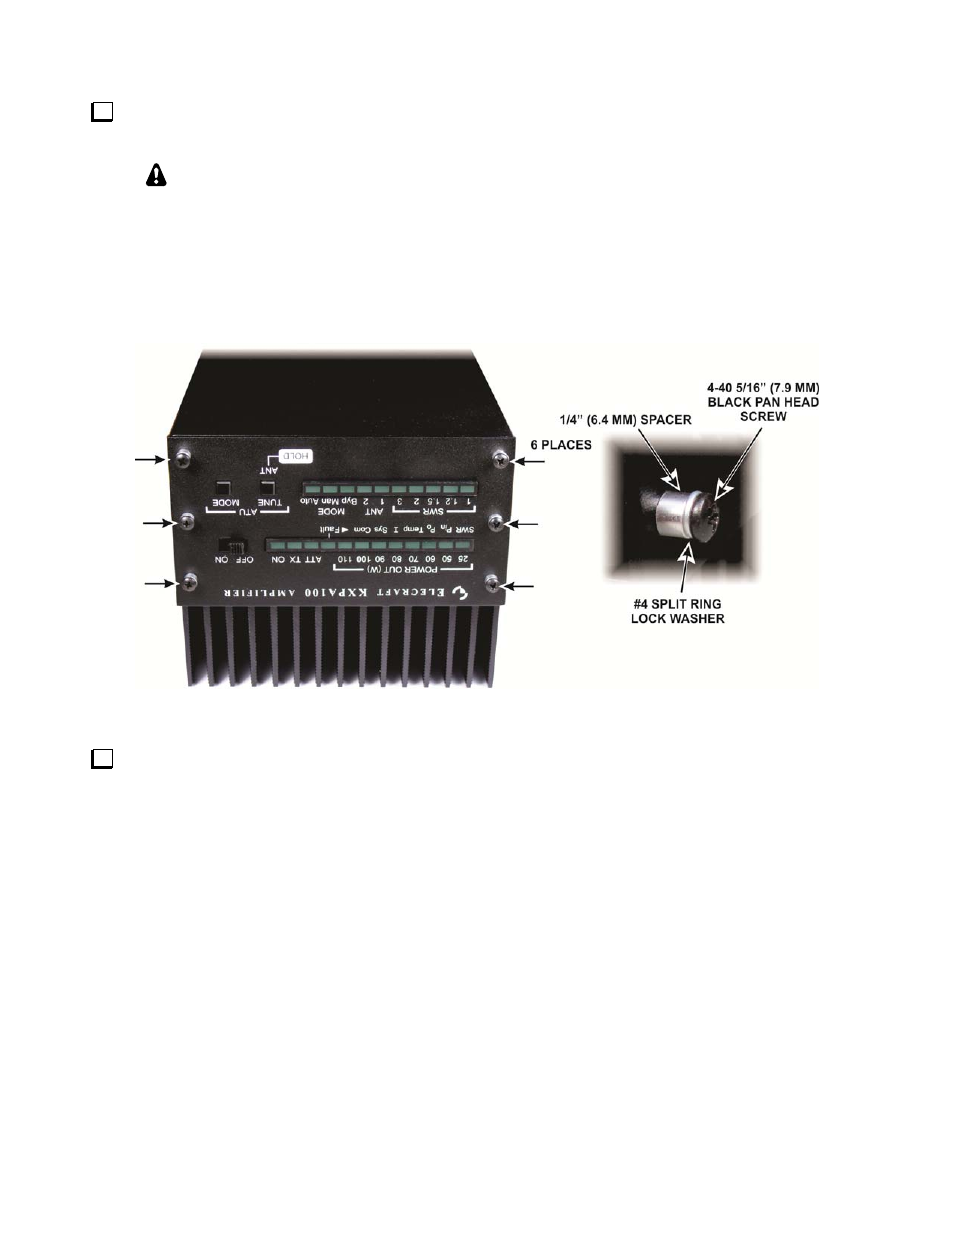
Position the front panel so the LEDs, OFF/ON switch, TUNE and MODE buttons fit through the openings.
Secure it with screws, lock washers and spacers that you removed from the original front panel. (see Figure 16).
Start securing the front panel with screws, lock washers and spacers in the opposite
corners of the front panel and check to ensure the TUNE and MODE switches move freely.
They only move a small amount when pressed but you should feel a definite movement. If
necessary, loosen the hardware at one corner and adjust the front panel position slightly.
When you are satisfied, install the remaining screws, lock washers and spacers. If you failed
to install the lock washers under each standoff as shown in Figure 7 on page 11, the two
rows of LEDs will be too close together to fit in the openings. In that case you must
disassemble the unit and install the lock washers as shown in Figure 7 on page 11.
Figure 16. Installing the New Front Panel.
Replace the corner feet. Press each foot over the three screws, spacers and lock washers on the end panel,
and then replace the three screws, spacers and lock washers through the remaining holes into the side panel (see
Figure 1on page 8).
That completes the installation of the KXAT100 Antenna Tuner module in your KXAT100
Amplifier. Complete operating instructions are included in your KXPA100 Owner’s manual.