Glass size & glass setting, Glass size / glass setting, Step 1) – EFCO 960 Series User Manual
Page 63: Fig. # 68
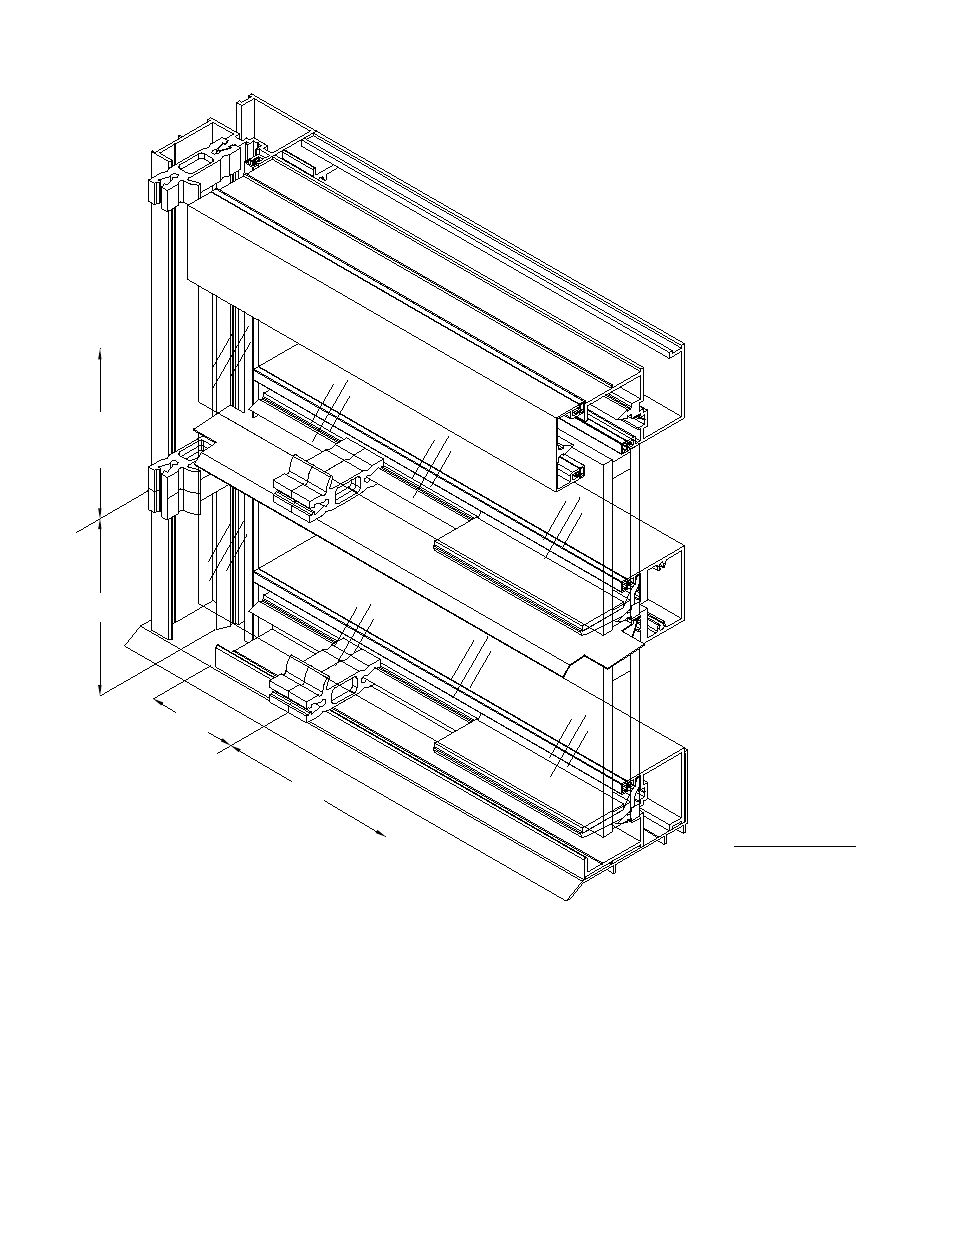
GLASS SIZE / GLASS SETTING
or horizontal intersection and single clips 9" on center.
SECTION X A - GLAZING
instructions on pages 62 and 63.
The glass must be installed prior to the installation of the remaining
isolator clips. After the glass is installed and properly positioned in the
The isolator clips alone are not suitable for temporary glazing.
opening, locate and install the isolator clips as shown in figure # 68 above.
At no time should set glass or panels be left unattended with only the
isolator clips holding the units in place. Prompt installation of the snap
If temporary glazing is required, please refer to the Temporary Glazing
The isolator clips are located: side by side pairs, 3" from each vertical
covers is required to obtain the full structural capability of the system.
NOTE:
TYP. TO
STEP 1)
SINGLE CLIP
L
DUAL CLIP
C
3"
9"
9"
DUAL
3"
CLIP
L
C
SINGLE CLIP
TYP. TO
BAH 11/2004
FIG. # 68
1/4" glazing systems.
toward the glass
intermediates.
at the head, jamb,
and sill. Also, up
at the horizontal
of the clips face
Be sure the "ears"
(See page 59 for butt glaze mullion
glass bite requirements.)
PAGE 61
Glass size = D.L.O. + 1"
for both 1" glazing and
960 WALL