Network setting, 4 network setting – AVer EXR6004-WiFi User Manual
Page 71
65
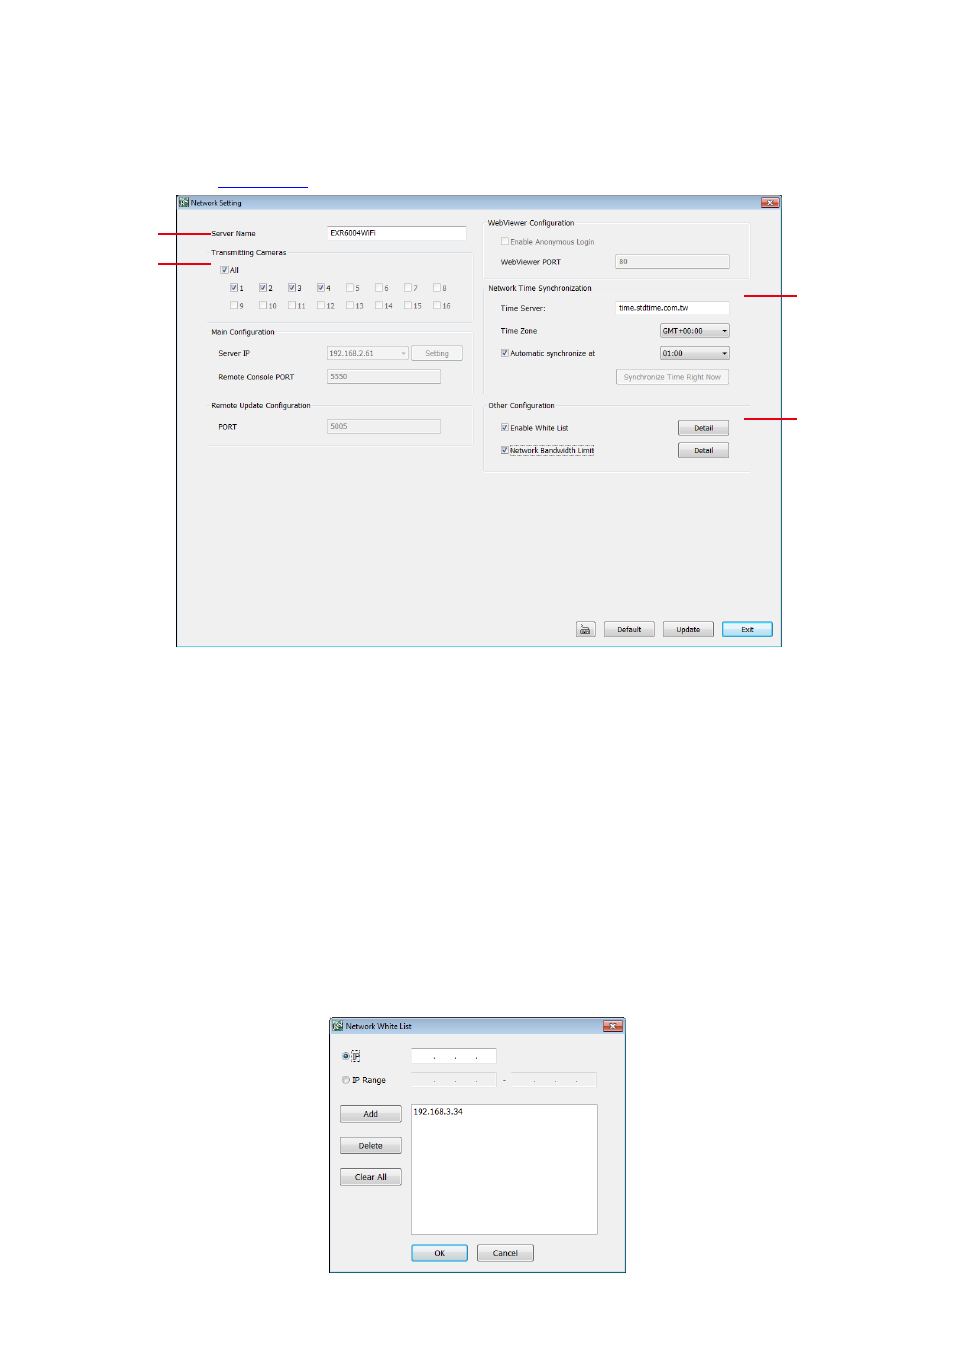
6.1.1.4 Network Setting
In the Network Setting dialog box, click Update to accept the new settings, click Exit to exit without saving,
and click Default to revert back to original factory setting. For the network service ports that use by DVR
(1)
(2)
(3)
(4)
(1) Server Name
Assign a name for the DVR unit. Alphabet letters and numbers only.
(2) Transmitting Cameras
Select and click on the camera number in the Transmitting Camera section you want to make it
accessible via internet using WebViewer, Remote Console, PDA Viewer and JAVAViewer (still image). To
select all the cameras, enable the ALL check box.
(3) Network Time Synchronization
Adjust the DVR system time same as network time server. Fill in the Time Server IP address or domain
name. Select the Time Zone that DVR is located. And then, mark the Automatic Synchronize time to
set automatic synchronize time on a daily basis.
(4) Other Configuration
-
Enable White List
An access permit list for the remote accessing of DVR server. Enter the IP address and click Add.
Or, enter a range of IP address and click Add. To delete the IP from the list, select the IP and click
Delete button. To reset the input, click Clear button.