Check on the viewfinder screen, To stop recording, Recording mode – Sony CCD-F33 User Manual
Page 19: Start recording
Attention! The text in this document has been recognized automatically. To view the original document, you can use the "Original mode".
Recording a Picture Using
the Automatic Adjustments
F-1
Start Recording
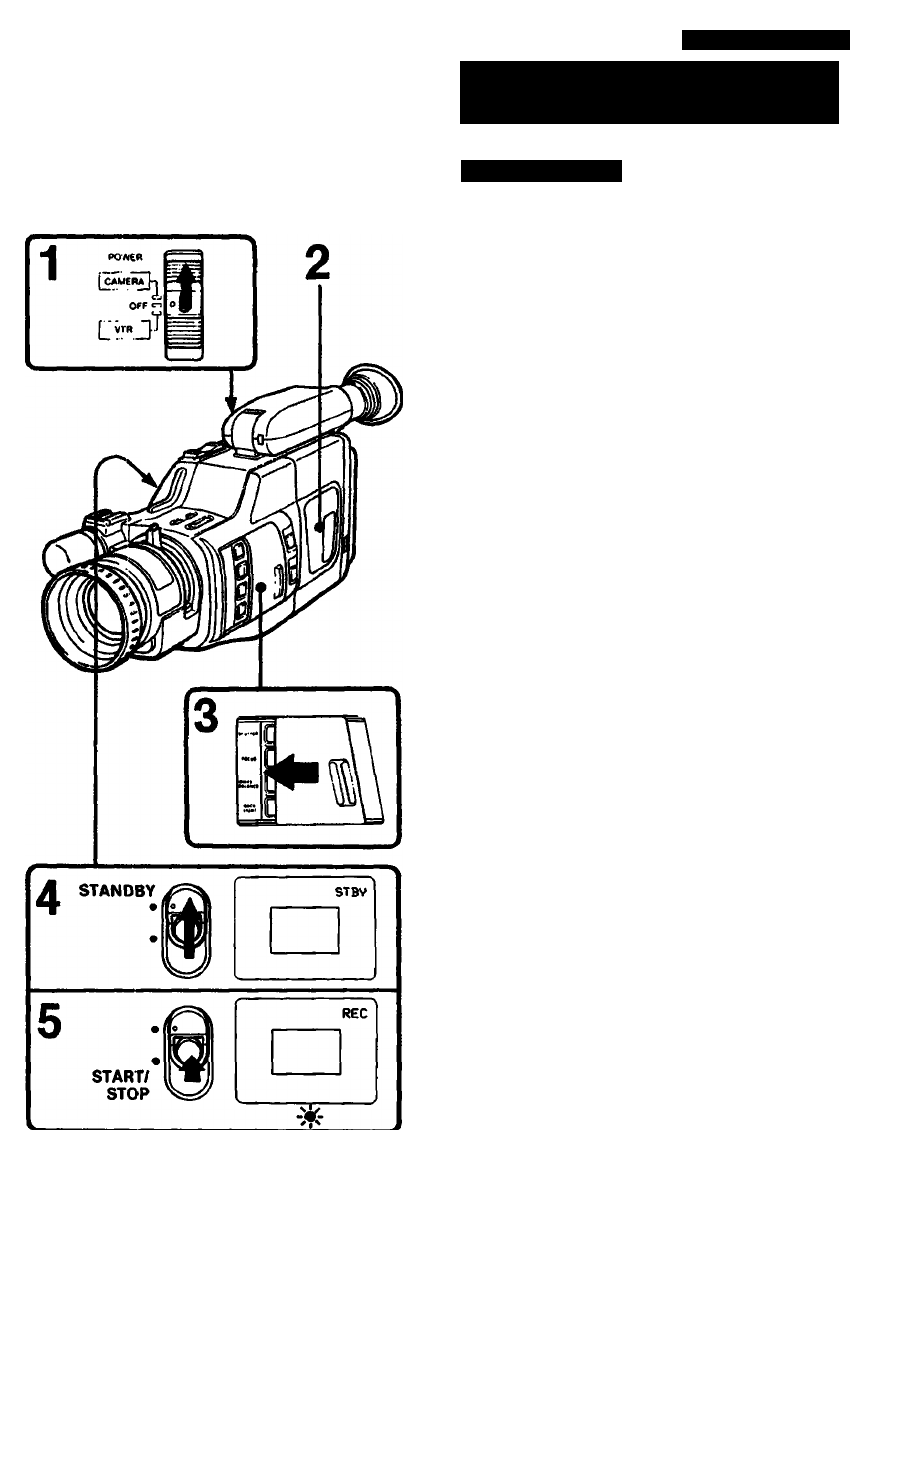
1
While pressing the small button, set the
POWER switch to CAMERA.
2 Insert the cassette.
3 Keep the AUTO LOCK cover closed.
4
Slide the STANDBY switch up.
The unit will enter the recording pause mode.
5 Press the START/STOP button.
Recording will start.
Check on the viewfinder screen
STBY: Displayed during recording pause mode.
REC: Displayed during recording.
To stop recording
Press the START/STOP button again.
The unit will enter the recording pause mode.
Avoid rough handling or mechanical shock to the
unit. Otherwise a smooth transition between
scenes may not be made.
Notes on recording
• For “once-only” events, it is strongly recommended
to have a trial run to check that everything is
working perfectly.
• If the POWER switch is moved during recording,
the tape will stop.
• Should you shoot a subject in bright conditions
such as sunlight just after shooting in a dark place,
the picture may not appear on the viewfinder
saeen. In this case, nxwe the camera away from
the subject to resume the normal condition.
• A vertical band may appear when a subject such
as a candle flame or a light is shot against a dark
background.
• During recording with auto focusing, do not turn or
stop the focus ring (lens hood) forcibly.
• Keep the lens clean.
Recording mode
This unit records in the SP mode (approximately
1.43 cm/second) and can play back in the SP mode
and the LP mode (approximately 0.72 cm/second).
The quality of the playback picture in the LP mode,
however, will not be as good as that in the SP mode.
19