Sony CCD-F33 User Manual
Page 14
Attention! The text in this document has been recognized automatically. To view the original document, you can use the "Original mode".
Setting the Date and Time
D-1
JAN. 1-1990 r
/1 M I '
\ JAN.
^
'Kii
IW" ’
JULc 1 1990
/ i v “
^
%
JUL;^,4^ri990
I PM
^
Once the date and the current time are adjusted,
the date or time can be recorded together with
the picture.
• Make sure that the fully-charged battery pack
and lithium battery are installed.
• Set the POWER switch to CAMERA, and slide
the STANDBY switch up.
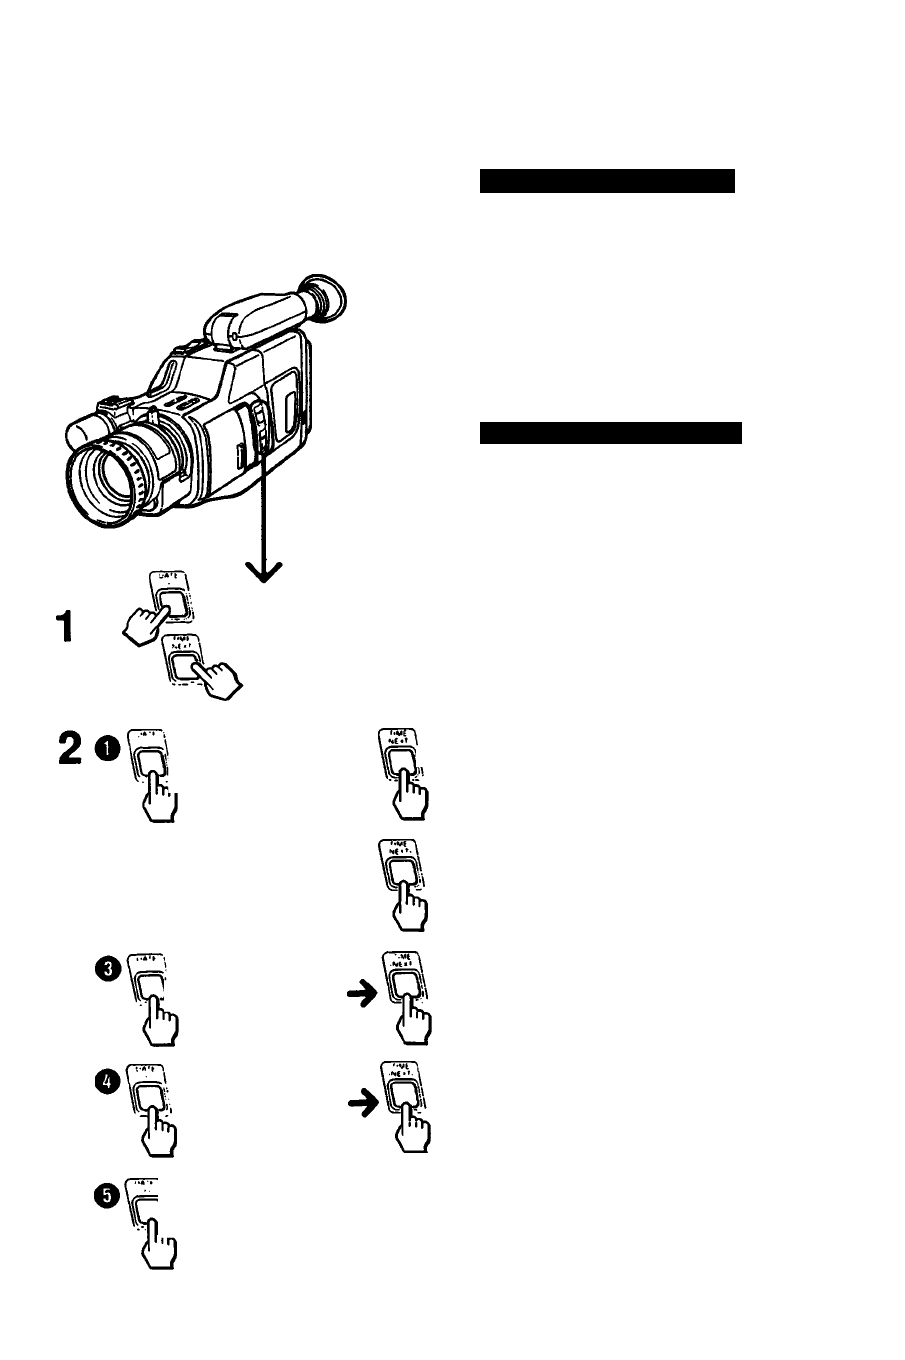
Setting the Date and Time
1 Press the DATE and TIME buttons
simultaneously for more than 3 seconds.
The date indication will appear in the
viewfinder (date/time setting mode).
The DATE button now functions as the +
button and the TIME button functions as the
NEXT button.
2 Adjust the
O
year, O month, O day,
O
hour
and
0
minute in sequence, following the
illustration.
First adjust the blinking digits with the
+
button,
and then press the NEXT button. After
adjusting the minute digits, press the NEXT
button at the same time with an announced
time signal.
The clock starts operating. There is no need to
readjust the date and time as long as the lithium
battery remains.
To clear the time Indication from the display
Press the TIME (NEXT) button again.
The button can be pressed in two ways
• When you keep the button pressed, the digits will
advance continuously.
• When you press and immediately release the
button, the digits will advance by one.