System battery – Dell PowerEdge 2650 User Manual
Page 57
8.
Align pin 1 on the microprocessor (see
) with pin 1 on the microprocessor socket.
9.
Install the microprocessor in the socket (see
10.
When the microprocessor is fully seated in the socket, rotate the socket release lever back down until it snaps into place, securing the microprocessor.
11.
Place the new heat sink on top of the microprocessor (see
).
12.
Orient the securing clips as shown in
.
13.
Hook the end of the clips without the latch to the tab on the edge of the socket.
14.
Push down and pivot the securing clip latch until the hole on the clip latches onto the ZIF socket tab.
15.
Ensure that the microprocessor cooling fan is installed:
l
If you removed the microprocessor cooling fan before you removed the microprocessor heat sink, replace the fan.
l
If you installed a second microprocessor, install the fan for the new microprocessor.
For information on installing or replacing a cooling fan, see "
16.
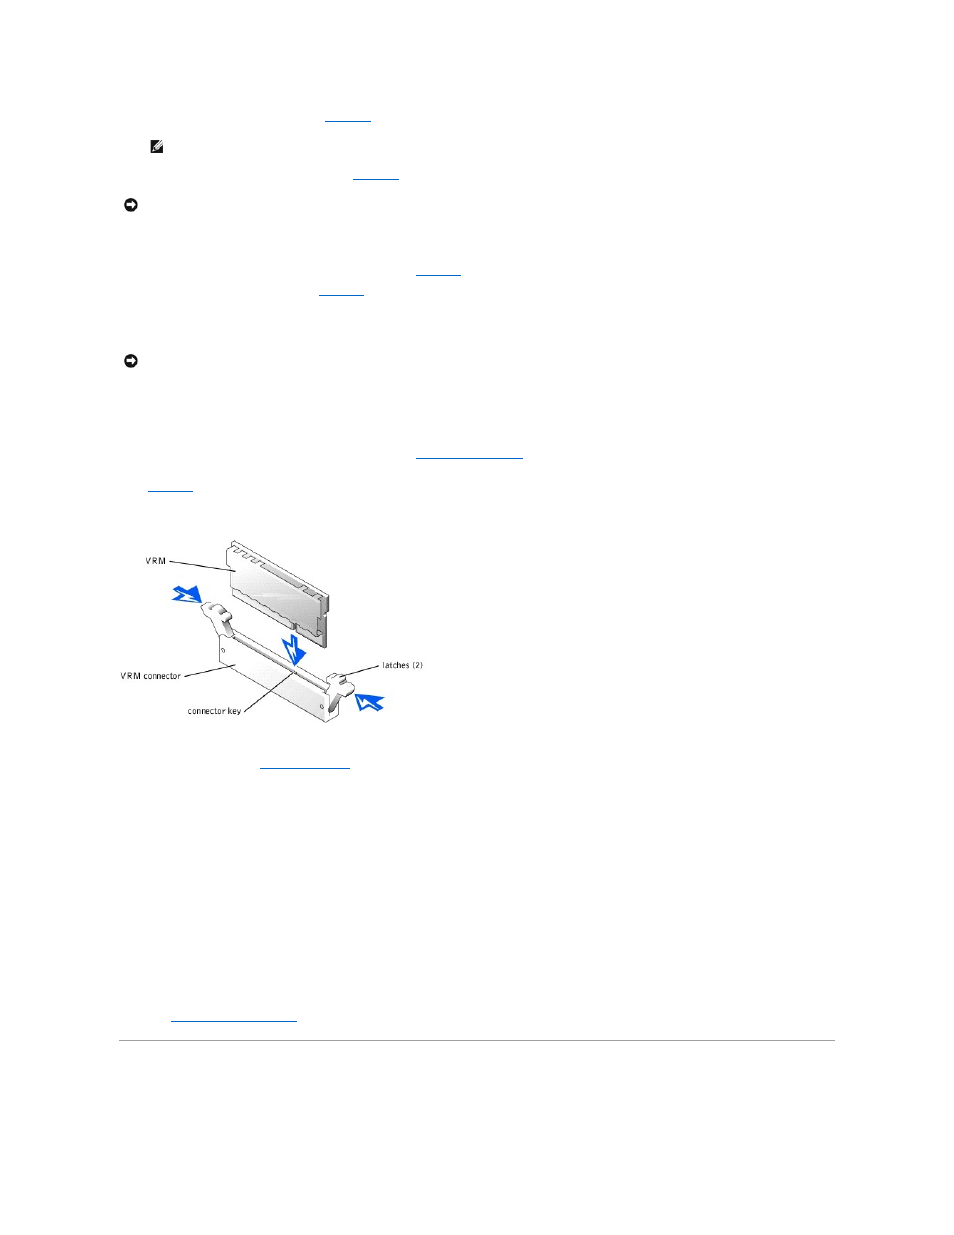
If you are adding a second microprocessor, install the VRM in the VRM 2 connector, pushing down firmly to make sure that the latches engage (see
).
Figure 6-9. Installing the VRM
17.
Replace the cover (see "
Replacing the Cover
" in "Troubleshooting Your System").
18.
Reconnect the system to its electrical outlet and turn the system on, including any attached peripherals.
19.
Enter the System Setup program, and ensure that the microprocessor options match the new system configuration (see "Using the System Setup
Program" in your User's Guide).
As the system boots, it detects the presence of the new microprocessor and automatically changes the system configuration information in the System
Setup program. If you installed a second microprocessor, a message similar to the following appears:
Two 1.8 GHZ Processors, Processor Bus: 400 MHz, L2 cache 512 KB Advanced
If only one microprocessor is installed, a message similar to the following appears:
One 1.8 GHz Processor, Processor Bus: 400 MHz, L2 cache 512 KB Advanced
20.
Confirm that the top line of the system data area in the System Setup program correctly identifies the installed microprocessor(s) (see "Using the
System Setup Program" in your User's Guide).
21.
Exit the System Setup program.
22.
Run the system diagnostics to verify that the new microprocessor is operating correctly.
See "
Running System Diagnostics
" for information on running the diagnostics and troubleshooting any problems that may occur.
System Battery
The system battery is a 3.0-volt (V), coin-cell battery.
NOTE:
No force is needed to install the microprocessor in the socket. When the microprocessor is aligned correctly, it should drop into the socket.
NOTICE:
Positioning the microprocessor incorrectly can permanently damage the microprocessor and the system when you turn on the system. When
placing the microprocessor in the socket, be sure that all of the pins on the microprocessor go into the corresponding holes. Be careful not to bend the
pins.
NOTICE:
A cooling fan is required for each microprocessor to maintain proper thermal conditions.