Removing the optical panel insert – Dell Vostro 410 (Late 2008) User Manual
Page 23
4.
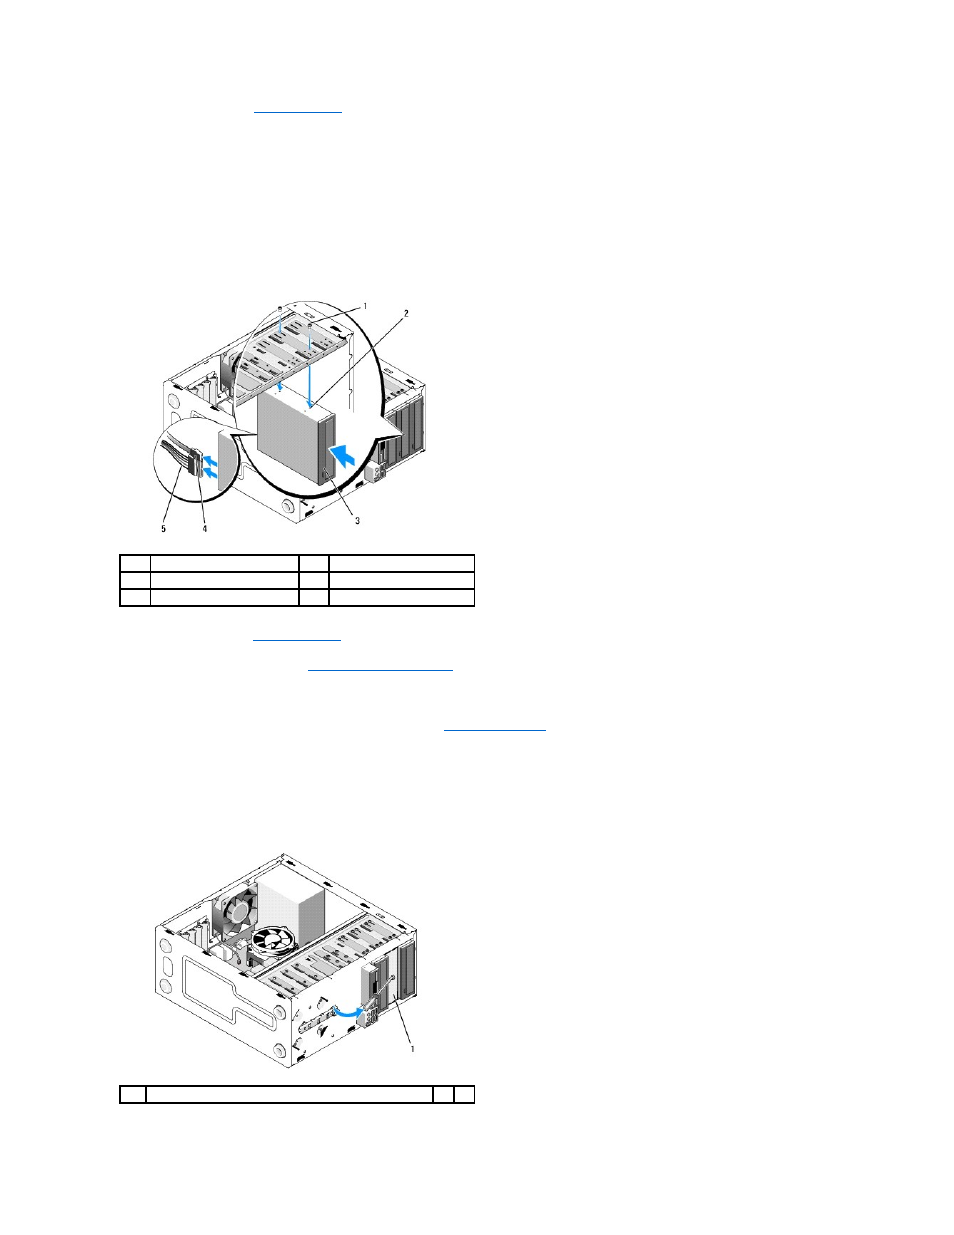
Gently slide the optical drive into place.
5.
Align the screw slots in the optical drive with the screw slots in the optical drive bay.
6.
Replace and tighten the two screws securing the optical drive.
7.
Connect the power and data cables to the drive.
8.
Connect the data cable to the system board connector on the system board.
.
9.
Replace the bezel (see
Replacing the Bezel
).
10.
Perform the steps in the procedure
After Working on Your Computer
.
11.
See the documentation that came with the drive for instructions on installing any software required for drive operation.
12.
Enter system setup and select the appropriate Drive option (see
Entering System Setup
).
13.
Verify that your computer works correctly by running the Dell Diagnostics. See your Setup and Quick Reference Guide for help running Dell Diagnostics.
Removing the Optical Panel Insert
Release the optical panel insert by pushing it out of the chassis.
1
screws (2)
2
screw holes
3
optical drive
4
data cable
5
power cable
1
optical panel insert (optional)