Floppy drive, Removing a floppy drive – Dell Vostro 410 (Late 2008) User Manual
Page 17
7.
Connect the power and data cables to the drive.
8.
Connect the data cable to the system board.
9.
Check all cables to be certain that they are properly connected and firmly seated.
10.
Replace the computer cover (see
Replacing the Computer Cover
).
11.
Connect your computer and devices to electrical outlets, and then turn them on.
12.
See the documentation that came with the drive for instructions on installing any software required for drive operation.
13.
Check the system setup for drive configuration changes (see
Entering System Setup
).
Floppy Drive
Removing a Floppy Drive
1.
Follow the procedures in
Before Working on Your Computer
.
2.
Remove the computer cover (see
Removing the Computer Cover
).
3.
Remove the bezel (see
Replacing the Bezel
).
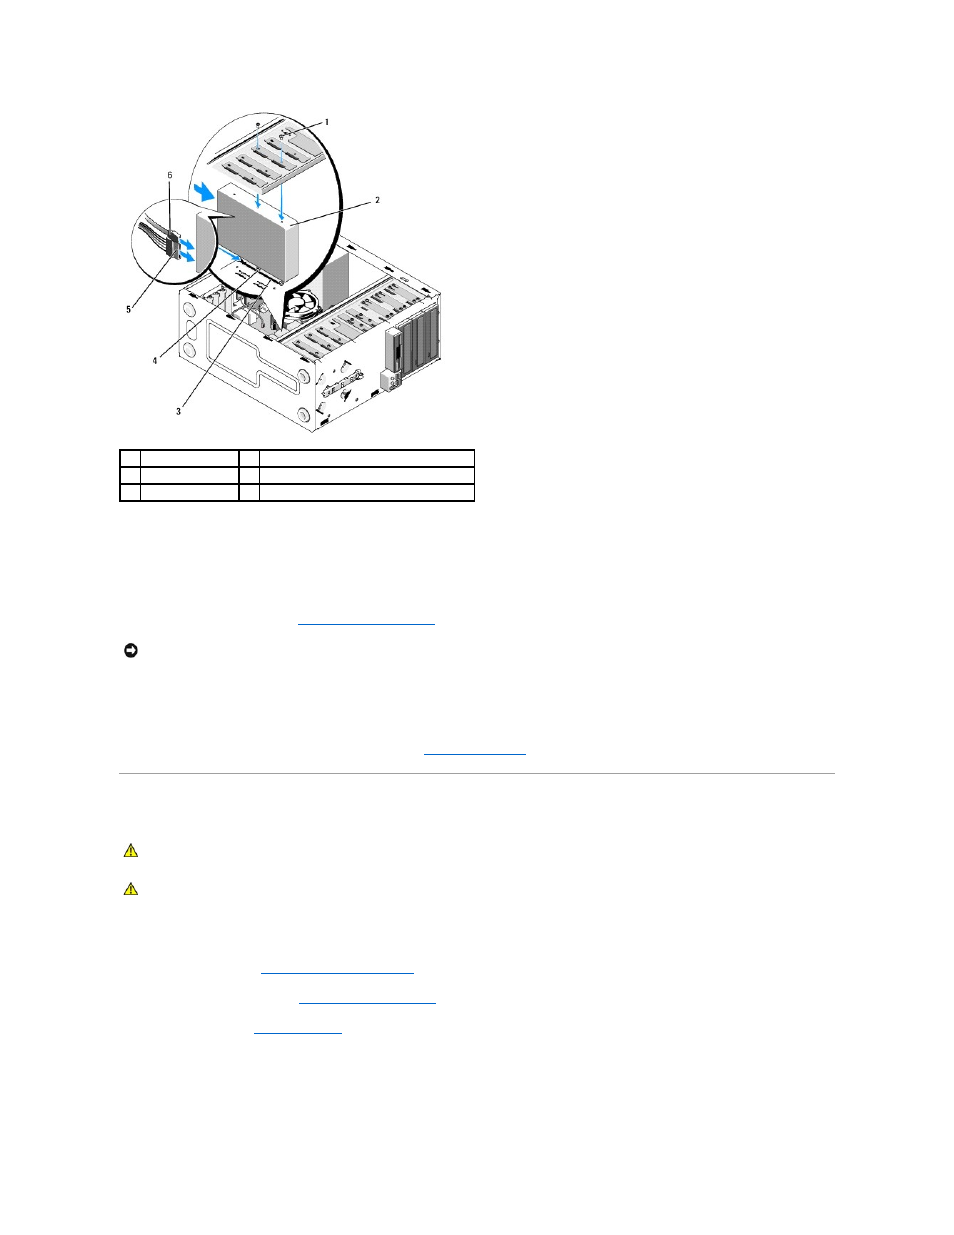
1
screws (2)
2
hard drive
3
slot
4
screws (2), partially inserted
5
power cable
6
data cable
NOTICE:
To connect a network cable, first plug the cable into the network port or device and then plug it into the computer.
CAUTION:
Before working inside your computer, read the safety information that shipped with your computer. For additional safety best
practices information, see the Regulatory Compliance Homepage at www.dell.com/regulatory_compliance.
CAUTION:
To guard against electrical shock, always unplug your computer from the electrical outlet before removing the cover.