Baseline Systems Ethernet Radio User Manual
Page 10
Ethernet Radio Configuration Guide
Page 4
Section 1 – Configuring the Radios
4. Plug the other end of the Ethernet cable into an Ethernet port on the laptop.
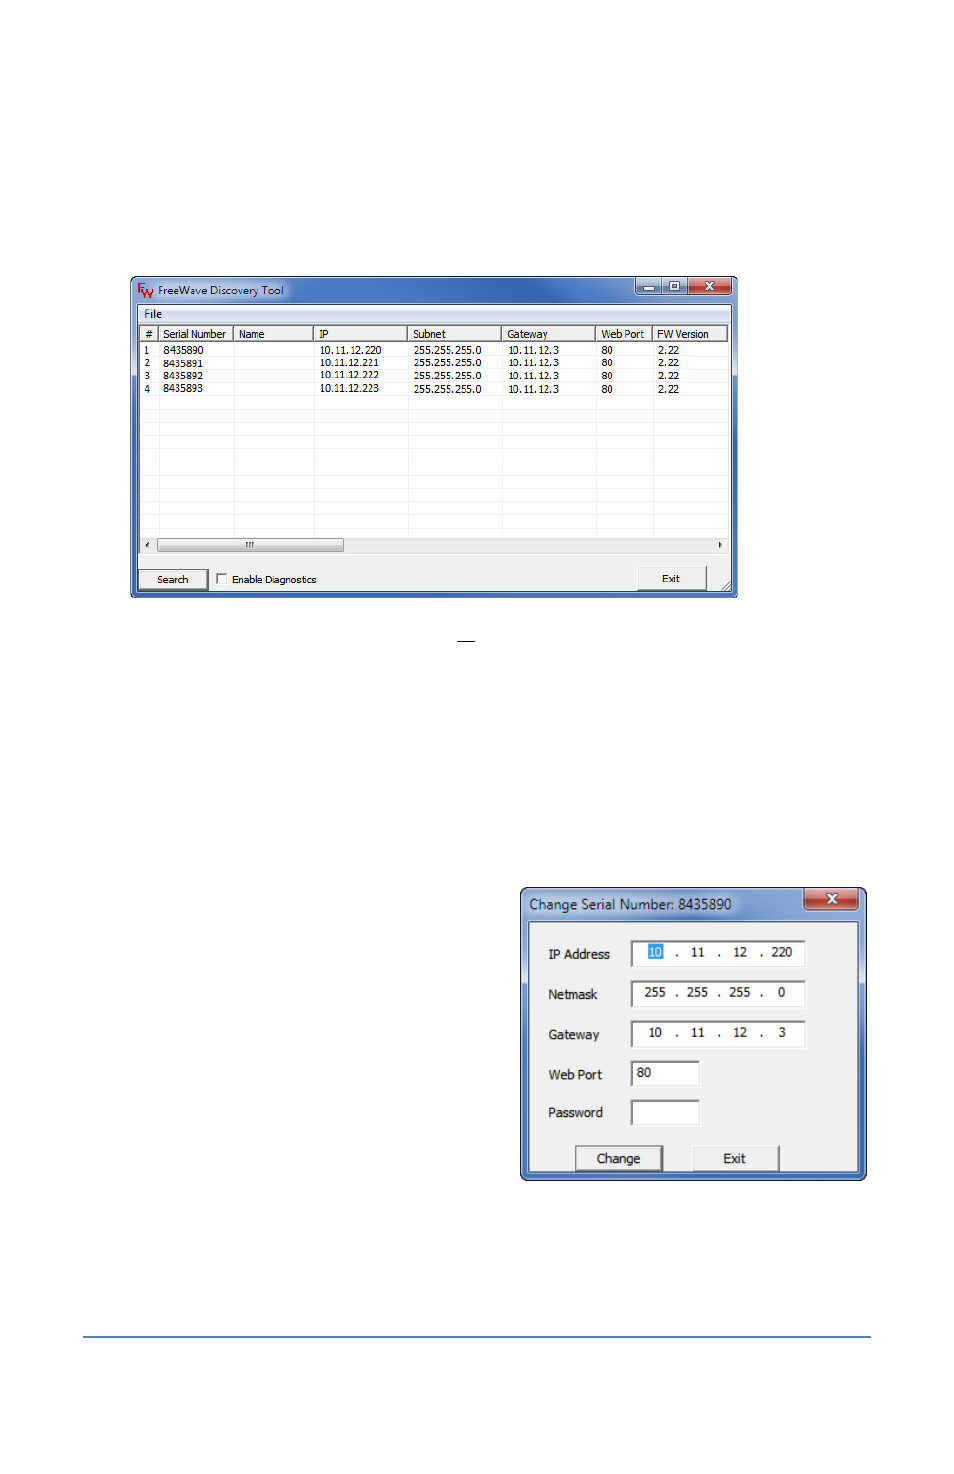
5. Double-click the Discovery Server executable file, and then click Run in the Security Warning
dialog box. The FreeWave Discovery Tool window displays a list of the radios that are on the
stand-alone network.
Note: The FreeWave Discovery Tool finds all radios that are connected to the radio network.
Check the serial number before you select a radio to ensure that you configure the correct
radio.
IMPORTANT!
When you change the IP address for a radio, it will drop from the list in the
Discovery Tool because it is no longer part of the stand-alone network. Change the IP
addresses for all of the Endpoint radios first in order to keep the Gateway radio in the list
until you have finished changing the IP addresses for all other radio units.
6. Using the Ethernet Radio Setup Worksheet, find the serial number for one of the Endpoint
radios in the FreeWave Discovery Tool window, and then click on the row to highlight it.
7. Right-click on the highlighted row and from
the menu that displays, click Change Basic
Settings. The Change Serial Number xxxxxxx
dialog box displays.
8. In the IP Address field, type the static IP
address that you recorded on the Ethernet
Radio Setup Worksheet for the selected radio
serial number.
9. In the Netmask field, type the LAN subnet
mask that you recorded on the Ethernet Radio
Setup Worksheet if it is different from the
default.
10. In the Gateway field, type the LAN default Gateway (also known as the router IP address) that
you recorded on the Ethernet Radio Setup Worksheet.