Rf 1 2 – Great Plains ADC2350BE Operator Manual User Manual
Page 67
Great Plains Manufacturing, Inc.
Adjustments
63
2012-08-01
167-085M
Refer to Figure 72
3.
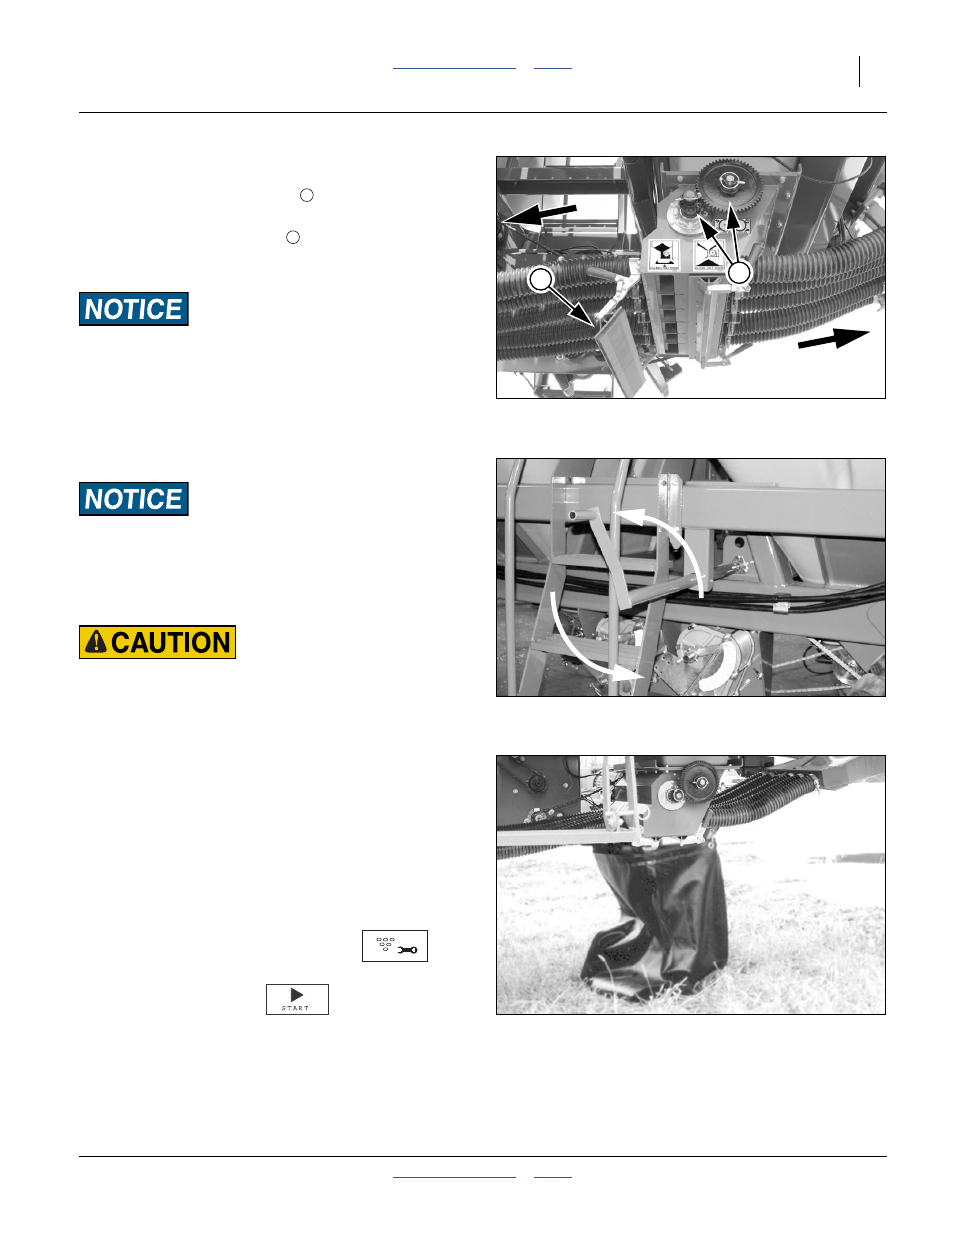
Since only one calibration bag is provided, remove
one of the final range gears
from the meter that is
NOT being tested, to disable it.
4.
Open the calibration door
of the meter being
calibrated. The calibration door is the rear of the two
bottom doors.
Material Loss Risk: Do not open the front door. This is the
clean-out door. Opening the front bottom door will drain the
hopper. Once the front clean-out door is open it is difficult to
stop seed flow until the hopper is empty.
Refer to Figure 72
5.
Insert calibration crank onto clutch shaft. See “Meter
Hand Crank” on page 36.
Rotate the calibration crank only in the
COUNTERCLOCKWISE direction. Operating in reverse can
cause gearbox damage.
6.
Turn the calibration crank enough turns to be sure
the meter flutes are full and the system is metering.
Obey manufacturer or grower recommendations for safety
equipment and protective gear when using treated seeds.
7.
Wipe all material off the flanges around the meter
door.
8.
Accurately weigh an empty container large enough
to catch material coming out of the meter. The
calibration bag supplied with your cart weighs
3.36 lbs (1.53 kg).
Refer to Figure 73
9.
Place container under open calibration door. If using
the calibration bag, loop bag handles over the door
handles and hook the bag to the front of the meter.
10. On the seed monitor terminal,
set the monitor to Calibration mode
.
enter [ 5 ] for the “# Meter Revs”, and
press the Start softkey
.
This “# Meter Revs” parameter does not affect the
monitor calibration because the monitor counts
actual meter shaft revolutions and uses that count to
compute the Calibration Constant.
The “# Meter Revs” parameter is used for a progress
bar displayed during calibration.
Figure 71
Calibration Door Open
26339
R
F
1
2
1
2
Figure 72
Calibration Crank
26333
Figure 73
Calibration Bag
26402