Storing auger, Auger swing arm, Storing auger auger swing arm – Great Plains ADC2350BE Operator Manual User Manual
Page 44
40
ADC2350/E and ADC2350B/BE
Great Plains Manufacturing, Inc.
167-085M
2012-08-01
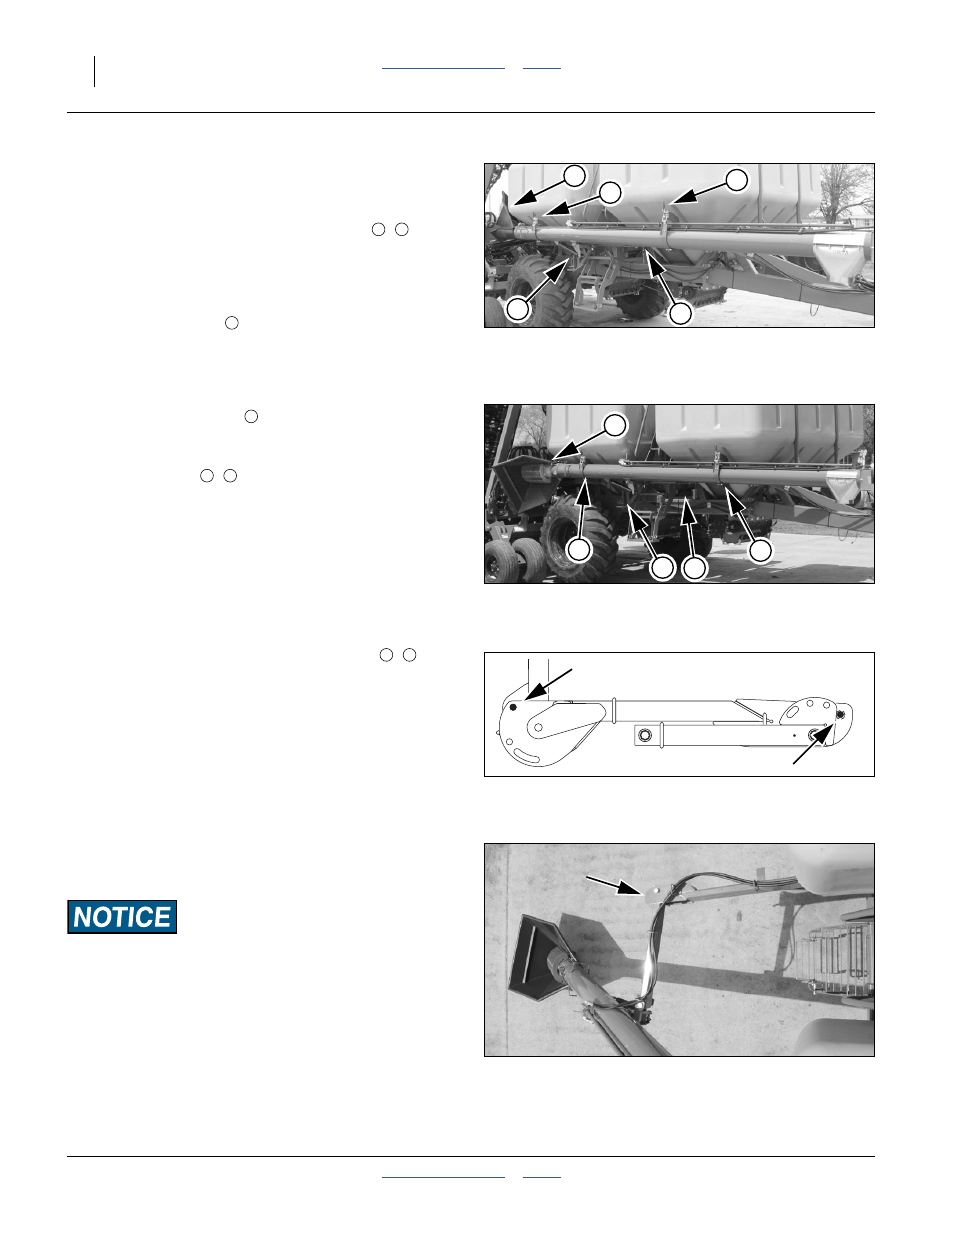
Storing Auger
Refer to Figure 40 and Figure 41
The auger will not fully seat in the rear cradle unless the
auger inlet hopper is in one of two positions
,
. Each
position is shown in the figures.
1.
Orient hopper.
If storing for transport, orient the inlet hopper up and
toward cart center
, as shown in Figure 40. This
protects the auger from damage from movement of
the trailing implement on uneven terrain, and
minimizes collection of debris thrown by the tire.
If securing the auger for cart storage, orient the inlet
hopper out and down
, as shown in Figure 41. This
minimizes collection of airborne debris and
precipitation. See also “Storage” on page 55.
2.
Set arm levers
,
to lock arm pins open.
3.
Fold arm with center pivot forward.
4.
Push auger to cradles.
Refer to Figure 42
which depicts pin configurations with arm in storage position.
Arm lengths have been foreshortened for clarity.
5.
Release arm pins, so that they will seat automatically
when arm is in final storage position.
6.
Seat auger in cradles, and secure straps
,
.
Auger Swing Arm
The auger arm may be completely unfolded to straight
out, or folded, with the middle pivot pointing to cart front
or back, as needed, to meet your loading or unloading
requirements.
The arms pins may be used during unfolding and
positioning to hold one arm in place while the other is
being moved. This is useful for single-person operations.
In specific working configurations, you can engage the
pins in slots or holes, to constrain the range of movement
of the arm, or prevent movement altogether.
Equipment Damage Risk:
Be aware of the location of the outlet end of the auger during
positioning. In addition to overhead line hazards, if a trailing
implement is folded, the auger can strike it during positioning,
with possible damage to the auger or implement.
See arm positioning illustrations at specific task topics:
“Unloading the Cart” on page 47, and
“Loading Material” on page 44.
Figure 40
Auger Latched for Movement
26329
3
6
5
4
1
1
2
1
Figure 41
Auger Latched for Storage
26349
4
6
2
5
3
2
3
4
Figure 42
Pins when Arm is Stored
26358
5
6
Figure 43
Auger Swing Arm
26359