Setting fertilizer drive range, Setting high range, Setting low range – Great Plains 2S-2600HDF Operator Manual v2 User Manual
Page 58: Setting high range setting low range
54
2S-2600HD
Great Plains Manufacturing, Inc.
195-069M
2014-02-03
Setting Fertilizer Drive Range
Refer to the Fertilizer Rate Chart in the Seed Rate Man-
ual to find the correct Range sprocket size for your drill’s
row spacing and target (or adjusted) application rate.
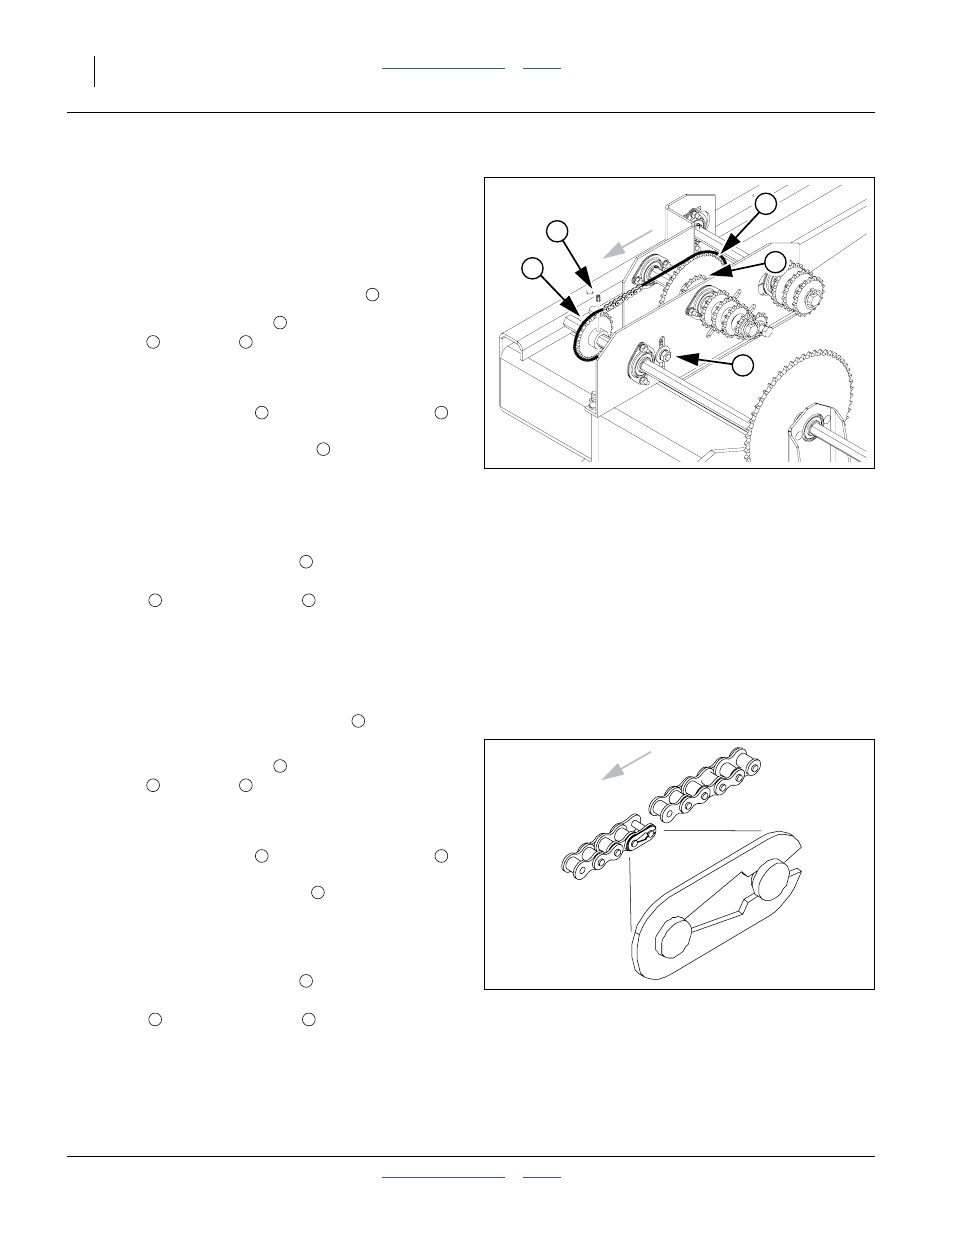
Setting High Range
Refer to Figure 51 (gray arrow shows chain direction)
High Range uses the smaller 16T sprocket
.
1.
Loosen the idler sprocket
and remove chain from
driving
and range
sprockets.
2.
Open chain at removable link. Remove and save the
16-pitch section of the chain.
3.
Loosen the set screws
on the driving sprocket
,
and slide it on the shaft until it is in alignment with the
small 16T High Range sprocket
.
Refer to Figure 52
4.
Re-assemble and re-mount the chain. Make sure the
open ends of all chain clips face away from the direc-
tion of chain travel (shown by the gray arrow).
5.
Re-engage the idler sprocket
, allowing
1
⁄
4
in
(6.4mm) slack in the top chain span. Tighten set
screws
on driving sprocket
.
6.
If this is the final Range setting, after calibration,
repeat step 1 through step 5 for the right drill section.
Setting Low Range
Refer to Figure 51
Low Range uses the larger 44T sprocket
. If it is
already engaged by the chain, no change is necessary.
1.
Loosen the idler sprocket
and remove chain from
driving
and range
sprockets.
2.
Reinsert the saved 16-pitch section of the chain.
This section has clips on each end.
3.
Loosen the set screws
on the driving sprocket
,
and slide it on the shaft until it is in alignment with the
large 44T Low Range sprocket
.
4.
Re-assemble and re-mount the chain. Make sure the
open ends of chain clips face away from the direction
of chain travel (shown by the gray arrow).
5.
Re-engage the idler sprocket
, allowing
1
⁄
4
in
(6.4mm) slack in the top chain span. Tighten set
screws
on driving sprocket
.
6.
If this is the final Range setting, after calibration,
repeat step 1 through step 5 for the right drill section.
Figure 51
Fertilizer Drive Low Range
21778
4
3
1
2
5
2
3
5
1
4
5
1
3
4
5
Figure 52
Chain Clip Orientation
26482
1
3
5
1
4
5
1
3
4
5