Nozzle cleaning station – Tweco QRC-2000 User Manual
Page 18
nozzle cleaning station
5-16
SM-QRC-2000
MAintenAnCe
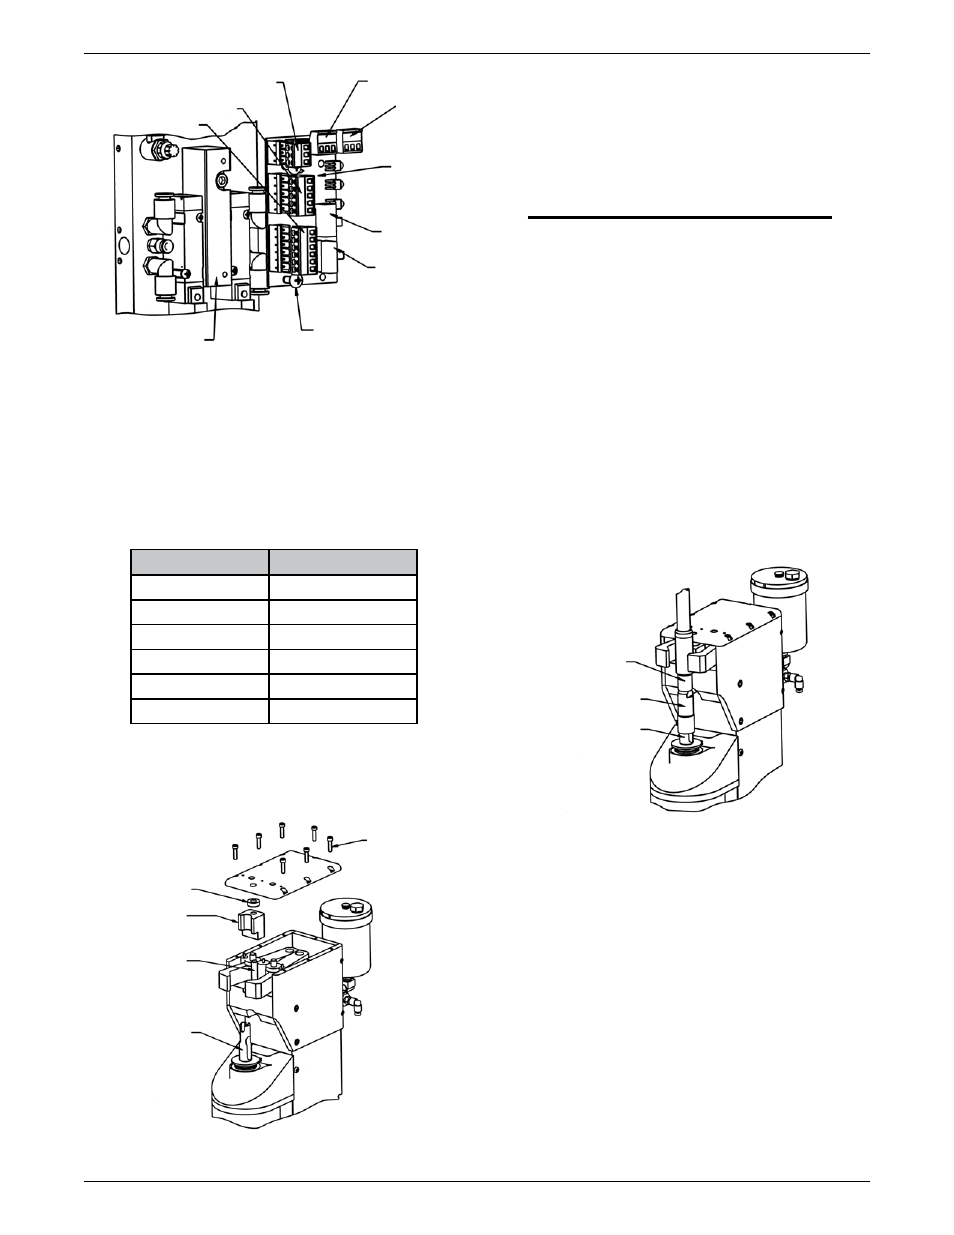
Clamp Block
Ensure that the power and air supply are off and
disconnected before replacing the clamp block.
Certain applications or normal wear may cause the need
to replace the QRC
TM
-2000 clamp block. There are five
clamp blocks available.
CIRCUIT BOARD
INSULATOR
NO. 10 S 1/2” LG.
THREAD-FORMING
SCREW (2 EA.)
SW1 SWITCH
SW2 SWITCH
CIRCUIT
BOARD
J5
CONNECTOR
Figure 17
J4 CONNECTOR
J3 CONNECTOR
J1 CONNECTOR
J2 CONNECTOR
Table 4: ORC
TM
-2000 Clamp Blocks List
Clamp Block O.D.
Fits Nozzles
QRC2102-A
.938” (23,8mm)
QRC2102-B
1” (25,4mm)
QRC2102-C
1.062” (27,0mm)
QRC2102-D
1.125” (28,6mm)
QRC2102-E
.875” (22,2mm)
QRC2102-F
.787” (20,0mm)
Clamp block “B” comes assembled on all QRC
TM
-2000
Nozzle Cleaning Station. The clamp blocks A, C, D, and E
are also supplied with the unit.
LOCATOR SPACER
CLAMP BLOCK
CLAMP BLOCK
LOCATOR PIN
REAMER BLADE
TOP PLATE
SCREWS (7 EA)
Figure 18
Remove the seven screws on three top plate.
Remove the top plate to the cleaning station.
Lift and rotate the clamp block so that the desired
sizes face the jaws.
Clean the components thoroughly and lubricate with
grease before reassembling them.
NOTE
part numbers are stamped on clamp blocks.
please refer to table 4 - QRC
tM
2000 clamp
block list for the outside diameter of the
nozzle.
•
•
•
•
QRC
TM
-2000 Reamer Blade
To remove the reamer blade, place the 9/16” (14mm)
spanner wrench, part no. QRC-440, on the hex flats
at the end of the extension shaft and the QRC-441
wrench on the top of the reamer blade.
The cutter is removed by turning counterclockwise
when viewed from above. Considerable force may be
required to loosen the reamer blade since it tightens
naturally as the reamer operates.
Please refer to Table 1 for reamer blade options.
•
•
•
T-WRENCH
REAMER BLADE
9/16” SPANNER
WRENCH
Figure 19