Fabricator 181i, 24 setup for stick (smaw) welding – Tweco 181i Fabricator User Manual
Page 57
Fabricator 181i
Manual 0-51
91
3-27
INSTALLATION, OPERATION AND SETUP
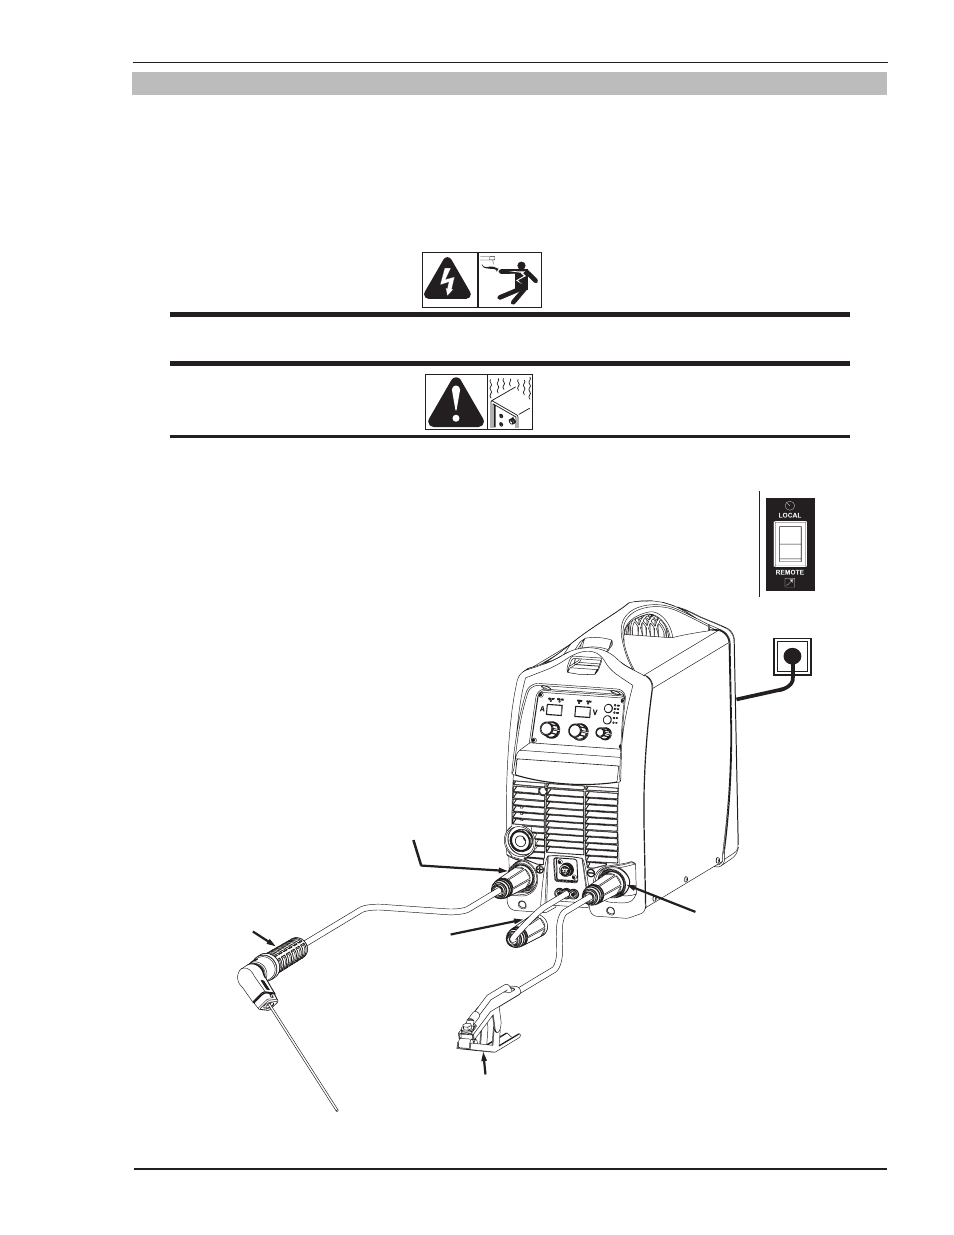
3.24 Setup for STICK (SMAW) Welding
A. Connect the Electrode Holder lead to the positive welding terminal (+). If in doubt, consult the electrode
manufacturer. Welding current flows from the Power Source via heavy duty bayonet type terminals. It is
essential, however, that the male plug is inserted and turned securely to achieve a sound electrical connection.
B. Connect the work lead to the negative welding terminal (-). If in doubt, consult the electrode manufacturer.
Welding current flows from the Power Source via heavy duty bayonet type terminals. It is essential, however,
that the male plug is inserted and turned securely to achieve a sound electrical connection.
WARNING
Before connecting the work clamp to the work and inserting the electrode in the electrode holder
make sure the Electricity Supply is switched OFF.
CAUTION
Remove any packaging material prior to use. Do not block the air vents at the front or rear of the
Welding Power Source.
C. Switch the LOCAL/REMOTE switch inside the wire feed compartment to LOCAL to use
the Power Sources Amperage control or REMOTE for remote amperage control using a
Hand Pendant Control.
Art #
A-10365
Negative Welding
Terminal (-)
Positive Welding
Terminal (+)
Work Lead
Electrode
Holder
MIG Gun
polarity lead
not connected.
Figure 3-19: Setup for Manual Arc Welding.