E-flite Cessna 150 Aerobat 250 ARF User Manual
Page 6
6
E-flite Cessna 150 Aerobat 250 ARF Assembly Manual
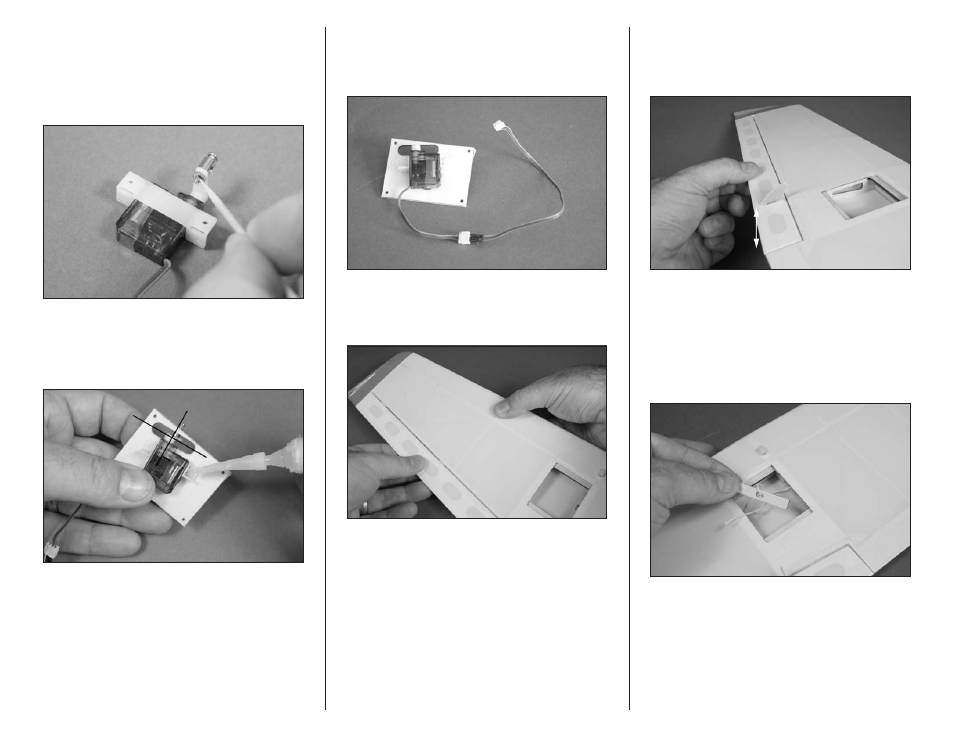
4. Use a very small amount of medium CA on a
toothpick to secure the nut to the bottom of the
connector threads. Do not use thin CA for this
step as it can wick through the nut and glue the
connector to the arm. Make sure the connector still
rotates freely in the arm after the glue is cured.
5. Place the servo on the aileron servo cover. Center
the servo arm in the opening, then use medium CA
to glue the mount to the cover. Use care not to get
glue under the servo.
6. Connect a 6-inch (152mm) servo extension to
the servo lead. Use a piece of dental floss to secure
the leads so they do not accidentally disconnect
inside the wing.
7. Check that the hinges are secure by gently pulling
on the control surface. If not, apply thin CA to any
hinges that are not glued and recheck.
8. Move the control surface through its range of
motion several times to break in the hinges. This
will reduce the initial load on the servo during
your first flights.
9. A string is located in the wing to pull the servo
lead through the wing. Remove the string from the
wood support and tie the string to the end of the
servo lead as shown. Pull the servo lead through
the wing using care not to damage the internal
structure. Once the lead is routed through the wing,
remove the string from the lead.