E-flite Cessna 150 Aerobat 250 ARF User Manual
Page 21
21
E-flite Cessna 150 Aerobat 250 ARF Assembly Manual
Rudder, Elevator and Nose Gear
Linkage Installation
Required parts
Fuselage assembly Servo hardware
Transmitter
Receiver battery
Nose gear pushrod, 3.31-inch (84mm)
Elevator pushrod, 17.25-inch (438mm)
Rudder pushrod, 18.25-inch (463mm)
Nylon pushrod keeper (2)
Pushrod connector with hardware (2)
Required Tools and Adhesives
Threadlock
Phillips screwdriver: #0, #1
Square
Side cutters
Medium CA
Toothpicks
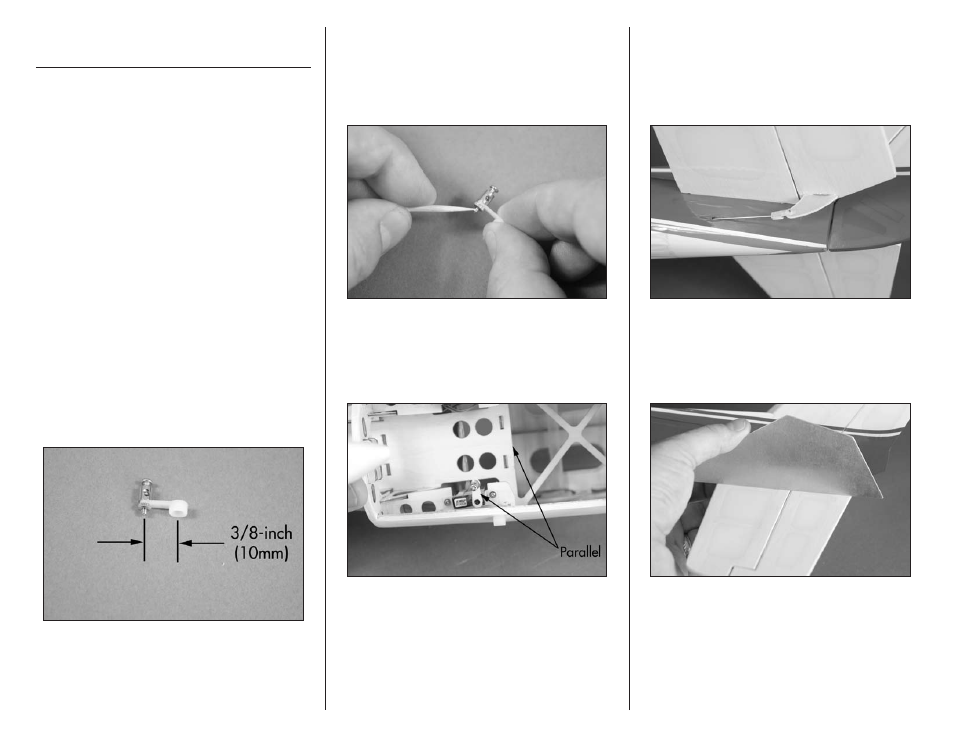
1. Use side cutters to trim one side of the standard
double arm off. Use the other side of the short
double arm for this step. Attach the pushrod
connector to the hole that is 3/8-inch (10mm)
from the center of the servo horn. The washers
that come on the connector are not needed and can
be removed. Tighten the nut so that it is secure
on the arm but is not tight. There should be a
small amount of play between the arm and the
connector and the connector should be able to
rotate freely on the arm.
2. Use a very small amount of medium CA on a
toothpick to secure the nut to the bottom of the
connector threads. Do not use thin CA for this
step as it can wick through the nut and glue the
connector to the arm. Make sure the connector still
rotates freely in the arm after the glue is cured.
3. Center the elevator servo using the transmitter.
Attach the servo horn to the elevator servo using
the screw provided with the servo and a #0 Phillips
screwdriver. The arm will be parallel to the rear
edge of the battery plate in the fuselage.
4. Slide the 17.25-inch (438mm) elevator pushrod
into the tube in the fuselage. Guide the pushrod
wire through the hole in the pushrod keeper that
is attached to the elevator servo horn. Use a
nylon pushrod keeper to secure the pushrod to the
elevator control horn.
5. With the radio system on and the elevator servo
centered, check that the control surface is aligned
with the fixed surface. Use a square between the
two surfaces. Use a #1 Phillips screwdriver to secure
the pushrod in the pushrod connector.