E-flite 4-Site F3P 250 ARF User Manual
Page 8
8
E-flite 4-Site Assembly Manual
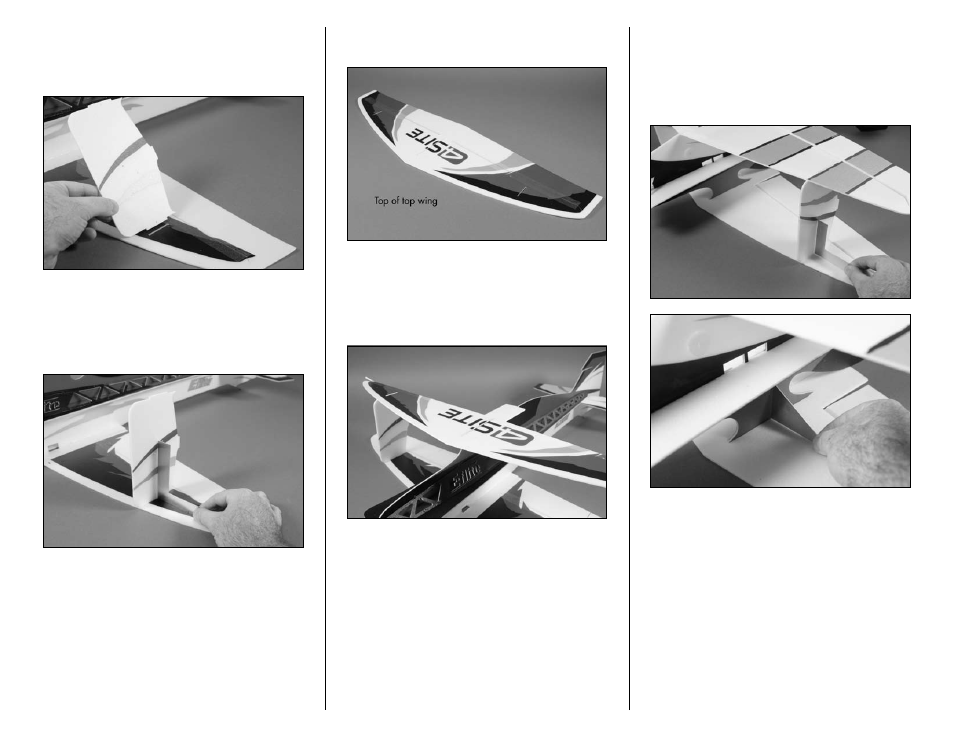
5. Test fit the outer strut into the bottom wing as
shown. Make sure the tab is flat when inserted into
the bottom wing. If not, you may induce an airfoil
resulting in unwanted flight characteristics.
6. After confirming the fit between the outer strut
and bottom wing, use foam-safe CA to glue the
outer strut to the wing. Use a square between
the outer strut and bottom wing to keep them in
alignment while the CA fully cures.
7. Repeat Steps 5 and 6 to install the remaining
outer strut. Make sure to match the trim scheme on
the struts on each side or your flying buddies will
laugh at you.
8. Locate the top wing. The bottom side of the top
wing is white with no trim scheme.
9. Test fit the top wing to the fuselage and outer
struts. The tab on the struts and fuselage will
be flat in the top wing. If not, it may induce an
unwanted airfoil that could result in unwanted flight
characteristics.
10. Remove the top wing and place it upside down
on your flat work surface. Use foam-safe CA to
glue the top wing to the fuselage and outer struts.
Make sure to use a square at both the struts and
fuselage to keep things in alignment while the CA
cures.