E-flite 4-Site F3P 250 ARF User Manual
Page 19
19
E-flite 4-Site Assembly Manual
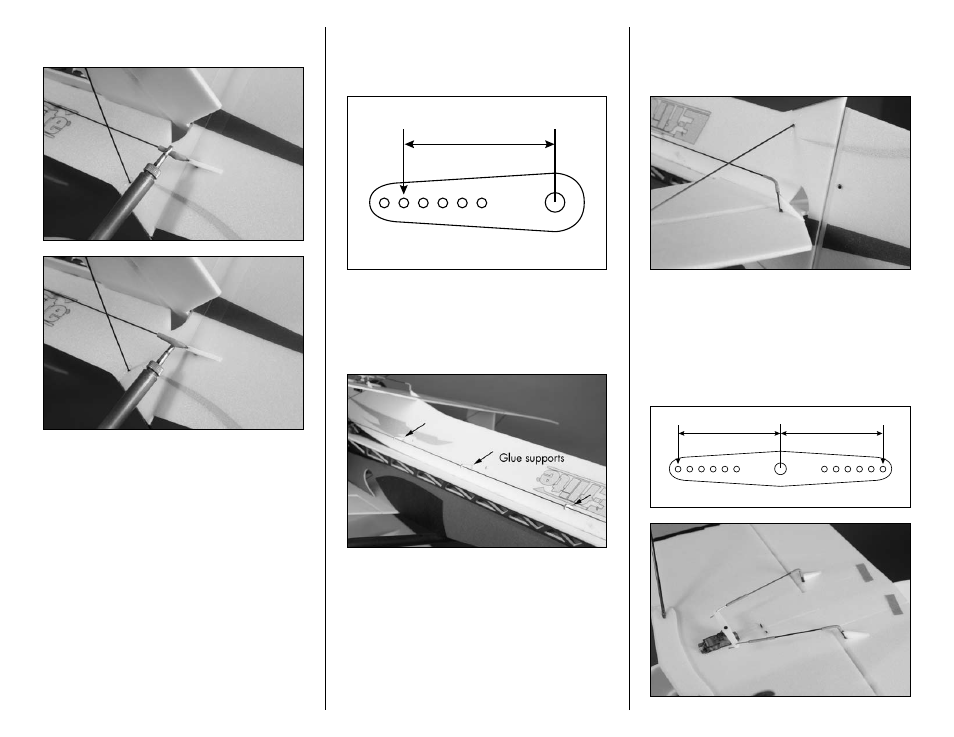
14. Use a soldering iron to shrink the tubing to
secure the pushrod to the control horn.
15. Go back and align the supports so that the
pushrod is straight, and glue them in using foam-
safe CA.
16. Insert the bend of the 23
5
/
8
-inch (600mm)
elevator pushrod into the servo arm. Use the
second hole in from the end of the servo arm as
shown.
Not to scale
11/16-inch
(17mm)
17. Insert the pushrod guides into the slots in the
fuselage. In each position, there is a pair of holes.
The elevator pushrod supports will be flush with the
opposite side of the fuselage when installed. Do not
glue the supports at this time.
18. After aligning and trimming the elevator
pushrod using side cutters, connect the pushrod to
the elevator control horn using heat shrink tubing
and a soldering iron.
19. Go back and align the supports so that the
pushrod is straight and glue them in using foam-
safe CA.
20. The installation of the aileron pushrod follows
the same procedure as the elevator and rudder
pushrods, only without the supports.
Not to scale
3/4-inch
(19mm)
3/4-inch
(19mm)