Motor installation – E-flite 4-Site F3P 250 ARF User Manual
Page 13
13
E-flite 4-Site Assembly Manual
Motor Installation
Required Parts
Assembled airframe Carbon firewall
Motor
Receiver
Transmitter
Motor battery
Speed control
Right lower diagonal brace
Required Tools and Adhesives
Foam-safe CA
Sandpaper
Flat blade screwdriver, small
Phillips screwdriver, #1
Hobby knife with #11 blade or round file
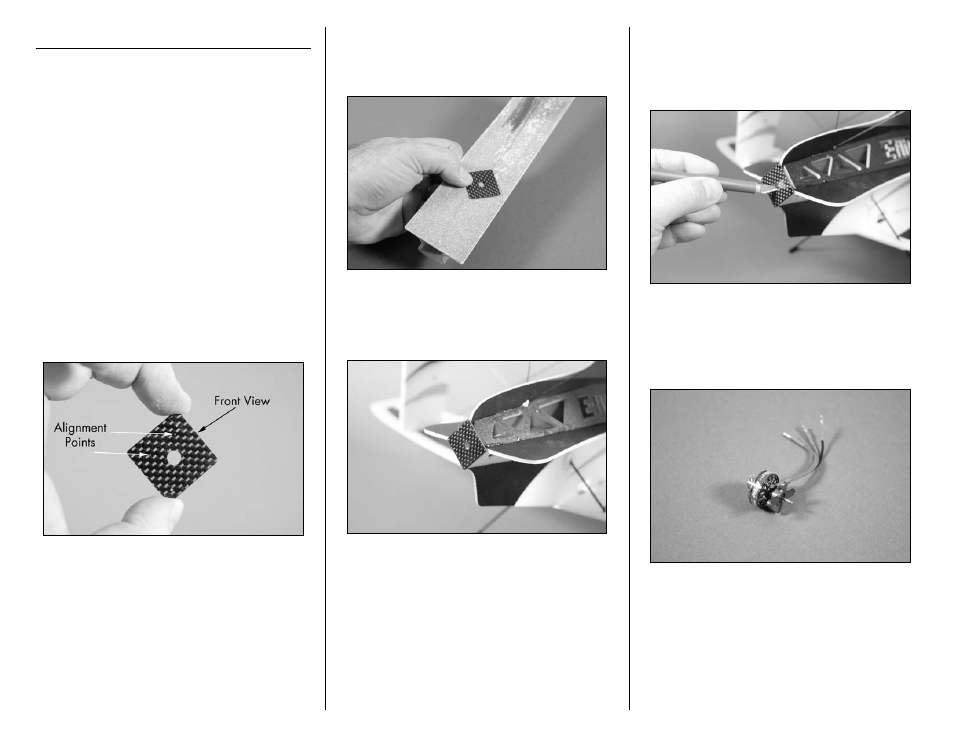
1. Locate the carbon firewall. There are four
holes in the firewall: two large and two small.
The two smaller holes are the alignment points for
positioning the firewall on the fuselage. These holes
will be located just like the ones on the Depron
firewall.
2. Use medium grit sandpaper to lightly sand
the back side of the firewall. The glue will be
applied to this side of the firewall to attach it to
the fuselage.
3. Match the two alignment points to those in the
Depron firewall (top and left as viewed from the
front of the fuselage). Use foam-safe CA to secure
the firewall to the fuselage.
4. It may be necessary to remove a small amount
of material from behind the firewall to clear the
motor shaft of your particular motor. You can use
either a round file or hobby knife to accomplish this
task.
5. Attach the motor mount to the motor following
the instructions provided with the motor using a flat
blade screwdriver. Note the position of the motor
wires in relation to the motor, as they need to be
positioned as such to connect to the speed control.