Retract installation – E-flite Hawker Sea Fury 480 ARF User Manual
Page 6
6
E-flite Hawker Sea Fury 480 ARF Assembly Manual
Retract Installation
Required parts
Servo (2)
Retract linkage (2)
Double-sided tape (2 pcs)
Retract assembly (right and left)
3mm x 6mm countersunk sheet metal screw (8)
Required Tools and Adhesives
Phillips screwdriver: #0, #1 Hobby knife
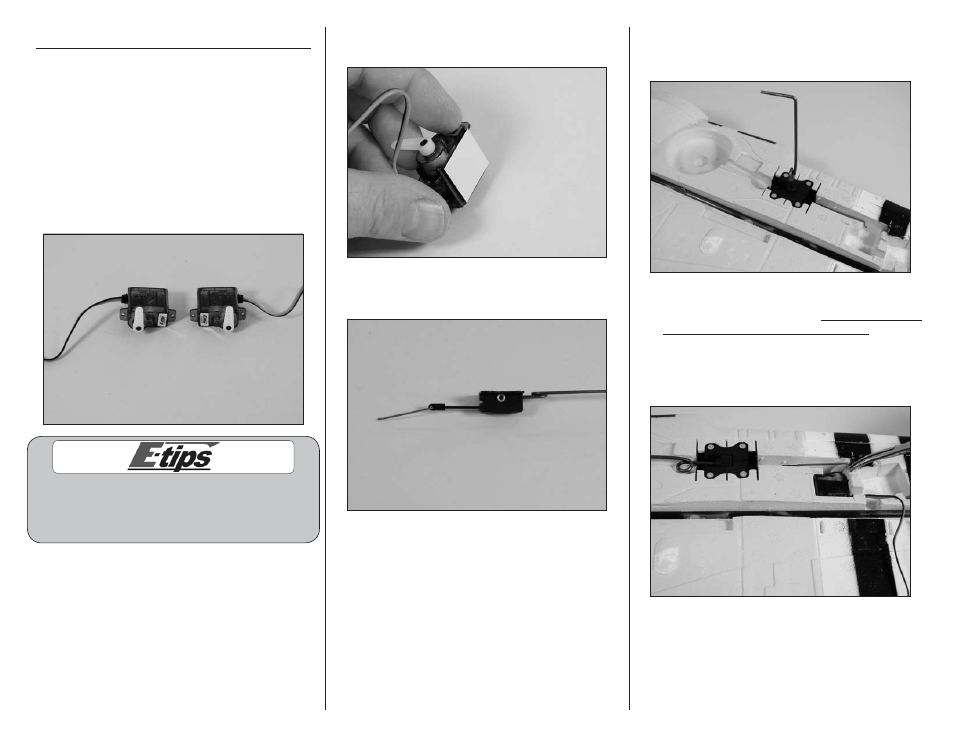
1. Prepare the retract servos by installing the servo
arms on the servos.
The servos are shown with the servo arms
centered. Make sure to position the servo horn
so they travel equally from this center position
or your retracts may not operate correctly.
2. Apply a piece of double-sided tape onto each
servo on the side opposite the servo arm.
3. Connect the retract linkage to the retract
actuator arm.
4. Secure the retract assembly in the wing using
a #1 Phillips screwdriver and four 3mm x 6mm
countersunk sheet metal screws per assembly.
5. Place the retract in the UP position and insert
the retract servo in the pocket.
Do not connect the
linkage to the retract servo at this time. Use the
radio to move the servo arm to the UP position.
Hold the linkage to the arm to make sure the
linkage aligns with the servo arm. Adjust the end
point at the radio to align the arm with the linkage.