Step 1: balancing the tilt axis, Step 2: balancing the roll axis, Step 3: balancing the vertical tilt – DJI Ronin User Manual
Page 15
©
2014 DJI. All Rights Reserved.
15
Ronin
User Manual
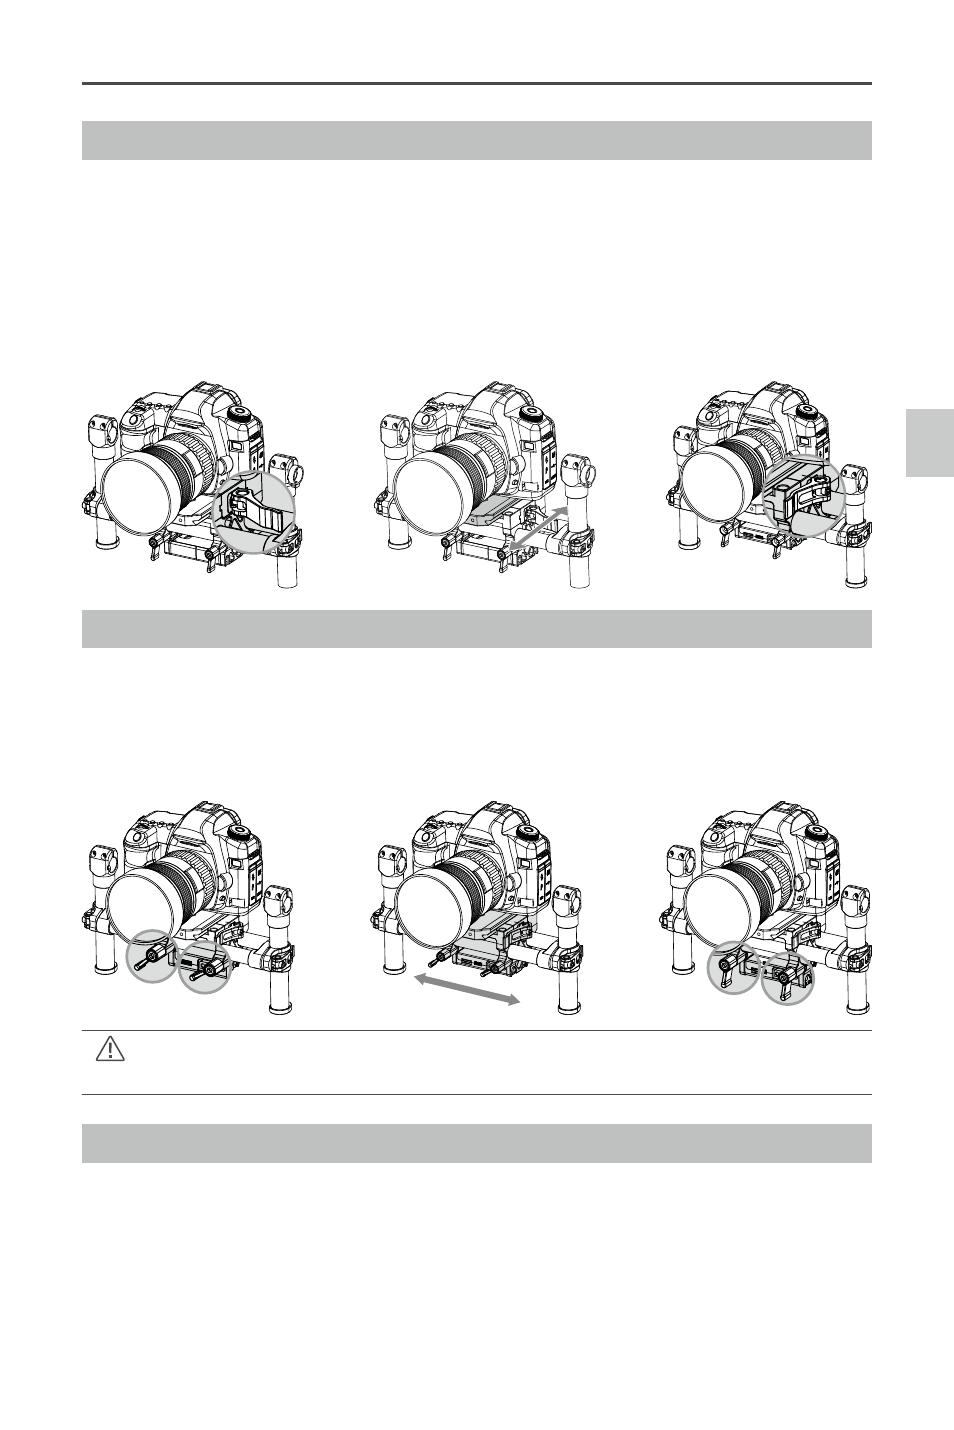
Step 1: Balancing the Tilt Axis
First, we need to balance the camera fore and aft on the Tilt Axis. When the proper fore and aft tilt
balance is achieved, the camera will stay level when you remove your hands.
1. Loosen the camera base's side clamp to allow the camera and mounting plate to slide forwards
and backwards.
2. Slide the camera forwards or backwards until the Tilt Axis remains level. It takes very small
adjustments to get the balance right.
3. Tighten the side clamp to lock the camera and mounting plate in position. If properly balanced, the
camera should be able to remain steady in any given tilt angle.
Step 2: Balancing the Roll Axis
Balancing the camera left-to-right on the Roll Axis is also required. When the proper left/right roll
balance is achieved, the camera will stay level.
1. Loosen the 2 lock-knobs to allow the camera and mounting plate to slide left and right.
2. Slide the camera left or right until the Roll Axis remains level.
3. Tighten the 2 lock-knobs to lock the camera mounting plate in position.
Step 3: Balancing the Vertical Tilt
To adjust the vertical balance, you will need to change the camera’s vertical position. When proper balance
is achieved, you can rotate the camera to any tilt angle, and it will stay in that position.
Adjust the height of the crossbar to achieve vertical tilt balance.
1. Rotate the Tilt Axis so that the camera lens is pointing skyward as much as your lens setup will allow
and loosen the two vertical adjustment tabs.
2. Gently slide the camera mount crossbar forward or backward until the camera remains pointing
skyward when released.
When adjusting the roll balancing position of the camera, only loosen the 2 lock-knobs a few
turns to allow the camera base to slide. Do not loosen the lock-knobs excessively.
Balancing