Handle bar adjustment, Balancing – DJI Ronin User Manual
Page 14
14
©
2014 DJI. All Rights Reserved.
Ronin
User Manual
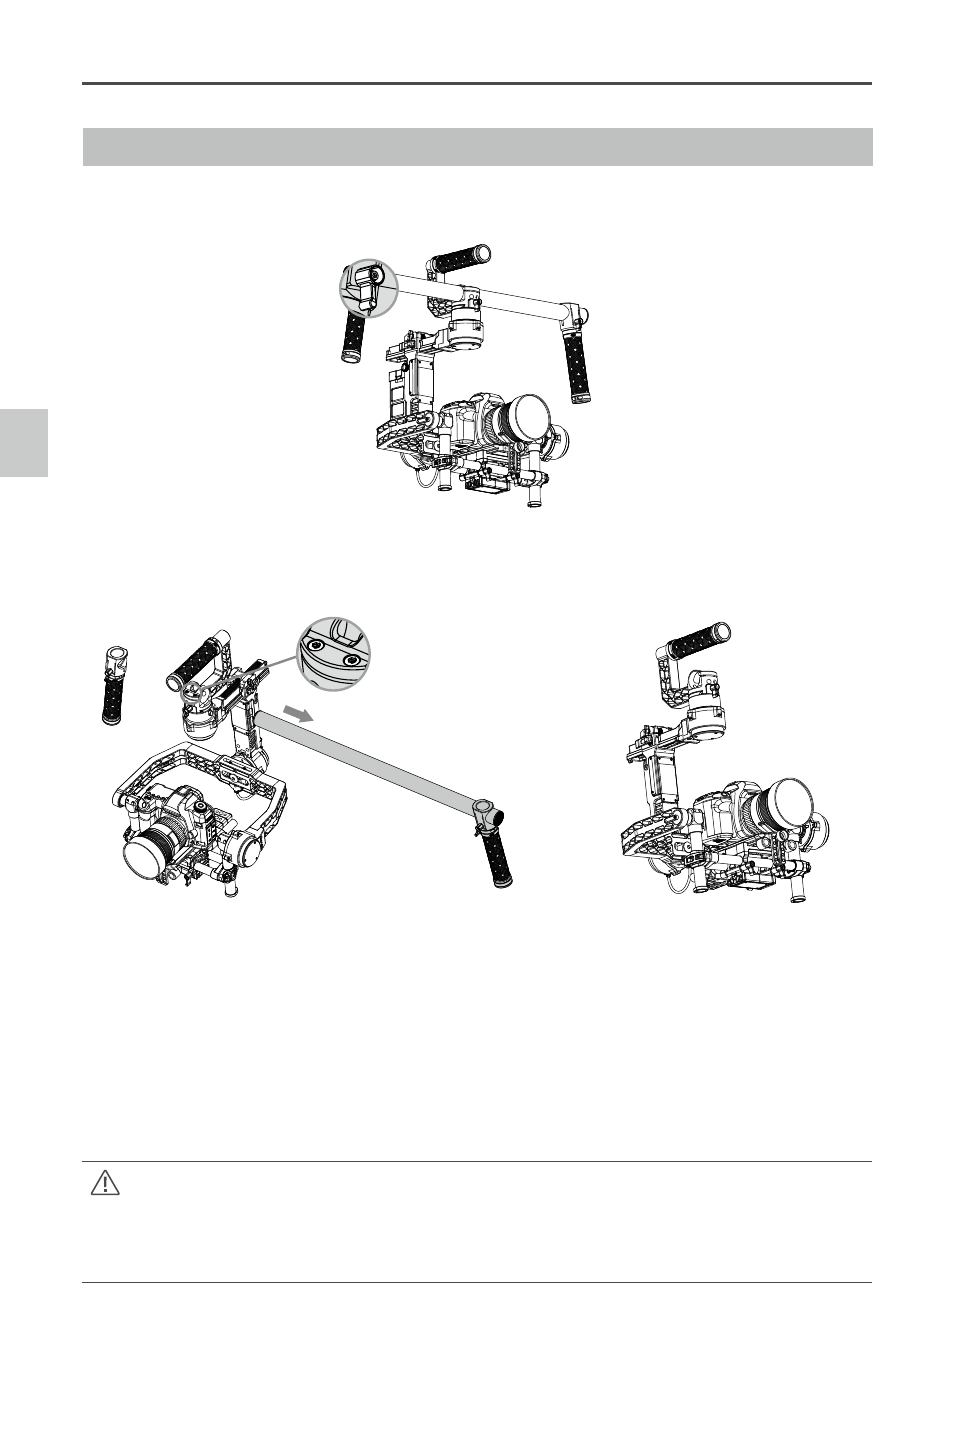
Handle Bar Adjustment
The customizable handle bar of the Ronin can be removed by following the steps below, if required.
1. Loosen screw on either grip.
2. Remove the grip from the handle bar. Loosen the two screws and then the top bar can be removed.
3. The resulting setup is shown below.
Balancing
To achieve the best performance from the Ronin, proper balancing is necessary and a must. Accurate
balance is critical in shots where the Ronin will be subjected to extreme movements or accelerations
(running, horseback riding, biking, car mounts, helicopters, etc.) Proper balance will also offer a longer
battery runtime. There are 3 axes that need to be accurately balanced prior to powering the Ronin on
and setting up the software.
The camera needs to be fully setup with all accessories prior to installing and balancing the
camera on the gimbal. If you are balancing the camera with a lens cap on, be sure to remove
the lens cap prior to balancing. Be sure whenever balancing the camera that the Ronin’s
power is turned off.
Balancing