Installation instructions – Brandmotion FLTW-7604 User Manual
Page 2
INSTALLATION INSTRUCTIONS
7604 Instructions 5-13-14.doc
Page 2 of 2
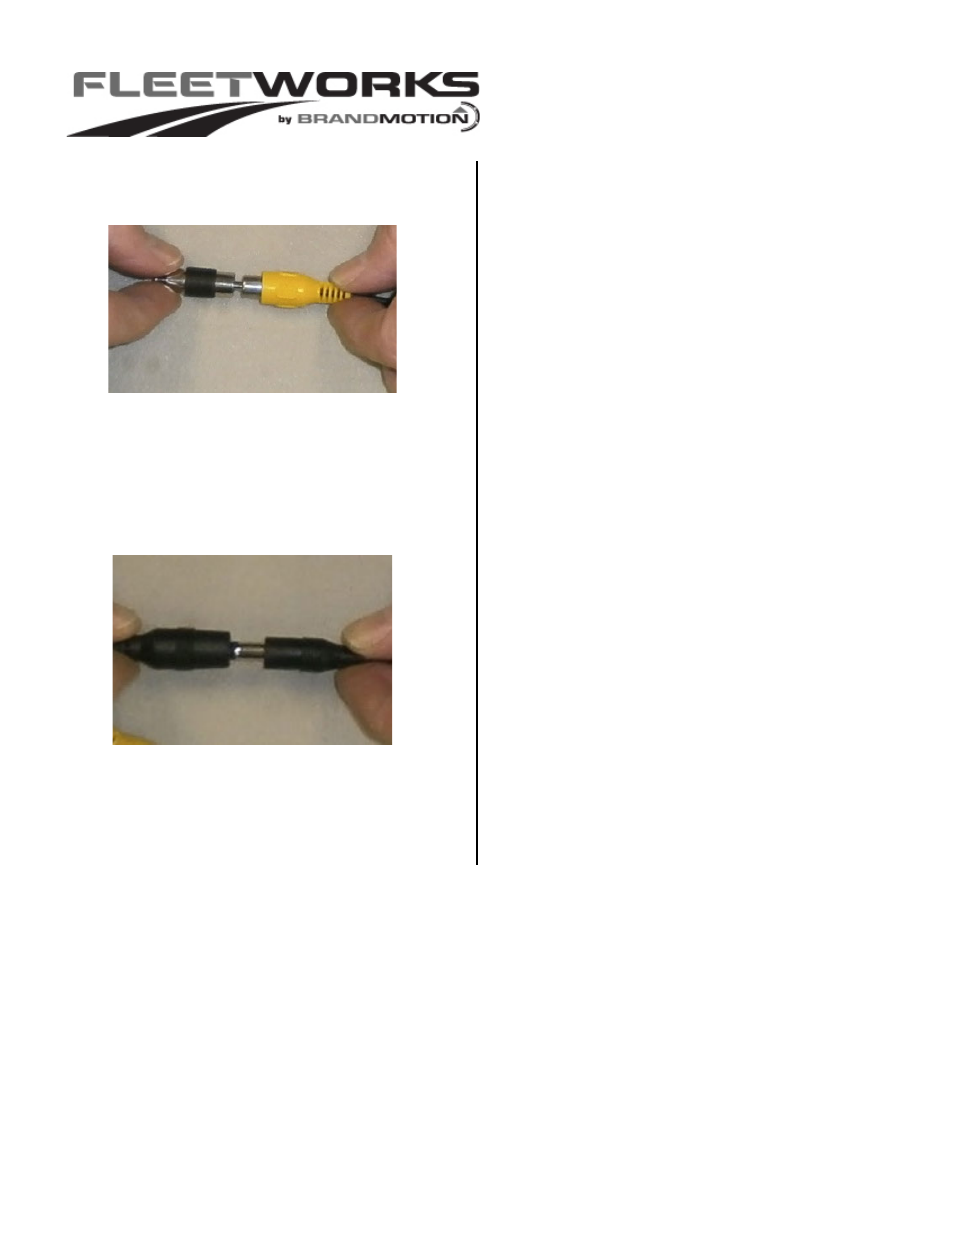
Step 7: (If necessary) Connect supplied Female to Male RCA
Adaptor to yellow RCA Video Harness plug.
Step 8: Install video monitor / Navigation display per
manufacturer’s instructions. See Chart A below for Reverse
signal location.
Step 9: Connect yellow RCA plug of Video Harness to “Camera
IN” on the video / Navigation display. (NOTE: The white RCA
plug is not used in this application.)
Step 10: Connect Camera Harness power connector to the
supplied Power Harness.
Step 11: Splice the red wire from the Power Harness to a
12v+ Ignition power wire in your vehicle. (Recommended: T-
taps or Solder.)
Step 12: Add a Ground Eyelet (recommended) to the black
wire from the Power Harness and use a screw or nut to attach
it to a Chassis Ground in your vehicle.
Step 17: Test the system. Inspect that all connections are
proper and secure. Clear all loose items removed from area
around the vehicle. Turn ignition key ON and shift into Reverse
to test system. The video image from the Camera should
appear in your display / Navigation display.
Step 18: Secure Chassis, Video, and Power Harnesses to
existing vehicle wiring and reassemble vehicle by following
your disassembly steps in reverse order. Avoid binding or
otherwise damaging the harnesses. (Recommended: Wire Ties
or Electrical Tape.