Installation instructions – Brandmotion 9002-8520 User Manual
Page 3
INSTALLATION INSTRUCTIONS
8520 Instructions 11-20-13.doc
Page 3 of 4
Step 13: Splice the red and green Chassis
Harness leads into the corresponding vehicle
wires and the black wire to chassis ground.
(Note: Soldering recommended or T-taps as optional
connection method). RECOMMENDED: Attach an
Eyelet to the black ground wire.
Step 14: Route Camera Harness towards the side of
the vehicle that supplies power.
Step 15: Connect Camera Harness to supplied
Chassis Harness. The optimal location for this
junction may occur at the top of the liftgate or the
inner edge of the trunk. (Note: Most vehicles have
existing wires passing through this area; use this
route if at all possible).
Step 16: Route Chassis Harness forward. It may
be necessary to remove sill plates, pillar covers, seat
bases, side panels, etc. using a Plastic Trim Removal
Tool. In some cases, seatbelt bolts must be removed.
(CAUTION: Any bolts removed for safety devices
must be retightened to manufacturer’s torque
specifications).
Step 17: Secure Camera Harness to existing
vehicle wiring. This will minimize chance of
binding or otherwise damaging the harness.
RECOMMENDED: Wire Ties or Electrical Tape.
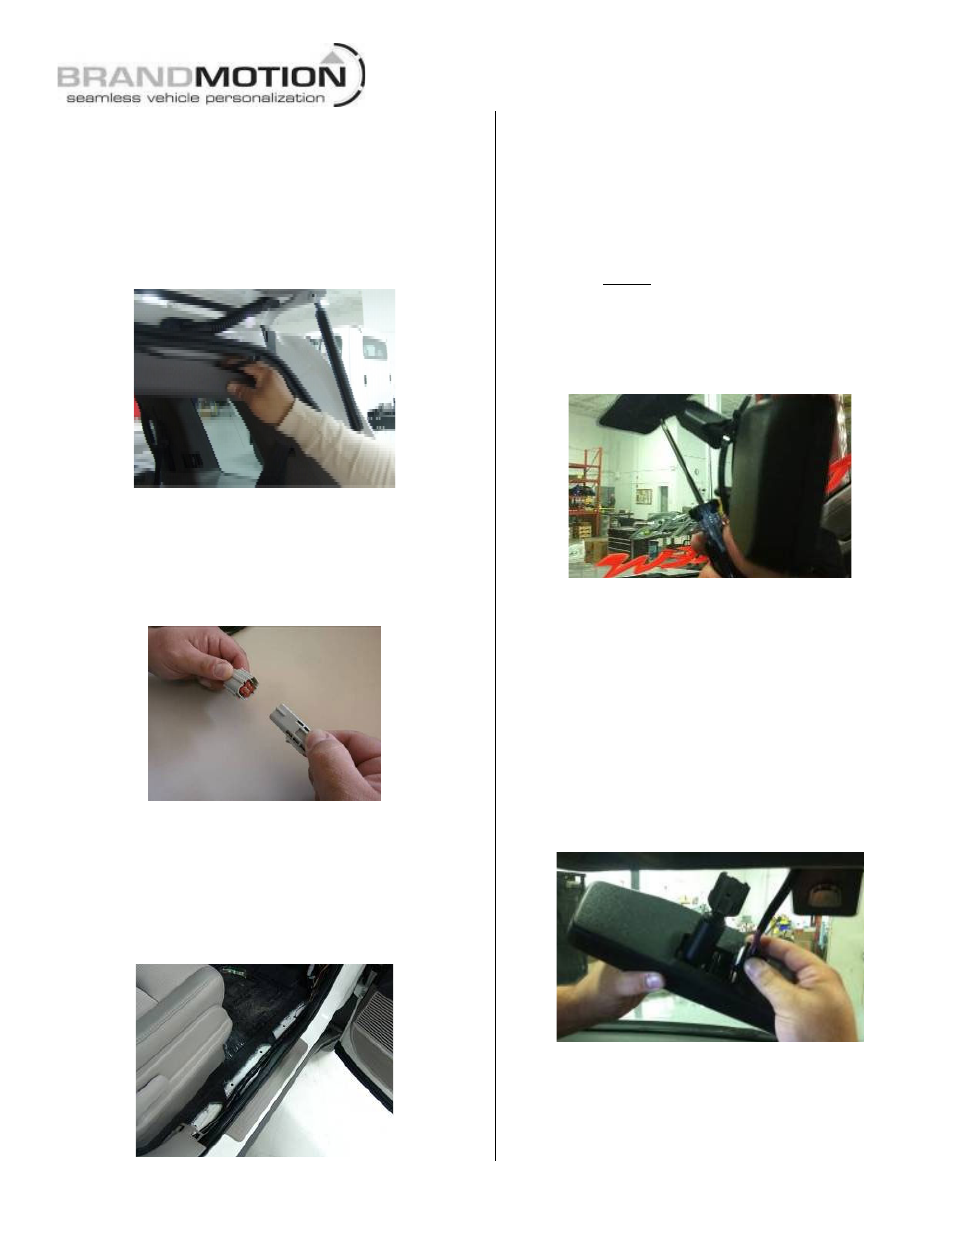
Step 18: Remove vehicle inside rearview
mirror. Most OEM mirrors are secured using a
T20 Torx screw. Loosen the screw and slide the
mirror up; do not twist. NOTE: some Ford vehicle
mirrors are not secured with a screw and require
Mirror Removal Tool # OTC8200 or Brandmotion
part # CTAA585.
CAUTION: Removing the mirror can cause
damage to the windshield.
Step 19: Slide supplied Mirror down onto
windshield tab and secure using a T20 Torx
Driver. This mirror has a Wedge/ D-tab style
mounting base. Please check our compatibility
chart to make sure it is compatible with your
vehicle (adapters are available for specific
applications separately).
IMPORTANT: Torque for the mirror screw that
attaches to the windshield tab is 1.8 Nm (16 lb-
in) and cannot exceed 2.2 Nm (19.5 lb-in).
Step 20: Insert 16-pin mirror connector of
supplied Mirror Harness into Mirror.
Step 21: Route Mirror wiring. Tuck the
harness beneath the vehicle headliner and down
the A-pillar toward the Chassis Harness which
you installed previously.