Rockwell Automation 20D PowerFlex 700H/S Frame 12 Replacement Power Structure User Manual
Page 11
PowerFlex® 700S and 700H Frame 12 Replacement Power Structures
11
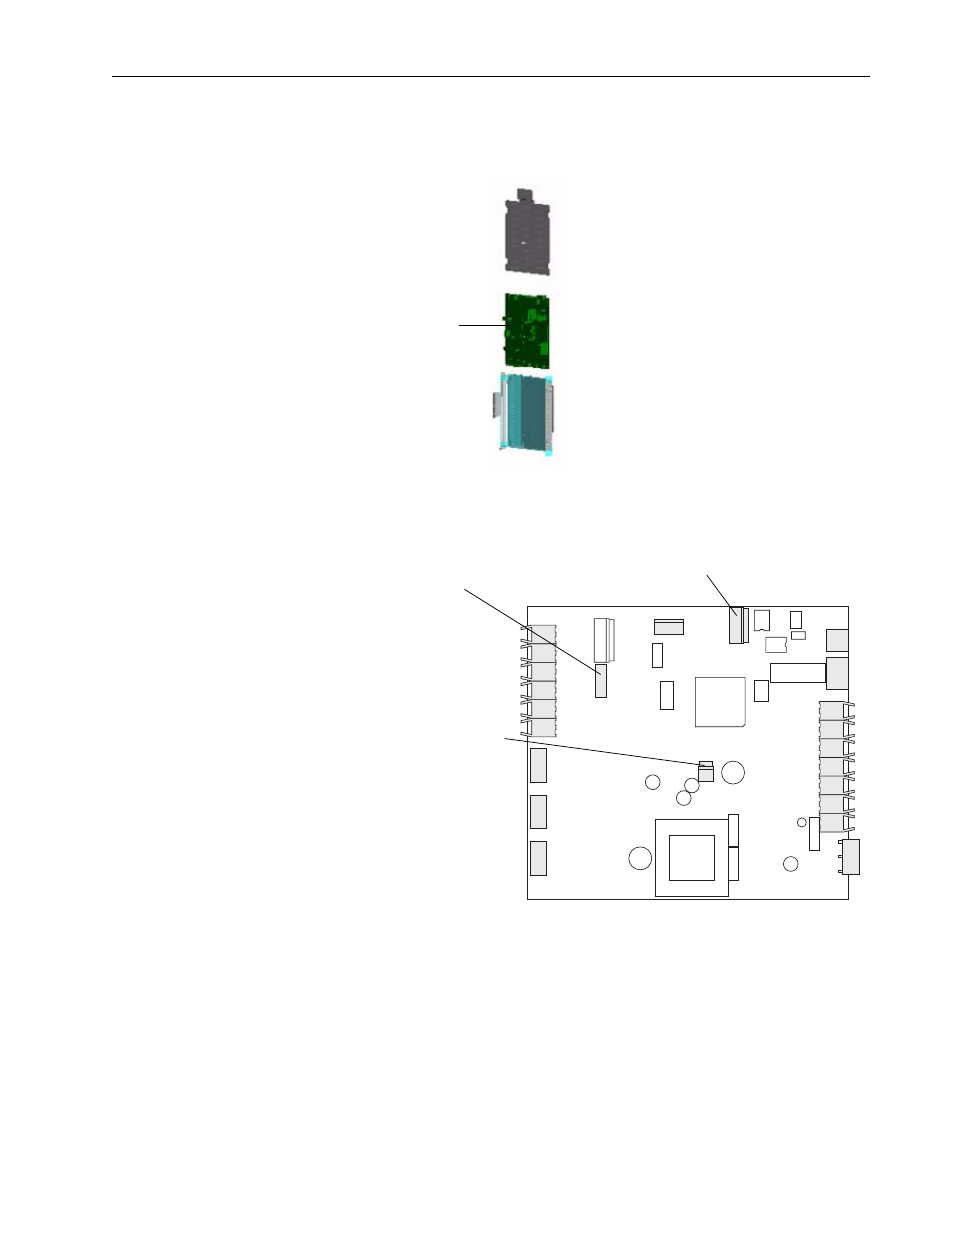
4. Slide the old ASIC board out of its chassis.
5. Slide the new ASIC board into the chassis.
6. If you are installing a replacement power structure on a drive with AC
input, remove the X2 plug from its protective sleeve and plug the cable
into the X2 socket on the ASIC board.
7. Connect the other end of the cable connected to X2 on the ASIC board
to X13 on the Rectifier circuit board on the upper right side of the
power structure.
8. Connect the cable from the Feedback board to the X26 connector on the
ASIC board.
9. Plug the fan that mounts on the ASIC assembly cover into the X1
connector on the ASIC board.
ASIC Board
H11
H12
H13
H8
H9
H10
X6
X9
X15
X3
X4
X5
X2
X1
H4
H5
H6
H1
H2
H3
H7
X26
X11
To X13 connection on Rectifying board
X1 Fan connection
X26 Feedback
board connection