Rockwell Automation 2711E-ND7 PanelView File Transfer Utility User Manual User Manual
Page 37
2–22
Working with the PanelView e Transfer Utility 32
Publication 2711E-UM003B–EN–P
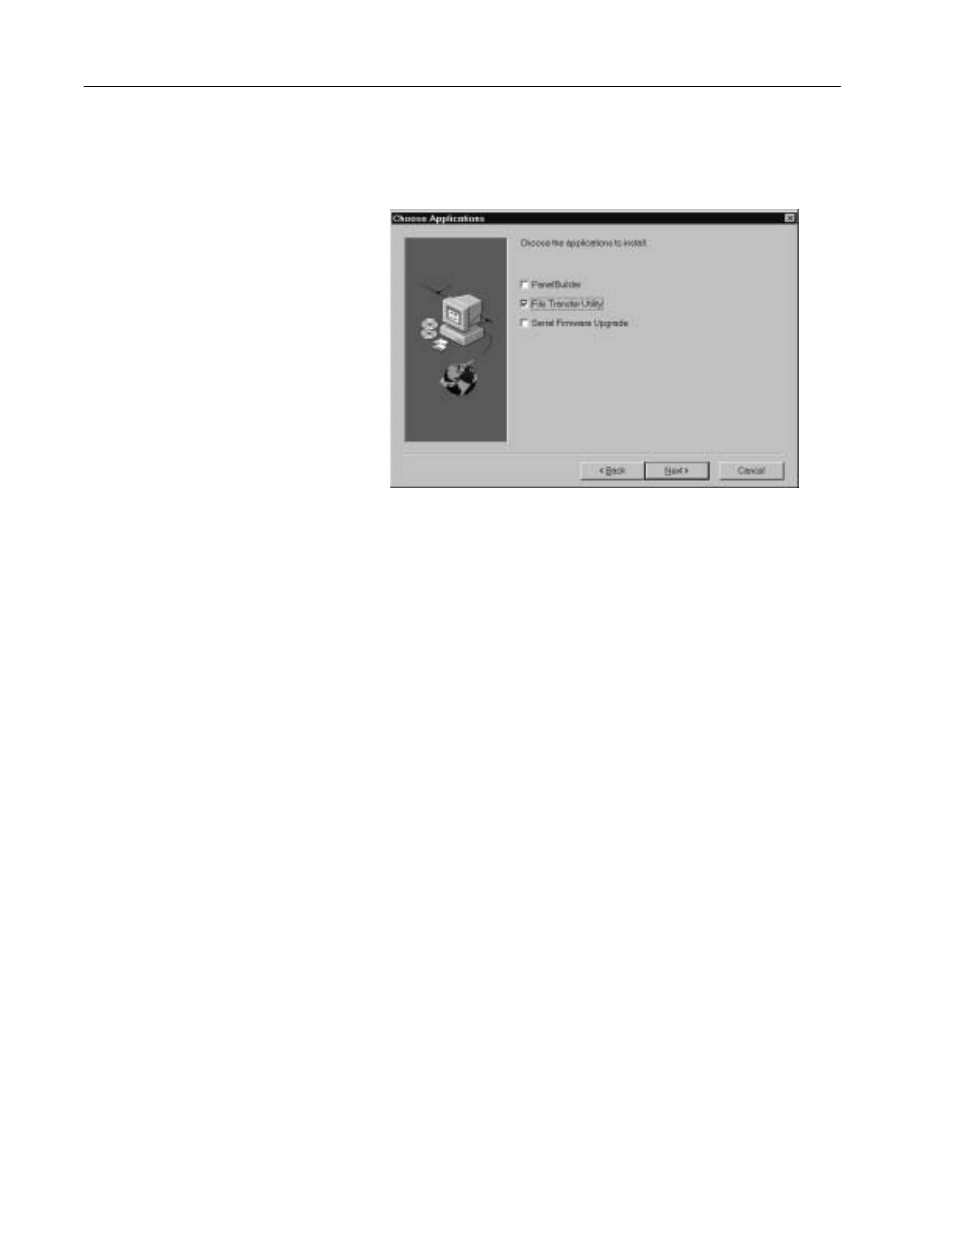
6. In the Choose Applications dialog box, choose File Transfer
Utility as the application you want to install. You can choose
more than one application to install. Then choose Next.
7. The Welcome dialog box for the File Transfer Utility
recommends that you close all open Windows applications. If you
have done that, choose Next.
8. In the registration window, enter the required information.
Registration information is on the software registration card
included with your PanelBuilder 1400e package. Choose Next.
9. Choose the drive and directory in which the FTU will be
installed. By default, this is C:\AB\PB1400E\FTU. To change the
destination drive or directory, type the new drive and/or directory
in the Program Files field. Then choose Next.
10. Choose the program folder (program group) in which you want to
install the FTU’s icons, which include a Readme file icon, the
Transfer Utility icon, and an Uninstall icon. By default, the icons
are installed in the PanelBuilder 1400e program folder. Then
choose Next.
11. Choose whether the installation utility will modify the
AUTOEXEC.BAT file. The entry
C:\RSI\CMN
is required in the PATH variable for the FTU to work correctly.
Then choose Next.
12. The setup utility shows a summary of the choices you made in the
preceding dialog boxes. To make any changes, choose the Back
button. Otherwise, choose Next to begin the installation.