2 - installing your module, Chapter objectives, Power requirements – Rockwell Automation 1771-ASB/E Remote I/O Adapter User Manual User Manual
Page 15: Module location and keying, Installing your module, Chapter
Chapter
2
Publication1771-UM001A-US-P - February 2000
Installing Your Module
This chapter describes the procedures for installing your remote I/O
adapter module. These include:
•
power requirements
•
module location and keying
•
setting configuration plugs
•
setting the module switches
•
setting the I/O chassis switches (backplane and
•
setting the I/O chassis power supply configuration plug
•
wiring the field wiring arm
•
installing the terminator resistor
•
compatibility of products
•
installing the module
The remote I/O adapter module requires a backplane current of 1.0A
at 5V dc. Remember to add this amount to other current
requirements for your remote I/O chassis.
The remote I/O adapter module must be installed in the leftmost slot
of the I/O chassis.
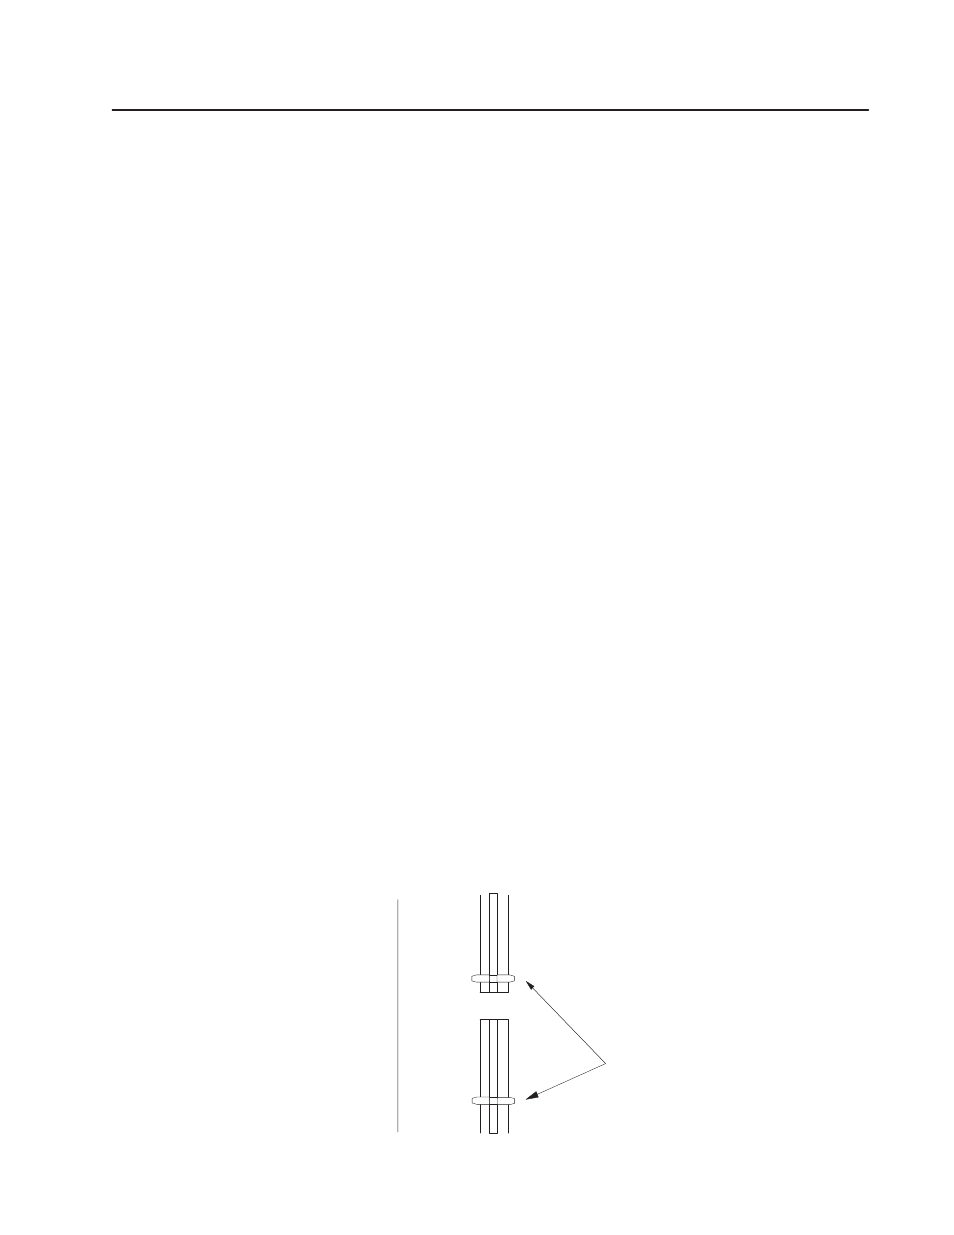
The I/O chassis backplane connectors are keyed to accept only one
type of module. This prevents accidental insertion of other modules
in the wrong module slot. Key the backplane connectors (Figure 2.1)
for the adapter module as follows:
•
upper connector: between 54 and 56
•
lower connector: between 16 and 18
Figure 2.1
Keying Diagram
4 0
4 2
4 4
4 6
4 8
5 0
5 2
5 4
5 6
2
4
6
8
1 0
1 2
1 4
1 6
8
0
2 2
Insert keying bands between:
upper connector Ć 54 and 56
lower connector Ć 16 and 18
2
1
12252
Upper Connector
Lower Connector
Keying Bands
Chapter Objectives
Power Requirements
Module Location and
Keying