Specific marker card calibration (if needed) – Rockwell Automation 1492-PRINT110_PRINT220 ClearMark Printer User Manual User Manual
Page 53
Rockwell Automation Publication 1492-UM008A-EN-P - June 2010
5-5
Calibration Chapter 5
23.
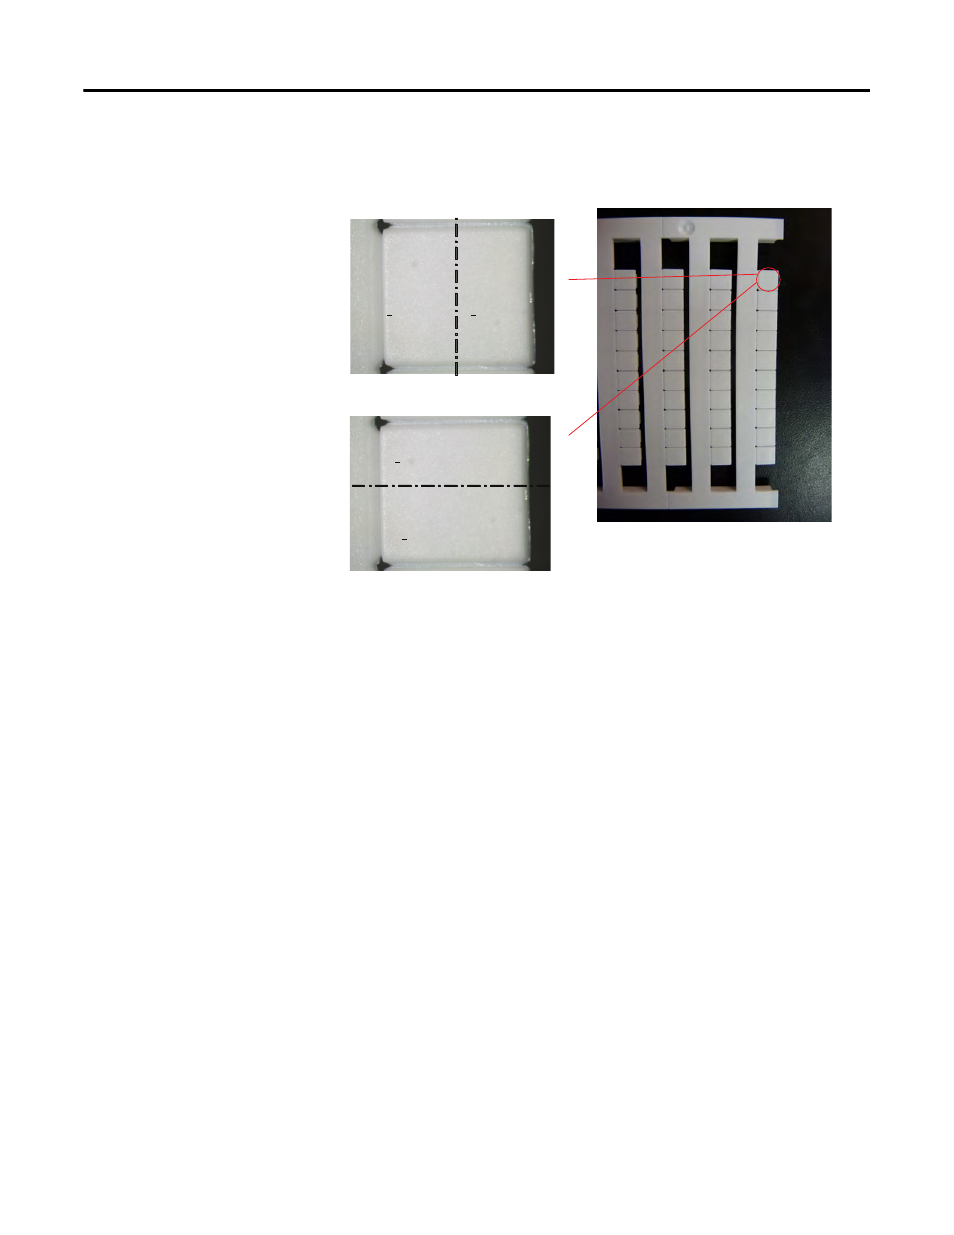
See Figure 5.8 for horizontal adjustments
24.
See Figure 5.9 for vertical adjustments.
Figure 5.8 -
Figure 5.9 -
25.
After making changes to the "Width" or "Height", Click [OK]. Then select
File→Print
to check the card.
Specific Marker Card Calibration (If Needed)
Notes: Affects only the specific marker card you are adjusting.
Continue with this section only if you are not satisfied with the calibration
after steps 1-25.
General calibration may not create the best printing alignment on all types of
marker cards. To create calibration values for specific marker cards, complete the
steps below.
1.
Similar to what was done with general calibration, in the first column of
the desired marker card, place a capital "X" five marker tags down. (See
Figure 5.10)
Notes: It is critical to select this tag.
Turn off the heat setting so the card can be cleaned and re-used.
If “X“ appears on
this half of the
card
decrease
the “Actual Width
(X)“ number to
move it back to
center.
If “X“ appears on
this half of the
card
increase
the “Actual Width
(X)“ number to
move it back to
center.
If “X“ appears on this half of the
card
increase
the “Actual Height
(Y) “ number to move it back to
center.
If “X“ appears on this half of the
card
decrease
the “Actual Height
(Y) “ number to move it back to
center.