Installation, Optional light installation – Regency Horizon HZ42STE Medium Gas Fireplace User Manual
Page 41
Regency Horizon™ HZ42STE Gas Fireplace
41
INSTALLATION
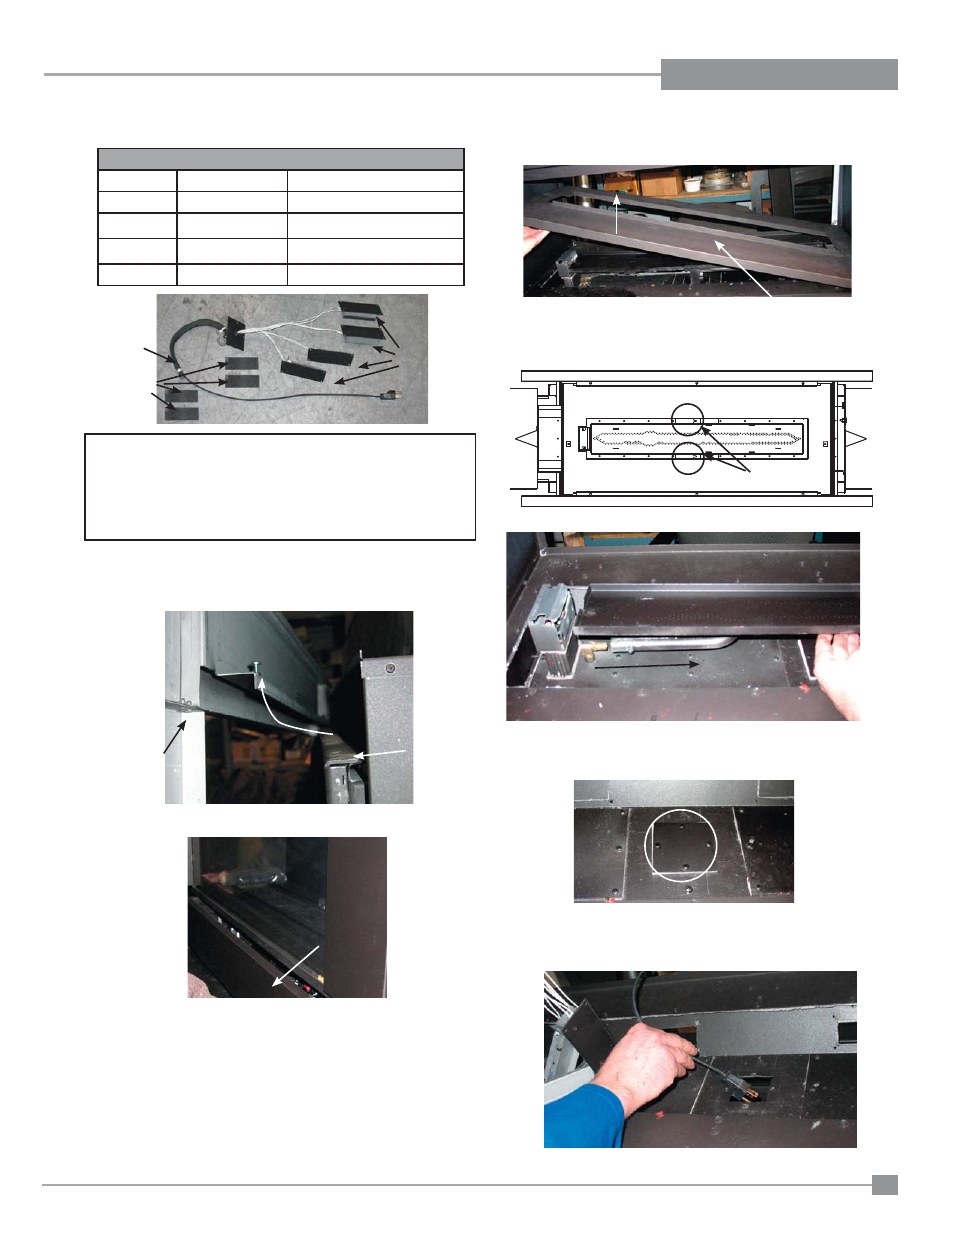
1) Shut off electrical supply.
If faceplate is installed - complete steps 2 & 3 below.
2)
Remove faceplate by lifting up off glass door - see below.
4)
Remove the glass door - see instructions in manual.
5)
Remove the glass crystals/optional ceramic stones or pebbles- if
installed.
6)
Remove inner panels if installed - see instructions in manual.
8)
Loosen 2 screws securing burner - slide burner away from
the pilot and lift out.
9)
Remove cover plate located in the centre of the fi rebox fl oor
by removing 4 screws. Discard the cover plate and gasket - keep the
screws.
X
X
X
X
Screws
Faceplate
Glass Door
3)
Slide out bottom faceplate panel - see below.
Plug Wiring
Light Diffuser
Amber Glass
7)
Remove bottom cover
Bottom cover
10)
Feed the plug wiring through the opening in the middle of the
fi rebox - secure light assembly mounting plate with 4 screws
(use screws from cover plate).
HZ42ST Accent Light Assembly Kit # 586-959
1
910-814
Plug wiring + gasket
4
910-997
Halogen Bulb
4
940-363
Amber Glass
1
Light Assembly
Includes gaskets (x 4)
1
918-829
Instruction Sheet
Important: 120 Volt AC power is required for the optional light.
The receptacle box will be installed on the lower left corner of
the unit and will need to be wired by a qualifi ed electrician prior
to the optional light installation. The neutral (wider) slot of the
polarized receptacle should be at the top. A wall mounted switch
should be installed to turn the accent lighting on/off.
See wiring diagram in the instruction manual.
OPTIONAL LIGHT INSTALLATION