Operating instructions, Aeration adjustment, First fire – Regency Bellavista B41XTCE Large Gas Fireplace User Manual
Page 58: Lighting procedure, Shutdown procedure, Normal operating sounds of gas appliances
58
Regency Bellavista™ B41XTCE Gas Fireplace
58
OPERATING INSTRUCTIONS
Burner Tray:
The burner tray is positioned directly under the
burner and is made of a different gauge material
from the rest of the fi rebox and body. Therefore,
the varying thicknesses of steel will expand and
contract at slightly different rates which can cause
"ticking" and "cracking" sounds. You should also
be aware that as there are temperature changes
within the unit these sounds will likely re-occur.
Again, this is normal for steel fi reboxes.
Pilot Flame:
While the pilot fl ame is on it can make a very
slight "whisper" sound.
Gas Control Valve:
As the gas control valve turns ON and OFF, a
dull clicking sound may be audible, this is normal
operation of a gas regulator or valve.
Unit Body/Firebox:
Different types and thicknesses of steel will
expand and contract at different rates resulting
in some "cracking" and "ticking" sounds will be
heard throughout the cycling process.
Blower Thermodisc:
When this thermally activated switch turns ON
it will create a small "clicking" sound. This is the
switch contacts closing and is normal.
AERATION
ADJUSTMENT
The burner aeration is factory set but may need
adjusting due to either the local gas supply or
altitude. Open the air shutter for a blue fl ame or
close for a more yellow fl ame.
Minimum Air Shutter Opening:
NG: 1/4"
LP: 1/2"
CAUTION: Carbon will be produced if air shutter
is tightly closed.
Note: Any damage due to carboning
resulting from improperly setting
the aeration controls is NOT covered
under warranty.
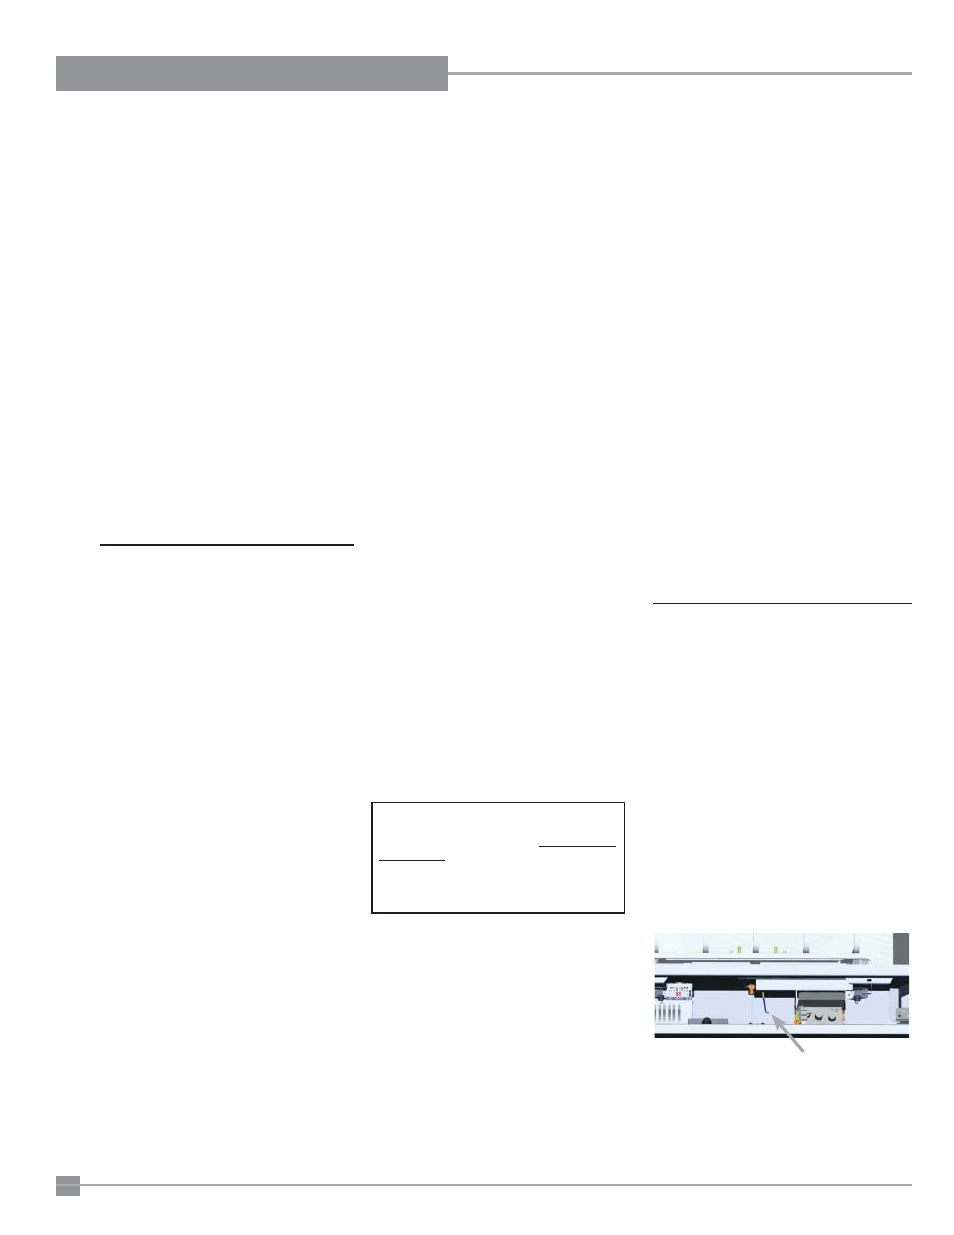
Air shutter rod: located to the left
of the valve assembly.
During the fi rst few fi res, a white fi lm
may develop on the glass front as part
of the curing process. The glass should
be cleaned or the fi lm will bake on and
become very diffi cult to remove. Use a
non-abrasive cleaner and NEVER clean
the glass while it is hot.
FIRST FIRE
The fi rst fi re in your fi replace is part of the
paint curing process. To ensure that the paint
is properly cured, it is recommended that you
burn your fi replace for at least four (4) hours the
fi rst time you use it with the fan on.
When fi rst operated, the unit will release an odour
caused by the curing of the paint, the burning
off of any oils remaining from manufacturing.
Smoke detectors in the house may go off at
this time. Open a few windows to ventilate the
room for a couple of hours.
The glass panel may require cleaning after the
unit has cooled down.
DO NOT ATTEMPT TO CLEAN THE
GLASS WHILE IT IS HOT.
Note: When the glass is cold and the
appliance is lit, it may cause
condensation and fog the glass.
This condensation is normal and will
disappear in a few minutes as the glass
heats up.
DO NOT BURN THE APPLIANCE
WITHOUT THE GLASS FRONT IN
PLACE.
OPERATING
INSTRUCTIONS
1) Read and understand these instructions
before operating this appliance.
2) Check to see that all wiring is correct and
enclosed to prevent possible shock.
3) Check to ensure there are no gas leaks.
4) Make sure the glass in the door frame is
properly positioned. Never operate the
appliance with the glass removed.
5) Verify that the venting and cap are
unobstructed.
6) Ensure that the brick panels are installed.
7) Verify log placement. If the pilot cannot be
seen when lighting the unit, the logs have
been incorrectly positioned.
8) The unit should never be turned off, and on
again without a minimum of a 60 second
wait.
LIGHTING PROCEDURE
1) Plug the power cord into a power outlet.
Turn on ON/OFF switch if optional Remote
is used.
2) Press and release on ON/OFF button once
on the remote control.
3) After approximately 4 seconds the spark
ignition system will spark for 60 seconds to
light the main burner.
4) The unit will turn on.
Note: The fi rst try for ignition will last approxi-
mately 60 seconds. If there is no fl ame igni-
tion (rectifi cation) the board will stop sparking
for approximately 35 seconds. After wait
time , the board will start second try for
ignition by sparking for approximately 60
seconds . If there is still no positive ignition
the board will go into lock out.
The system will need to be reset as follows:
a) Turn the system off using ON/OFF switch
or press ON/OFF button - if using optional
remote.
b) After approximately 2 seconds turn on ON/
OFF switch or press ON/OFF button if using
optional remote.
c) Repeat step 2.
SHUTDOWN
PROCEDURE
1) Turn ON/OFF switch or press and release
the ON/OFF button once if using optional
Remote Control.
2) If service is to be performed - you must
disconnect both sources of power to the
unit, the main power and battery.
NORMAL OPERATING
SOUNDS OF
GAS APPLIANCES
It is possible that you will hear some sounds
from your gas appliance. This is perfectly
normal due to the fact that there are various
gauges and types of steel used within your
appliance. Listed below are some examples.
All are
normal operating sounds and should
not be considered as defects in your appliance.