Installation – Regency Bellavista B41XTCE Large Gas Fireplace User Manual
Page 18
18
Regency Bellavista™ B41XTCE Gas Fireplace
INSTALLATION
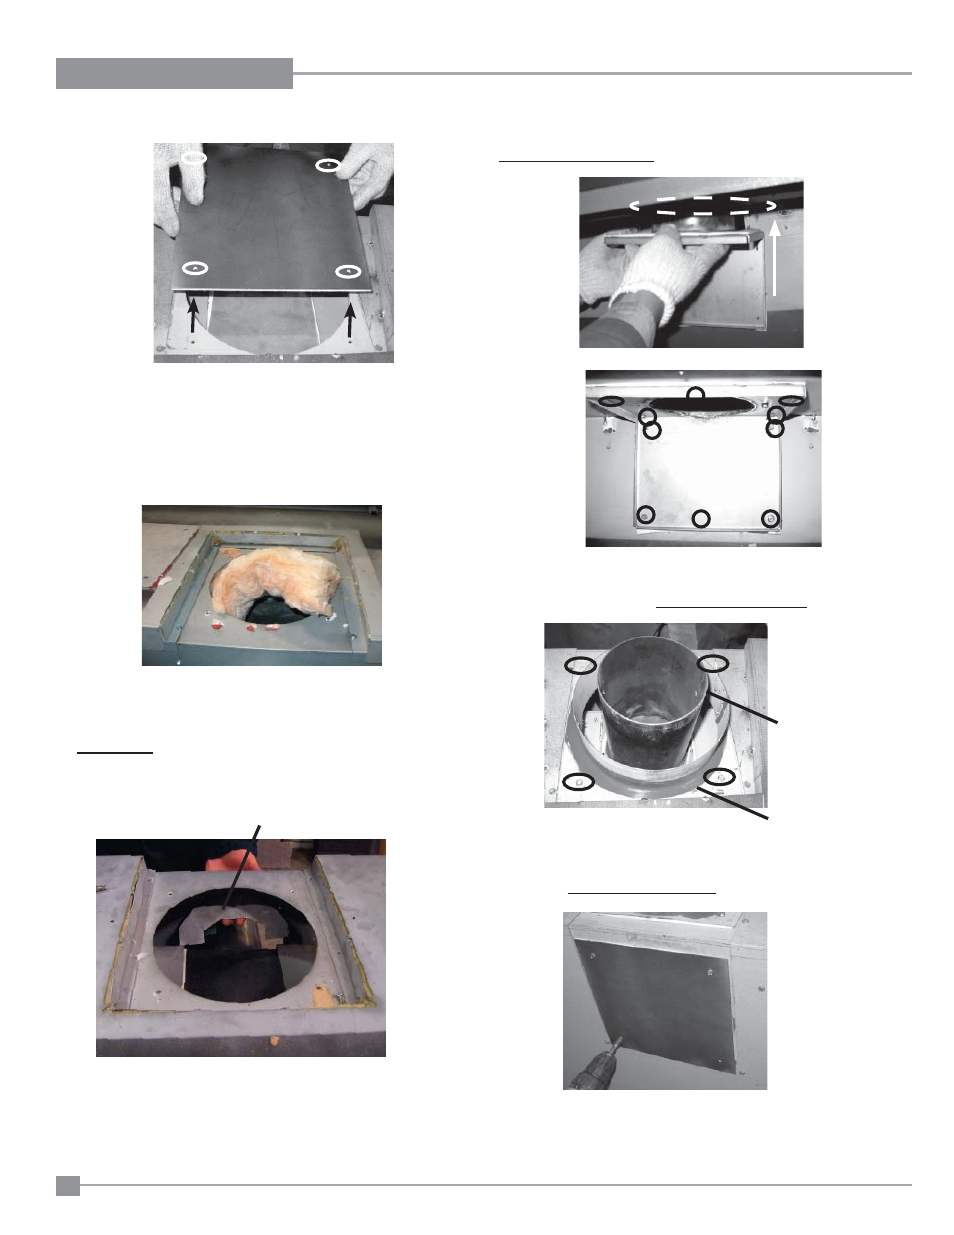
7) From the outside top of the fi rebox - remove the intake cover plate
by removing the 4 - 1/4" x 1/2 " screws.
Before proceeding to Step 8, inspect condition of all gaskets.
DO NOT install parts with damaged gaskets. Replace if necessary
with spare gaskets supplied.
10) From the inside of the fi rebox, place the exhaust assembly into
position as shown in Diagram 1 and secure with 10 - 1/4" x 1/2" screws
(Diagram 2). Ensure all screws are tight, but do not over tighten.
All 10 screws must be used.
Diagram 1
Diagram 2
12) From the outside rear of the fi rebox, install the intake cover plate
with 4 - 1/4" x 1/2" screws. Ensure all screws are tight, but do not
over tighten. All 4 screws must be used.
13) Set vent restrictor accordingly - see next page.
14) From inside the fi rebox, re-install the baffl e plate from step 2.
11) From the outside top of the fi rebox, install the intake collar as-
sembly. Secure with 4 - 1/4" x 1/2" screws. Ensure all screws are
tight, but do not over tighten. All 4 screws must be used.
Intake Collar
Assembly
Exhaust
Assembly
8) From the outside top of the fi rebox - completely remove the insula-
tion under the cover plate as shown and discard.
9) From the outside back of the fi rebox - locate the insulation defl ector
and bend completely upwards fl at against the back of fi rebox.
IMPORTANT: If the insulation defl ector is not bent fl at against the
back of the fi rebox this will block air intake which will affect the unit's
performance.
View Front of Firebox
Insulation Defl ector