Installation, Conversion to top vent – Regency Bellavista B41XTCE Large Gas Fireplace User Manual
Page 17
Regency Bellavista™ B41XTCE Gas Fireplace
17
INSTALLATION
CONVERSION TO TOP VENT
Note: This conversion must be done prior to the unit being placed in position.
The unit comes equipped as a rear vent unit. These instructions are to be used, only if the unit is going to be top vented.
Top Collar Assembly Kit Includes:
1
Intake Collar Assembly with Gasket
1
Intake Cover Plate with Gasket
1
Top/Rear Exhaust Assembly with Gasket
1
Baffl e Plate
29
1/4" x 1/2" Screws (4 spares)
1
Restrictor
1
Intake Collar Gasket (spare)
1
Exhaust Assembly Gasket (spare)
1
Insulation Plate Cover
1
Insulation Filling
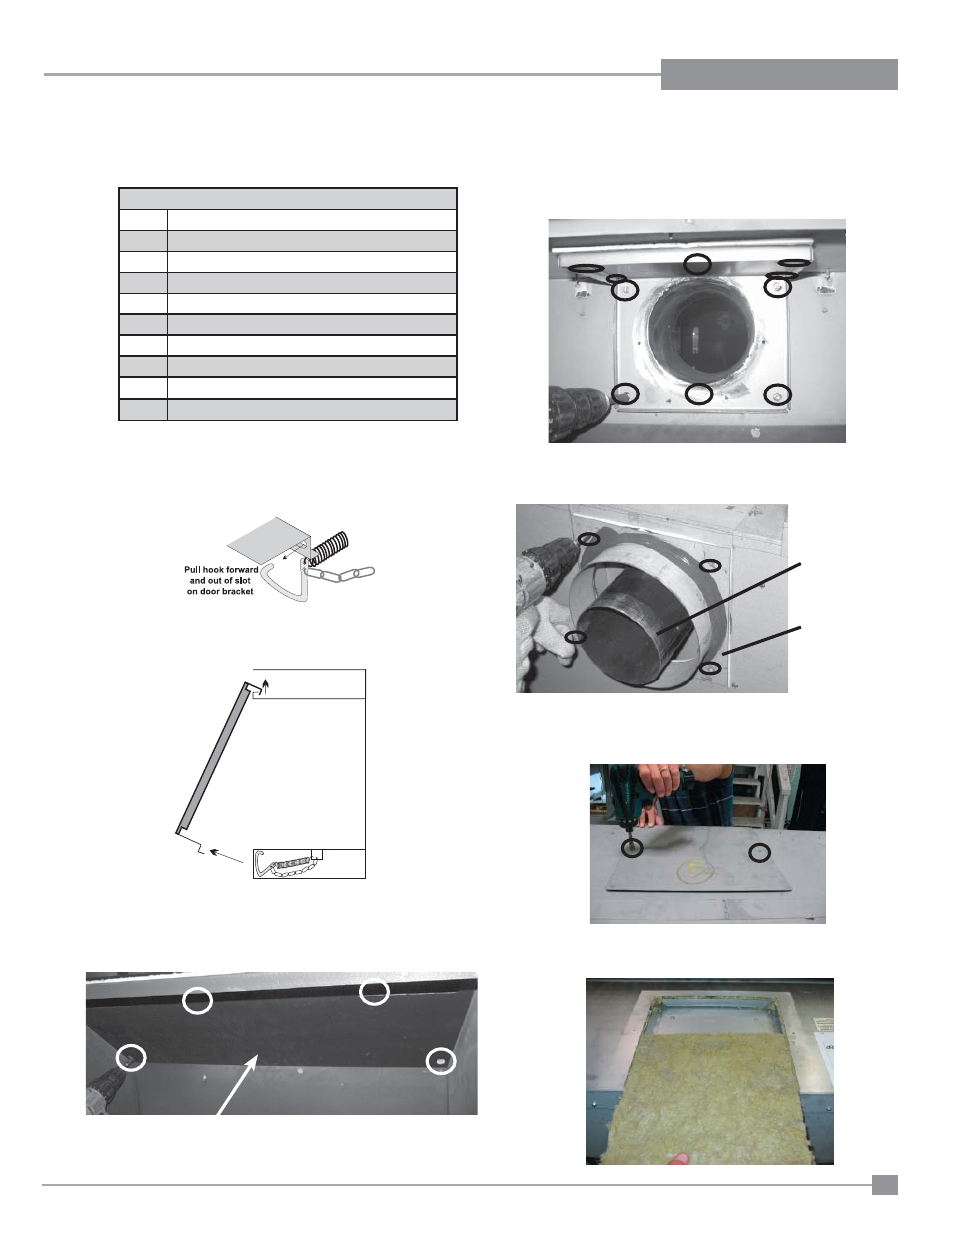
1) Remove the door by releasing the spring hooks at the bottom and
lifting the door up off the door frame.
2) From inside the fi rebox, remove the baffl e plate by removing 4
screws - remove top front screw fi rst.
Baffl e Plate
3) From the inside of the fi rebox, remove the exhaust assembly by
removing the 10 screws.
5) From the outside top of the fi rebox - remove top insulation cover
plate - by removing 2 screws as shown and discard.
4) From the outside rear of the fi rebox, remove the intake collar
assembly. Remove the 4 - 1/4" x 1/2" screws.
Exhaust
Assembly
Intake Collar
Assembly
Flush
Door
Swing door out
from the bottom
and lift up off
of door frame
6) From the outside top of the fi rebox - slide the square piece of
insulation out and discard.