3 fuse replacement – Sunnex CS2050D-MRI (Dual Ceiling) User Manual
Page 30
Sunnex Celestial Star MRI Service & Installation Manual
30
counter clockwise.
iv.
Grasp the bulb with one hand and unplug socket connector with the other.
v.
The notched ring assembly may now be removed from the lamp head and placed face down on a
flat surface.
vi.
Hold the notched ring assembly with thumbs and place two index fingers at flat part of spring (two
red lines in figure 8), pull the spring towards you pulling it out from the slot (Keep two ends of spring
inside it’s holes)
vii.
Remove old bulb
viii.
Install New bulb ** Do not touch inside reflector surface of bulb, always grasp from bulb outside
edges **
ix.
Replace the retainer spring on the bulb by inserting the front part of spring in the slot (using index
fingers), so that it fits properly. Check to ensure proper seating of the spring, by pulling on the bulb.
[Position (1) in figure 8 is “CLOSED SPRING”]. Ensure that two open ends of spring are properly
seated into holes in the notched ring assembly.
x.
Reconnect plug socket to bulb.
xi.
Replace the notched ring assembly in the lamp head by aligning the three guide projections into the
slots on the lamp head. Refer to figure 9. Press gently inward as you twist the assembly clockwise.
You will hit a stop and set in place. Before turning the lamp head over, BE POSITIVE THE
ASSEMBLY IS PROPERLY SEATED by comparing it with the other two.
xii.
Your light is now ready for use.
CAUTION! Use specified bulb only as the replacement, the power supply is developed to operate the
specified bulb. Any deviation from using this bulb may cause the light to not operate properly.
CAUTION! Be sure the bulb housing is properly
seated once it is attached!
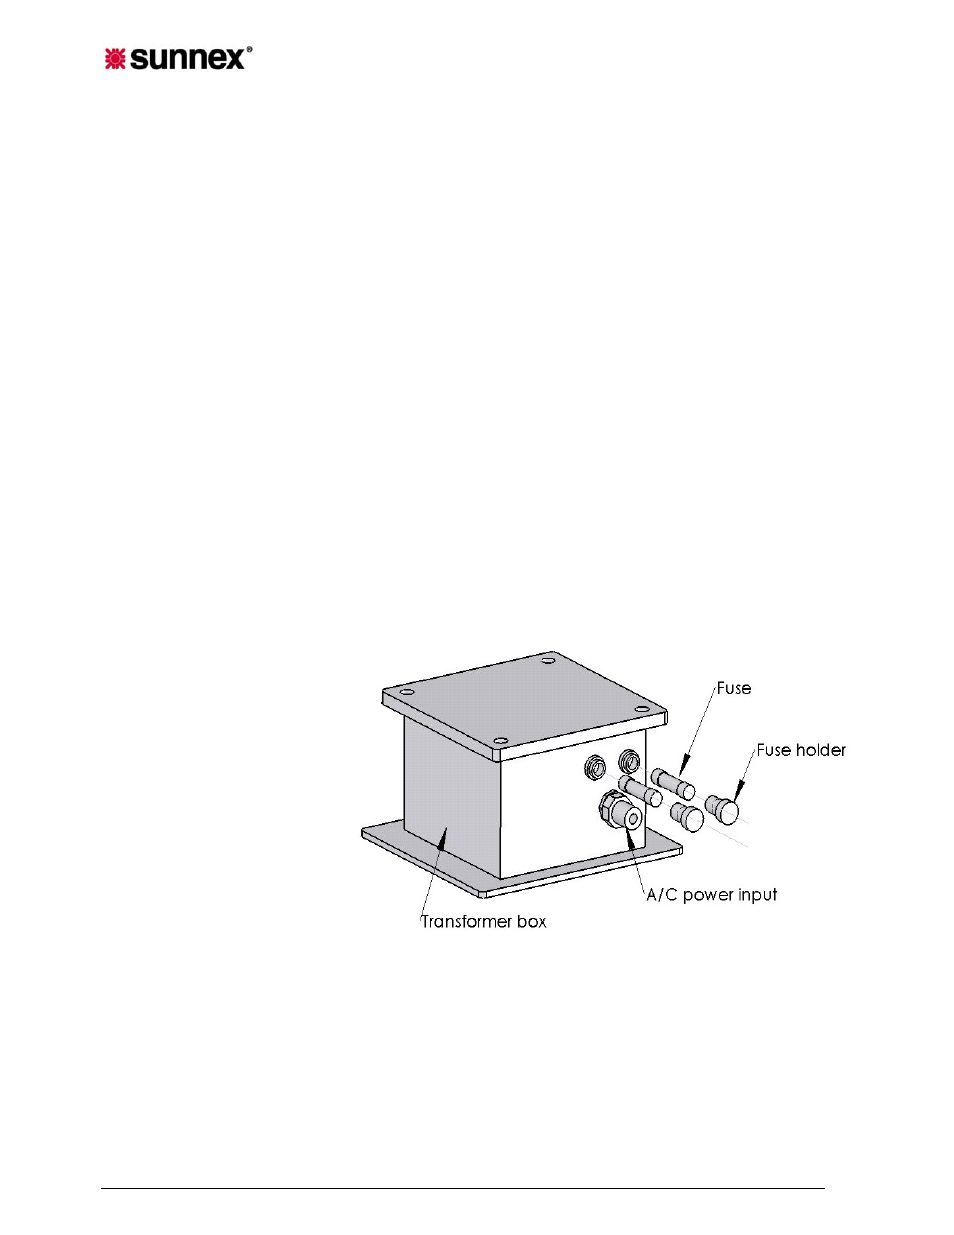
7.3 FUSE REPLACEMENT
1. Locate fuse holders (2) on the
side of the electrical box. Push
the fuse holder while turning it
counter clockwise and remove the
fuse holder from the fuse block by
pulling it out.
2. Replace fuse with proper
replacement fuse.
Fuse Replacement
Specifications:
USA : 250V, 2.5A,
Busmann MDA-2-1/2
Europe: 250V, 1.5A,
Busmann – MDA-1-1/2
3. Follow procedure in reverse to
return lamp to operating
condition.
Figure 15. Fuse Replacement