Installation – Skyjacker 9240 User Manual
Page 2
installation:
1. Park the vehicle on a level concrete or asphalt surface with the front tires / wheels pointing
straight forward.
2. Set the emergency brake & block the rear tires / wheels.
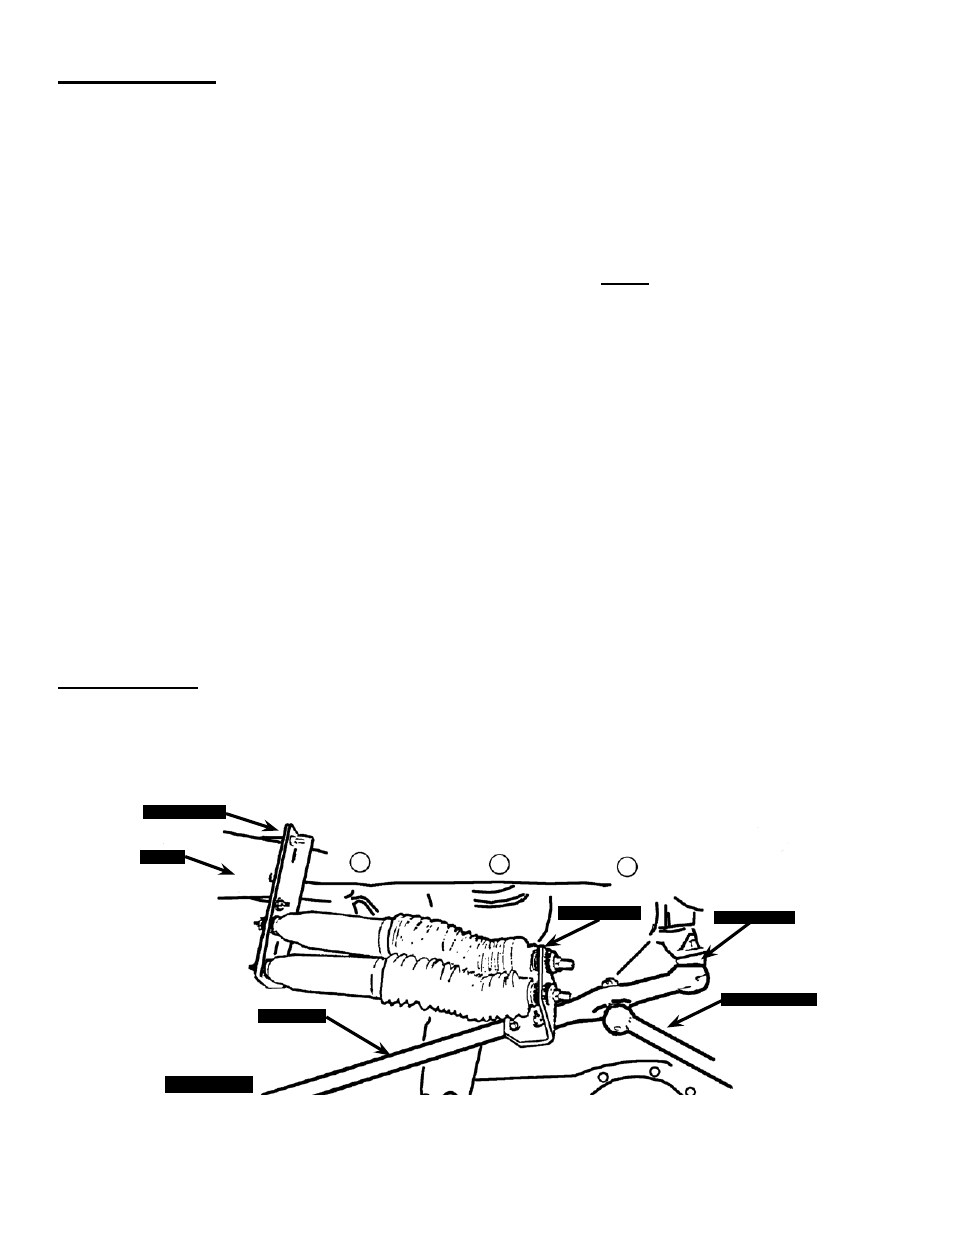
3. Install the new Skyjacker bracket "A" to the inside of the frame on the passenger side above the
OEM tie rod assembly & mount using the supplied square u-bolt, washers, & nuts. Twist the
bottom of the new bracket forward & tighten. (See Photo # 1 )
Note: On '92-'96 F-250 models,
the new bracket must either be tack welded in place or drill two 3/8" holes through the frame
using two of the holes in the new bracket as a template & bolt to the frame.
4. Attach the body end of the new Skyjacker steering stabilizers to the new bracket "A" using the
supplied bushings, washers, & nuts. (See Photo # 2)
5. Install the new Skyjacker boots on the new steering stabilizers using the supplied plastic ties &
install the new Skyjacker bracket "B" to the new steering stabilizers using the supplied bushings,
washers, & nuts.
6. Extend both of the new steering stabilizer piston rods 4.44" (exactly half-way out) & place the new
bracket "B" against the OEM drag link & secure with the supplied u-bolts, washers, & nuts. (See
Photo # 1)
7. Cycle the tires / wheels fully to right & to left making sure that no interference occurs & that the
stabilizers do not top or bottom out. Make adjustments as needed.
important Note:
• On F-350 vehicles with 6” or more of lift, the u-bolt supplied for the frame bracket will not work. The
bracket will need to be moved further down on the frame. Place the bracket in the desired position
on the frame & weld in place.
Drag link
Bracket “A”
Frame
Bracket “B”
Pitman Arm
outer Tie Rod
I-7240
Pg 2
Photo # 1