Installation – Skyjacker 9298 User Manual
Page 2
I-7298
Pg 2
installation:
1. Park the vehicle on a level concrete or asphalt surface with the front
tires / wheels pointing straight forward.
2. Set the emergency brake & block the rear tires / wheels.
3. While supporting the front cross member with a floor jack, remove
the front lower A-arm bolt at the frame using a 15/16" socket.
Note:
If installing on a vehicle with 3” or more lift, it will be the upper front
bolt on the after market cross member.
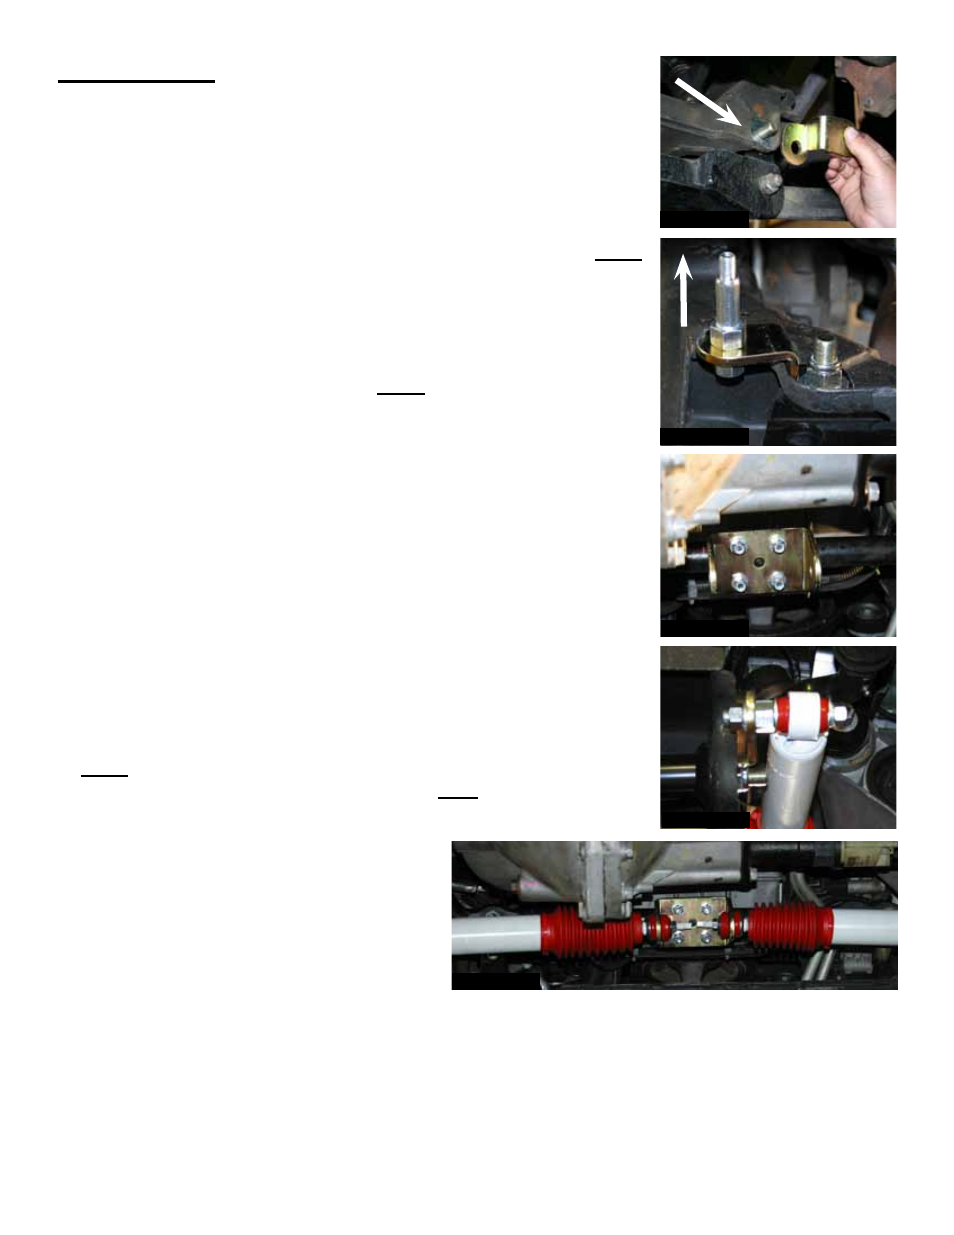
4. Once the bolt is removed, re-install with the new Skyjacker outer
stabilizer bracket. Place the large 5/8" washer between the bracket &
the frame. (See Arrow in Photo #1)
Note: Be sure to install the bolt
pointing toward the rear. Mount the new bracket so the tab sticks
back & outward toward the tire / wheel. Attach the steering stablizer
stud to the bracket. (See Photo # 2) Repeat this process on the
passenger side.
5. Mount the new Skyjacker center main bracket to the center link using
the supplied u-bolts, washers, & nuts. Do not tighten the u-bolts at
this time. (See Photo # 3)
6. Attach the cylinders to the main bracket & outer bracket. (See Photo
# 4) Center the main bracket so that both cylinders are pulled out
equal distances. (See Photo # 4 & # 5)
7. Cycle the steering left to right & check all parts for adequate
clearance.
Note: This steering stabilizer kit is designed for the 01-10 GM 2500
HD 4WD with 3"-6" lift heights. This kit will
NoT work on vehicles
with a lift kit that relocates the upper A-arms.
Photo # 1
Photo # 3
Photo # 4
Photo # 5
Photo # 2