Installation – Skyjacker 9098 User Manual
Page 2
Installation:
1. Park the vehicle on a level concrete or asphalt surface with
the front tires / wheels pointing straight forward.
2. Set the emergency brake & block the rear tires / wheels.
3. Remove the OEM steering stabilizer from the frame & from
the center steering link.
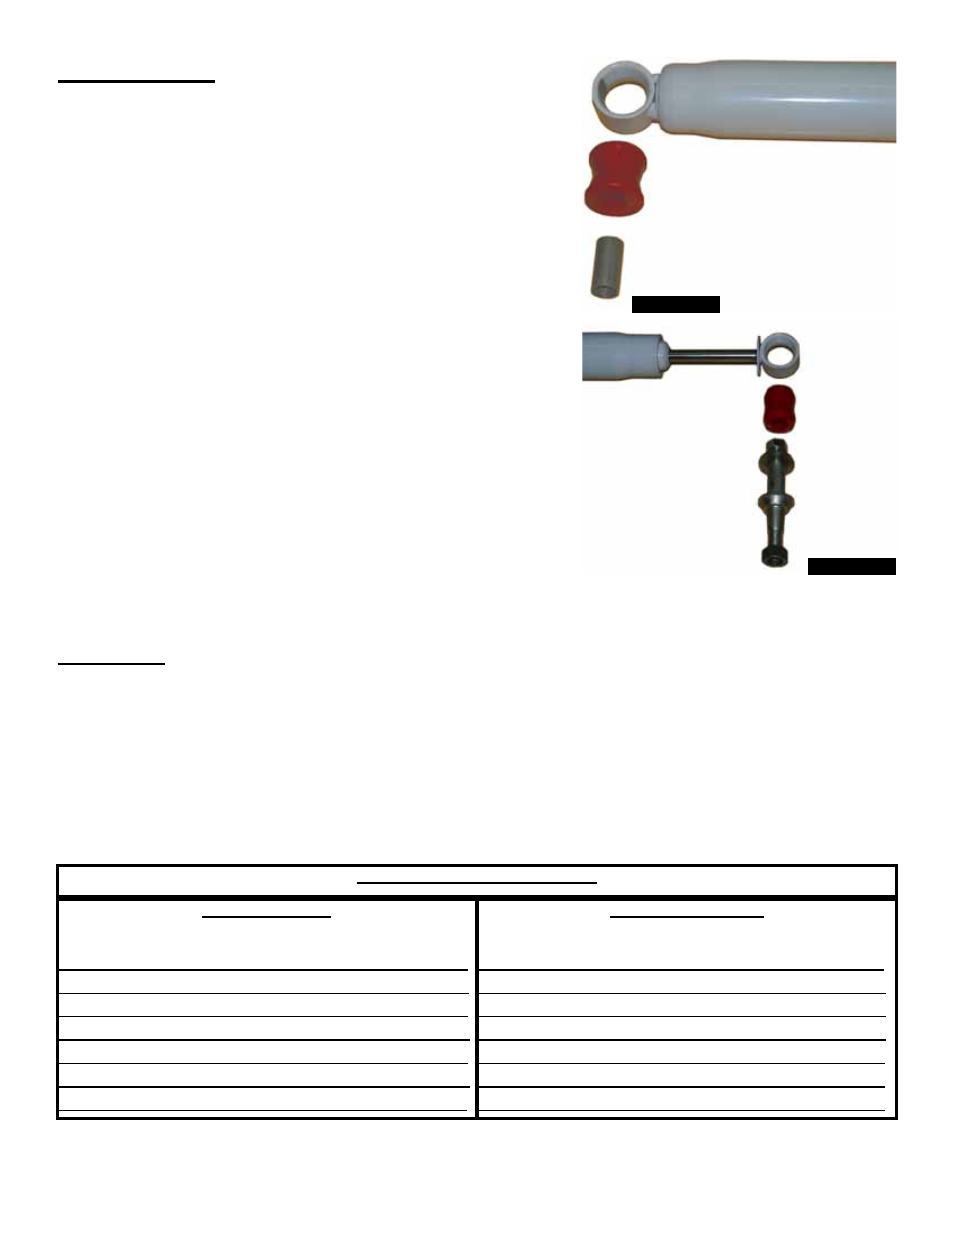
4. Install the supplied 1 1/4” long bushing into the body end of
the new Skyjacker steering stabilizer & install the supplied
1 1/4” long sleeve into the new bushing. (See Photo # 1)
5. Install the supplied 5/8” hourglass bushing, which is 1 1/2”
long, into the shaft end of the new Skyjacker steering
stabilizer. (See Photo # 2)
6. Install the supplied tapered stud into the OEM center
steering link using the supplied nut & washer. Slide the
shaft end of the new Skyjacker steering stabilizer over the
stud & install the supplied nut & washer. (See Photo # 2)
7. Attach the body end of the new Skyjacker steering stabilizer
to the OEM mount on the frame using the OEM hardware.
Final Notes:
• After the installation is complete, double check that all nuts & bolts are tight. Refer to the following
chart for the proper torque specifications. (Do not retighten the nuts & bolts where thread lock
compound was used.)
• Cycle the steering of the vehicle left to right & check all parts for adequate clearance.
• After the first 100 miles, check all of the hardware for the proper torque & periodically thereafter.
Photo # 1
Photo # 2
I-7098
Pg 2
TORquE SPECIFICATIONS
INCH SySTEM
Bolt Size Grade 5 Grade 8
5/16 15 FT LB 20 FT LB
3/8 30 FT LB 35 FT LB
7/16 45 FT LB 60 FT LB
1/2 65 FT LB 90 FT LB
9/16 95 FT LB
130 FTLB
5/8 135 FT LB 175 FT LB
3/4 185 FT LB
280 FT LB
METRIC SySTEM
Bolt Size Class 8.8 Class 10.9
6MM 5 FT LB 9 FT LB
8MM 18 FT LB 23 FT LB
10MM 32 FT LB 45 FT LB
12 MM 55 FT LB 75 FT LB
14MM 85 FT LB 120 FT LB
16MM 130 FT LB 165 FT LB
18MM 170 FT LB 240 FT LB
•
The above specifications are not to be used when the bolt is being installed with a bushing.