Installation – Skyjacker 9186 User Manual
Page 2
I-7186
Pg 2
Installation:
1. Park the vehicle on a level concrete or asphalt surface with the front tires / wheels pointing
straight forward.
2. Set the emergency brake & block the rear tires / wheels.
3. Remove the two rear bolts that hold the OEM idler arm to the frame on the passenger side &
install the supplied 12mm x 130mm bolts & washers.
Note: Do not install the supplied 12mm nuts
at this time. The head of the new 12mm x 130mm bolts should be toward the outside of the
vehicle.
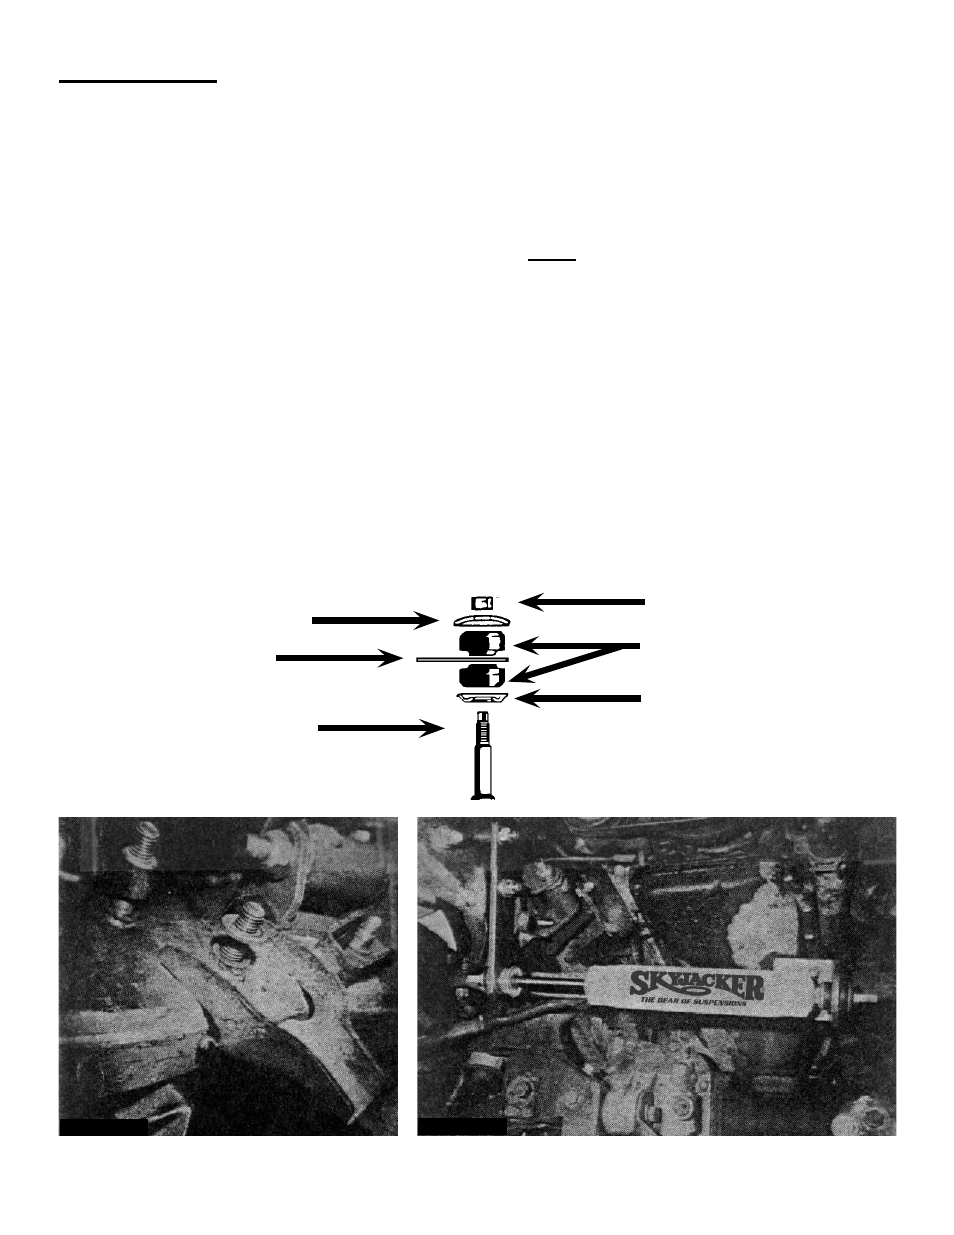
4. Install the supplied spacer on the upper bolt & place one of the thick OEM washers on the lower
bolt. The new spacer & OEM washer go between the frame & the new Skyjacker mounting
bracket. (See Photo # 1) Place the new bracket on the mounting bolts & secure with the
remaining washers & nuts. Tighten at this time.
5. Install the new Skyjacker boot onto the new Skyjacker steering stabilizer & attach the shaft end of
the new steering stabilizer onto the new frame mount.
6. Attach the new Skyjacker tie rod bracket to the new steering stabilizer with the (L) shape going
toward the new steering stabilizer cylinder (See Photo # 2) Extend the shaft out 4” (half-way) &
tighten using the supplied u-bolts, washers, & nuts.
Shock Stud
Stem Bushings
Retaining Washer
Retaining Washer
Bracket
Retaining Nut
Photo # 1
Photo # 2