Installation: part # 7199 – Skyjacker HB-7199 User Manual
Page 3
Installation: Part # 7199
1. Park the vehicle on a level concrete or
asphalt surface with the front tires /
wheels pointing straight forward.
2. Set the emergency brake & block the rear
tires / wheels.
3. Insert a new Skyjacker poly bushing into
each eye & the new Skyjacker steel
sleeve only in the eye attached to the
body end of the new Skyjacker steering
stabilizer.
4. Position the new Skyjacker boot onto the
new Skyjacker steering stabilizer &
secure with the supplied plastic tie.
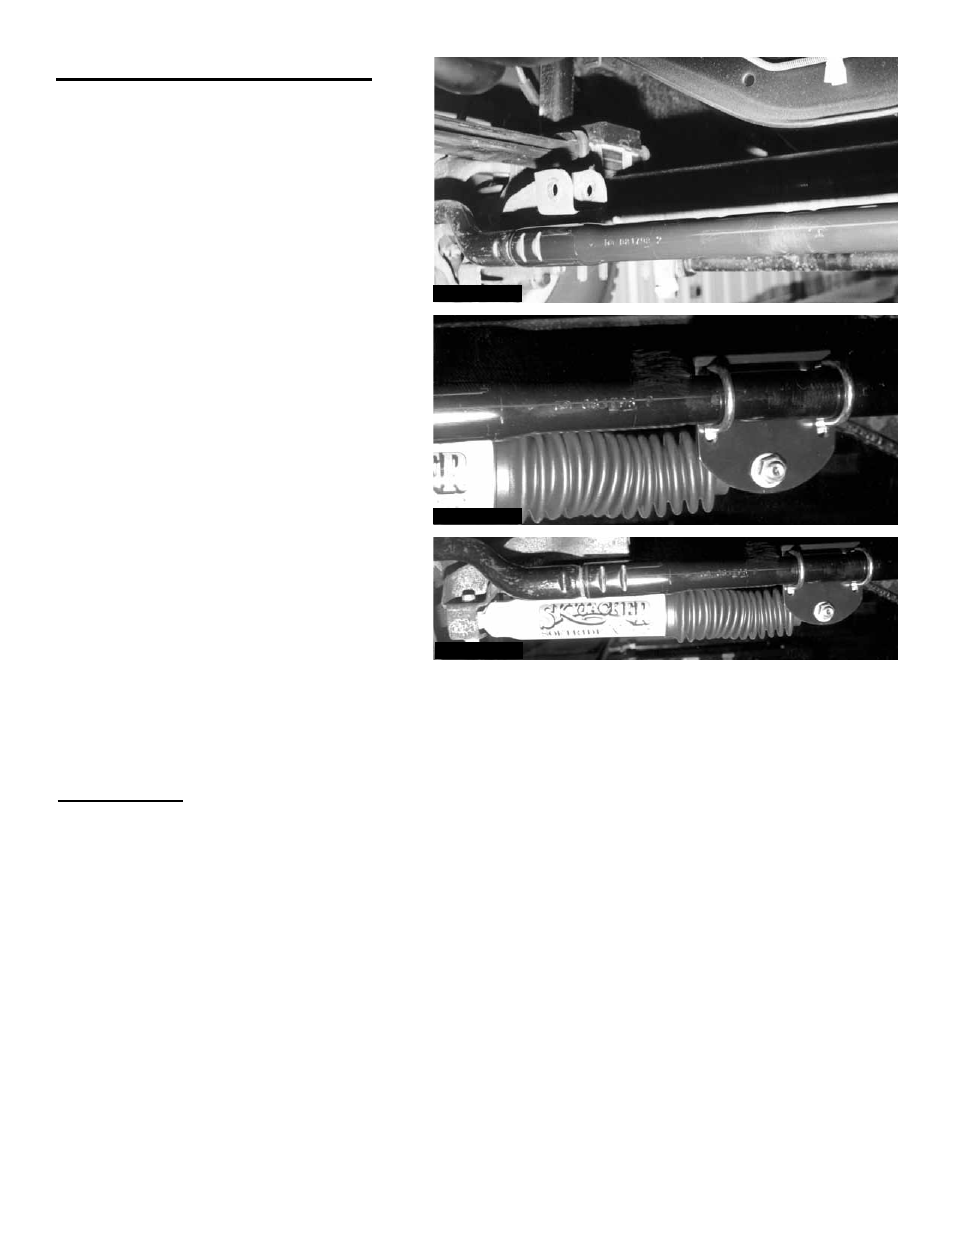
5. Notice the four indentions on top of the
OEM tie rod. (See Photo # 3) Install the
new Skyjacker tie rod bracket using
the supplied u-bolts over the OEM tie rod
using indentions # 2 & # 4. (See Photo
# 4) Install the supplied stud mount onto
the new tie rod bracket. (See Photo # 4)
6. Install the new Skyjacker steering
stabilizer into the OEM mount on the passenger side axle using the supplied 1/2" x 3" bolt,
washers, & nut. Install the new steering stabilizer onto the new mounting stud on the new tie rod
bracket. (See Photo # 5)
Final Notes:
• After the installation is complete, double check that all nuts & bolts are tight. Refer to the following
chart for the proper torque specifications. (Do not retighten the nuts & bolts where thread lock
compound was used.)
• Cycle the steering of the vehicle left to right & check all parts for adequate clearance.
• After the first 100 miles, check all of the hardware for the proper torque.
1
4
3
2
1
4
3
2
I-7099/7199
Pg 3
Photo # 3
Photo # 4
Photo # 5