Installation – Skyjacker 9203 User Manual
Page 2
installation:
1. Park the vehicle on a level concrete or asphalt surface with the front
tires / wheels pointing straight forward.
2. Set the emergency brake & block the rear tires / wheels.
3. Remove the OEM steering stabilizer from the OEM mount on the
axle & OEM drag link.
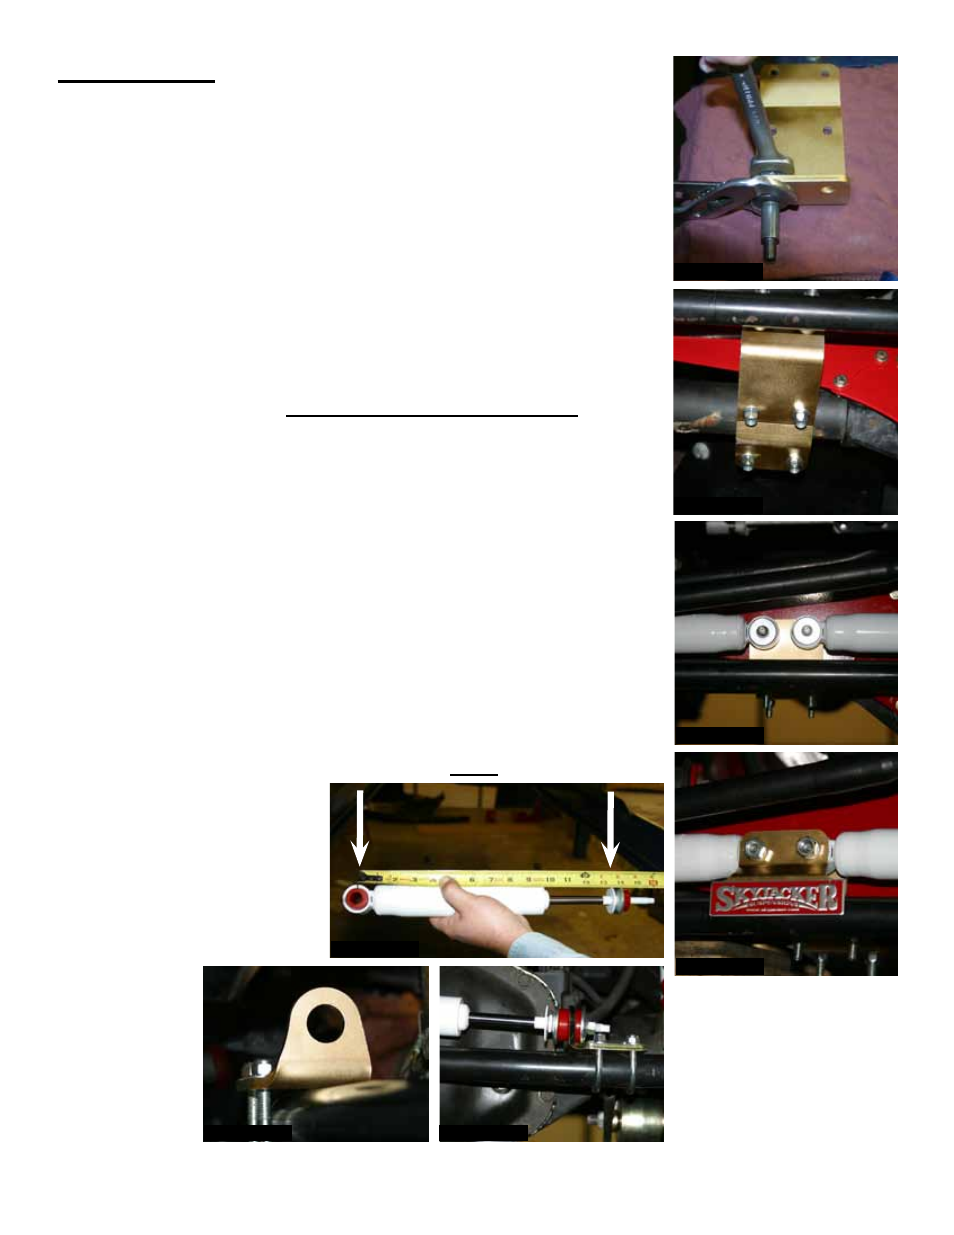
4. Install the two new Skyjacker straight studs to the new Skyjacker
axle bracket using a 3/4" socket & adjustable pliers. (See Photo # 1)
5. Measure from the differential housing 1 1/4" & install the new axle
bracket under the axle using the supplied 3/8" x 2 3/4" x 3" u-bolts,
nuts, & a 9/16" socket.
Note: Do not tighten at this time. (See
Photo # 2)
6. Install the eyelet end of each new Skyjacker stabilizer to a stud on
the new axle bracket & install the supplied 1/2" flat washers. (See
Photo # 3)
7. Install the new Skyjacker front plate using the supplied 1/2" lock
washers, nuts, & a 3/4" socket. (See Photo # 4)
8. Extend the new steering stabilizers 3 1/4", (exactly halfway). The
center to center length will be 13 1/2" when the steering stabilizers
are half way out. (See Photo # 5)
9. Install the new Skyjacker driver & passenger side tie rod brackets
using the supplied polyurethane stem bushings, stem washers, 5/16"
x 1 1/2" x 2" u-bolts, nuts, & a 1/2" socket.
Note: The new tie rod
brackets are to be installed
with the curved portion of
the bracket facing toward
the front of the vehicle.
(See Photo # 6 & 7)
I-7203
Pg 2
Photo # 1
Photo # 2
Photo # 3
Photo # 4
Photo # 5
Photo # 7
Photo # 6