Installation – Skyjacker 7211 User Manual
Page 2
Pg 2
I-7211
Installation
:
1. Park the vehicle on a level concrete or asphalt surface with the front
tires / wheels pointing straight forward.
2. Set the emergency brake & block the rear tires / wheels.
3. If equipped, remove the OEM steering stabilizer from the OEM mount
on the frame & OEM center link.
4. Place a floor jack under the lower control arm’s front cross member &
raise the vehicle. Place jack stands under the frame rails, behind the
front wheel wells & lower the frame of the vehicle onto the jack stands.
WARNING: Be extremely careful when loading or unloading the
torsion bars; there is a tremendous amount of stored energy (load
pressure) in the torsion bars. Keep your hands & body clear of the
adjuster arm assembly & puller tool in case anything slips or breaks.
NOTE: A special PULLER TOOL (Kent - Moore Part # CH-48809 is
required for the SAFE REMOVAL / INSTALLATION of the torsion bars.
This special puller can be purchased from a GM dealer or auto parts
store.
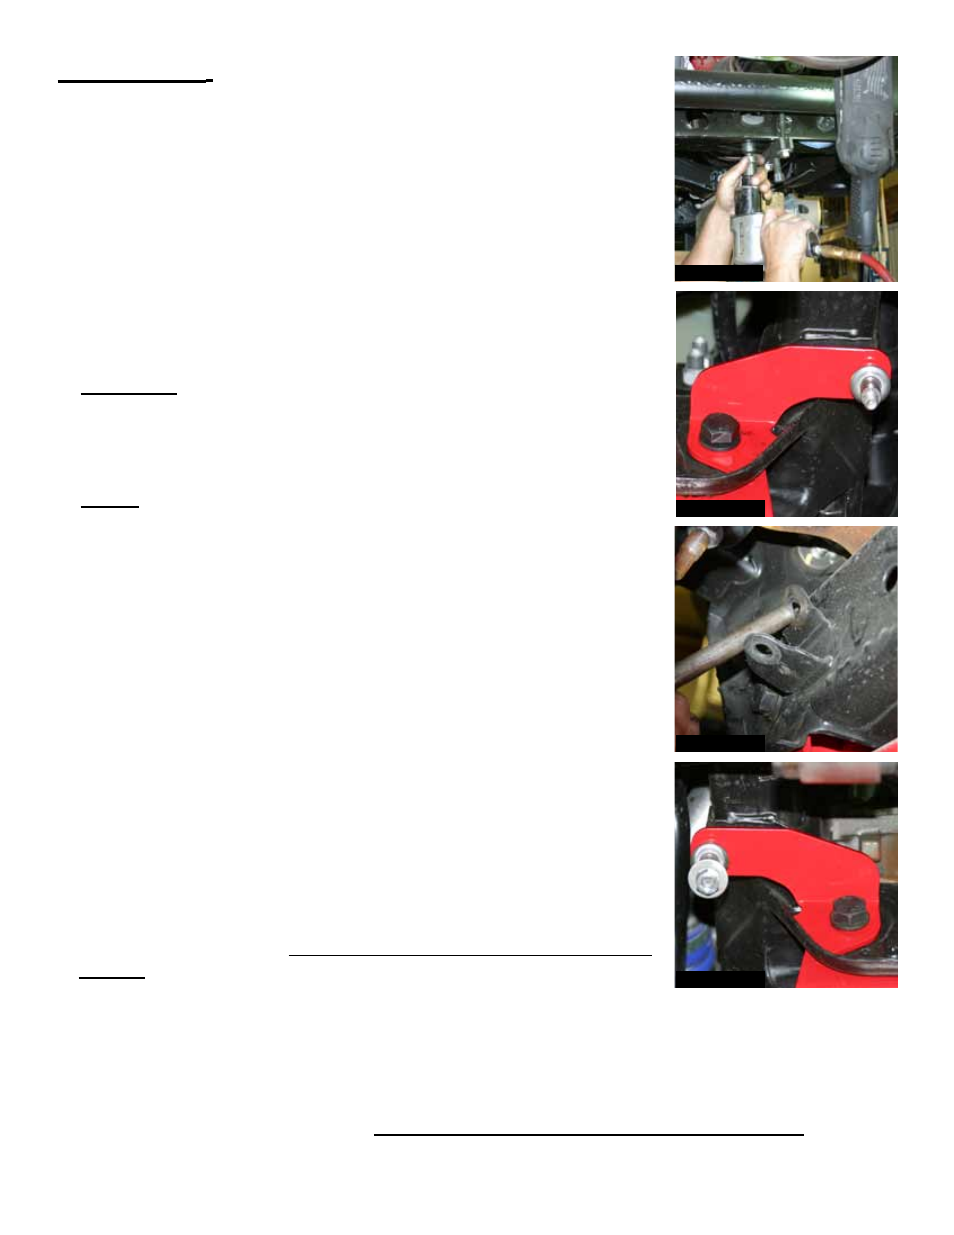
5. Locate the torsion bar adjuster bolt on the bottom of the torsion bar
cross member, measure & record the length of the torsion bar
adjusting bolt that is exposed. Apply a small amount of lubricating
grease to the puller threads & the puller shaft-to-adjuster arm contact
point. Position the puller & load the adjuster arm until the adjuster nut
can be removed from the torsion bar cross member using a 21mm
socket. (See Photo # 1) Repeat this process on the opposite side.
6. Install the four new Skyjacker studs to the driver side, center, &
passenger side brackets using a 3/4" socket & adjustable pliers. (See
Photo # 2, 4, & 5)
7. Remove the upper front cross member bolt on the passenger side of
the vehicle. Install the supplied 18mm washer between the OEM cross
member & the new Skyjacker passenger side bracket. Install the upper
front cross member bolt
(With the hex head of the bolt to the new
bracket) thru the new bracket, 18mm washer, & OEM cross member
using a 1 1/16" socket. (See Photo # 2)
8. Bend the OEM stablizer mounting bracket tabs upward using a hammer & punch. (See Photo # 3)
9. Remove the upper front cross member bolt on the driver side of the vehicle. Install the supplied
18mm washer between the OEM cross member & the new Skyjacker driver side bracket. Install
the upper front cross member bolt
(With the hex head of the bolt to the new bracket) thru the
new bracket, 18mm washer, & OEM cross member using a 1 1/16" socket. (See Photo # 4)
Photo # 1
Photo # 3
Photo # 4
Photo # 2