Installation – Skyjacker 7239 User Manual
Page 2
Hardware Bag Breakdown: (Continued)
HB-7239 HARDWARe BAG
iTeM# DeSCRiPTioN qTY
38SAEW
3/8 SAE WASHER
12
142121
ES24 SLEEVE/402087 1.38"
1
I-7239
Pg 2
installation:
1. Park the vehicle on a level concrete or asphalt surface with the tires
pointing straight forward.
2. Set the emergency brake & block the rear tires.
3. Remove the OEM steering stabilizer from the OEM mount on the
axle & OEM drag link.
4. Install the new Skyjacker passenger side bracket to the OEM
stabilizer mount on the axle using the 1/2" x 3” fine thread bolt,
washers, & nut.
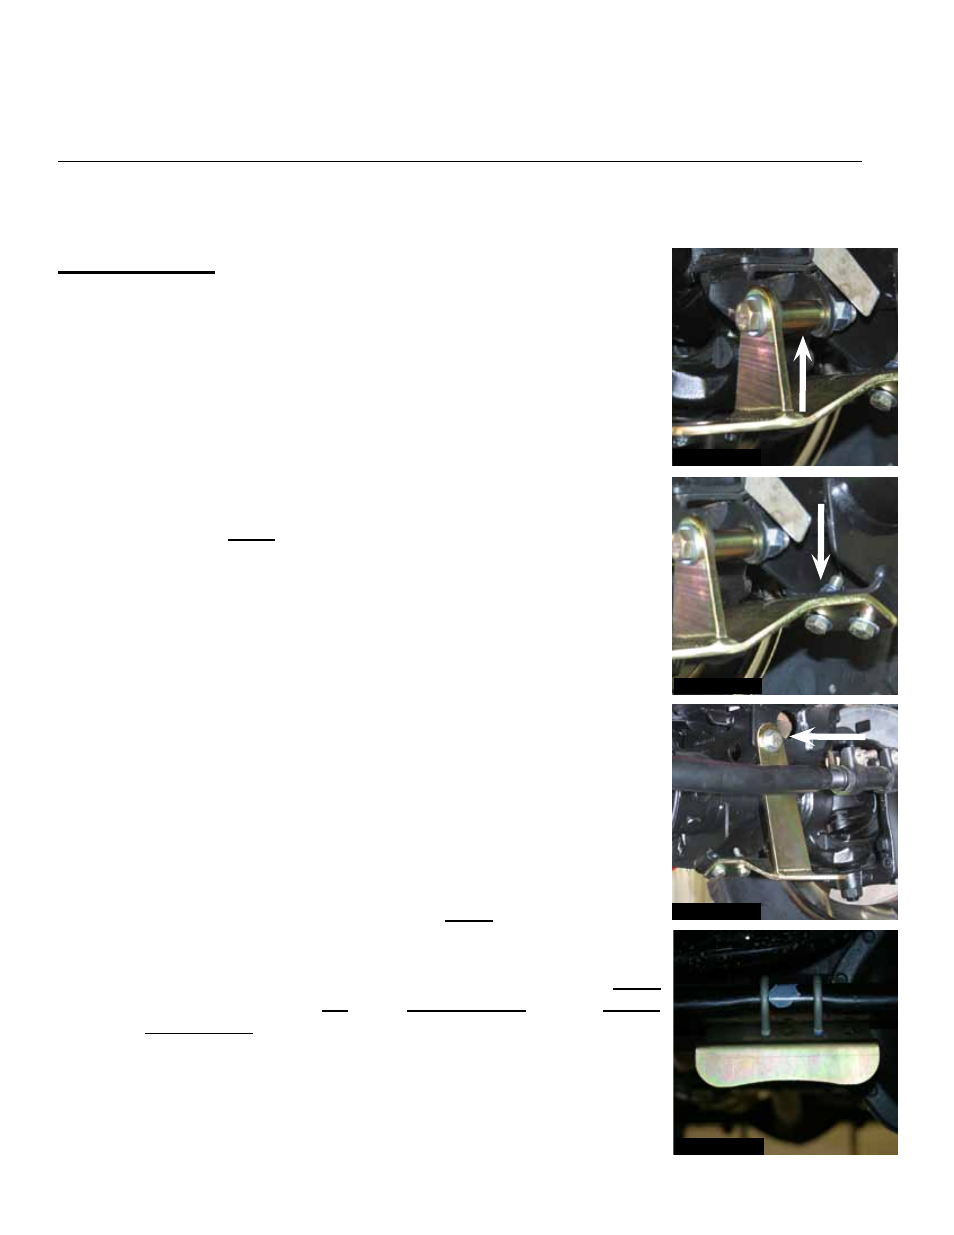
Note: Be sure to install the 1.38” anti-crush sleeve
(Part # 142121) inside the OEM mount. (See Arrow in Photo # 1)
5. Mark & drill the two lower mounting holes of the bracket to 3/8”.
Once drilled, install the 3/8" x 1 1/4” fine thread bolts, washers, &
nuts. (See Arrow in Photo # 2)
6. Install the new Skyjacker driver side bracket to the mounting hole in
the bottom of the OEM coil spring mount, using the 1/2" x 1 1/2” fine
thread bolt, washers, & nut. (See Arrow in Photo # 3)
7. Mark & drill the two lower bracket holes the same as in Step # 5.
Once drilled, install using the 3/8" x 1 1/4” fine thread bolts, washers,
& nuts.
8. Remove the OEM stabilizer bracket from the OEM drag link & install
the new Skyjacker main bracket, using the 3/8" x 1 7/16" x 2 3/4”
U-bolts, washers, & nuts. (See Photo # 4)
Note: Be sure to line the
U-bolts up with the OEM notches on the OEM drag link.
9. Install the new Skyjacker double ended studs to each bracket.
Note:
The studs will mount to the top of the outer brackets & to the bottom
of the main bracket.
10. Slide the new Skyjacker boots over the shafts of the new Skyjacker
steering stabilizers & attach with the supplied boot tie.
Photo # 1
Photo # 2
Photo # 3
Photo # 4