Rear installation – Skyjacker HB-916 User Manual
Page 4
16. Connect the OEM brake line brackets to the frame using the OEM
hardware. (See Photo # 1)
17. Install the front tires / wheels & lower the front of the vehicle to the
ground.
Rear Installation:
18. Block the front tires / wheels & raise the rear of the vehicle using a
floor jack. Properly support the frame rails using jack stands &
remove the rear tires / wheels.
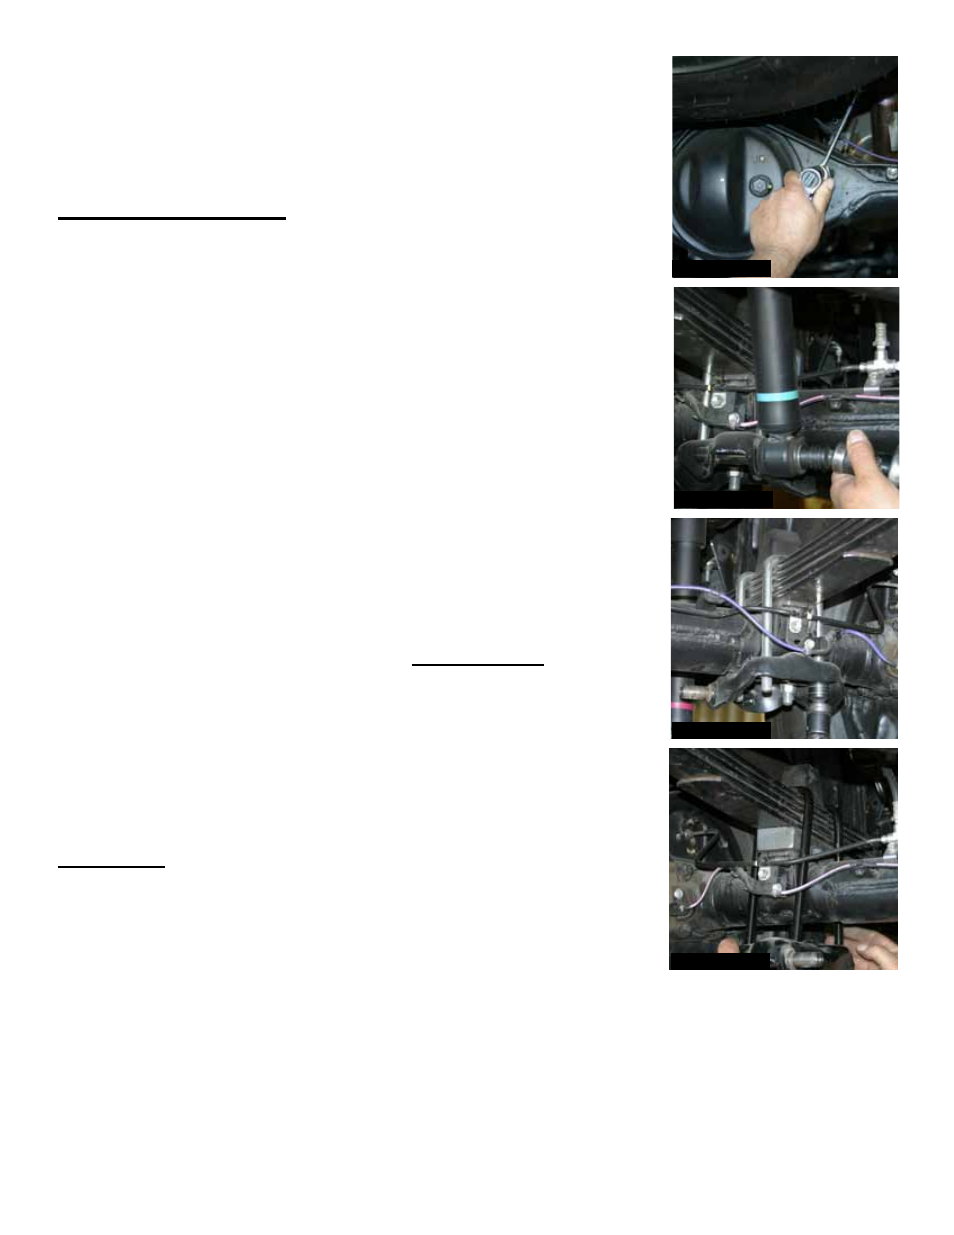
19. Disconnect the OEM brake proportioning valve linkage from the
rear differential. (See Photo # 10)
20. Support the rear differential & remove the OEM rear shocks. (See
Photo # 11)
21. Remove the OEM rear u-bolts & lower the rear differential enough to
allow for the installation of the new Skyjacker rear lift blocks. (See
Photo # 12)
22. Install the new Skyjacker rear lift blocks, raise the rear differential, &
install the new Skyjacker u-bolts using the supplied 9/16" nuts. (See
Photo # 13)
23. Install the new Skyjacker rear shocks (Sold Seperately), using the
supplied & OEM hardware.
24. Connect the OEM brake proportioning valve linkage to the rear
differential using the OEM hardware. (See Photo # 10)
25. Install rear tires / wheels & lower the rear of the vehicle to the
ground.
Final Notes:
• After the installation is complete, double check that all nuts & bolts are
tight. Refer to the following chart for the proper torque specifications.
(Do not retighten the nuts & bolts where thread lock compound was
used.)
• With the vehicle placed on the ground, cycle the steering lock to lock & inspect the steering,
suspension, brake lines, front & rear drivelines, fuel lines, & wiring harnesses for proper operation,
tightness, & adequate clearance.
• Have the headlights readjusted to the proper settings.
Pg 4
I-HL130ST
Photo # 10
Photo # 11
Photo # 12
Photo # 13