Rear installation – Skyjacker TT413ST User Manual
Page 3
Note: There are six snap ring grooves located on the new Skyjacker
strut body for 1" to 3" lift heights. The ring is installed in the second
groove from the top when shipped. This will yield 2.5" - 3" of lift. The
upper groove is only to be used when 2.5" - 3" of lift is desired, after
aftermarket accessories have been added that weigh the front of the
vehicle down (ie. winch, after market bumper, & etc). The lower
grooves can be used if you would like to keep the factory rake of the
vehicle (front of vehicle lower than the rear).
Once the coil spring
seat retaining ring has been installed, check all suspension
components for any contact or interference. If suspension
component contact or interference is present, lower the coil
spring seat by lowering the coil spring seat retaining ring until
no contact or interference is present.
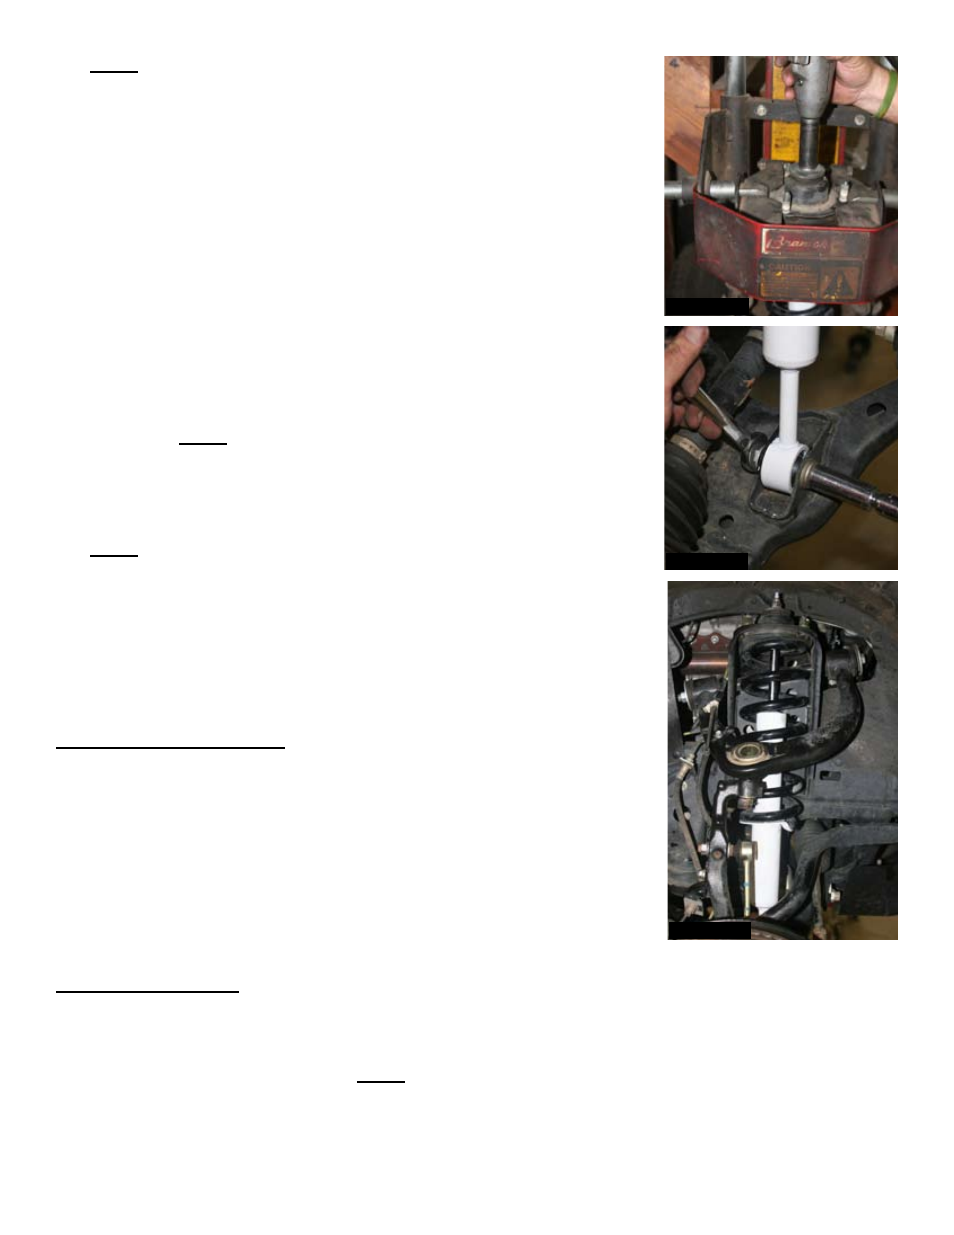
10. Re-assemble using the Skyjacker Strut. (See Photo #7)
11. Attach the strut assembly to the lower A-arm using the factory
hardware.
Note: Install the bolt from the rear, towards the front.
(See Photo #8)
12. Attach the upper strut mount to the frame using the factory
hardware. Re-attach the upper A-arm to the steering knuckle.
Note: It may be necessary to use a pry bar to pull the A-arm down
far enough to re-attach.
13. Re-attach the ABS line / brake line & sway bar end links. (See
Photo #9)
14. Install the front tires / wheels & lower the vehicle to the ground.
Rear Installation:
15. Block the front tires & raise the rear of the vehicle using a
floor jack. Properly support the frame rails using jack
stands & remove the rear tires / wheels.
16. Remove the rear shocks & disconnect the brake line bracket from
the axle.
17. Remove the rear U-bolts, allowing access to the rear springs.
Rear Spring Models:
18. Disconnect the E-brake cable from the leaf spring. Remove the
factory leaf spring & install the new Skyjacker leaf spring using the
new 9/16" x 2 1/2" x 7" U-bolts.
Note: Be sure to re-attach the
E-brake cable to the leaf spring using the factory hardware.
Photo #7
Photo #8
Photo #9
Pg 3
I-TT430ST