Unloading & assembly – MacDon 963 Harvest Header User Manual
Page 74
73
UNLOADING & ASSEMBLY
INSTALL DRAPERS (continued)
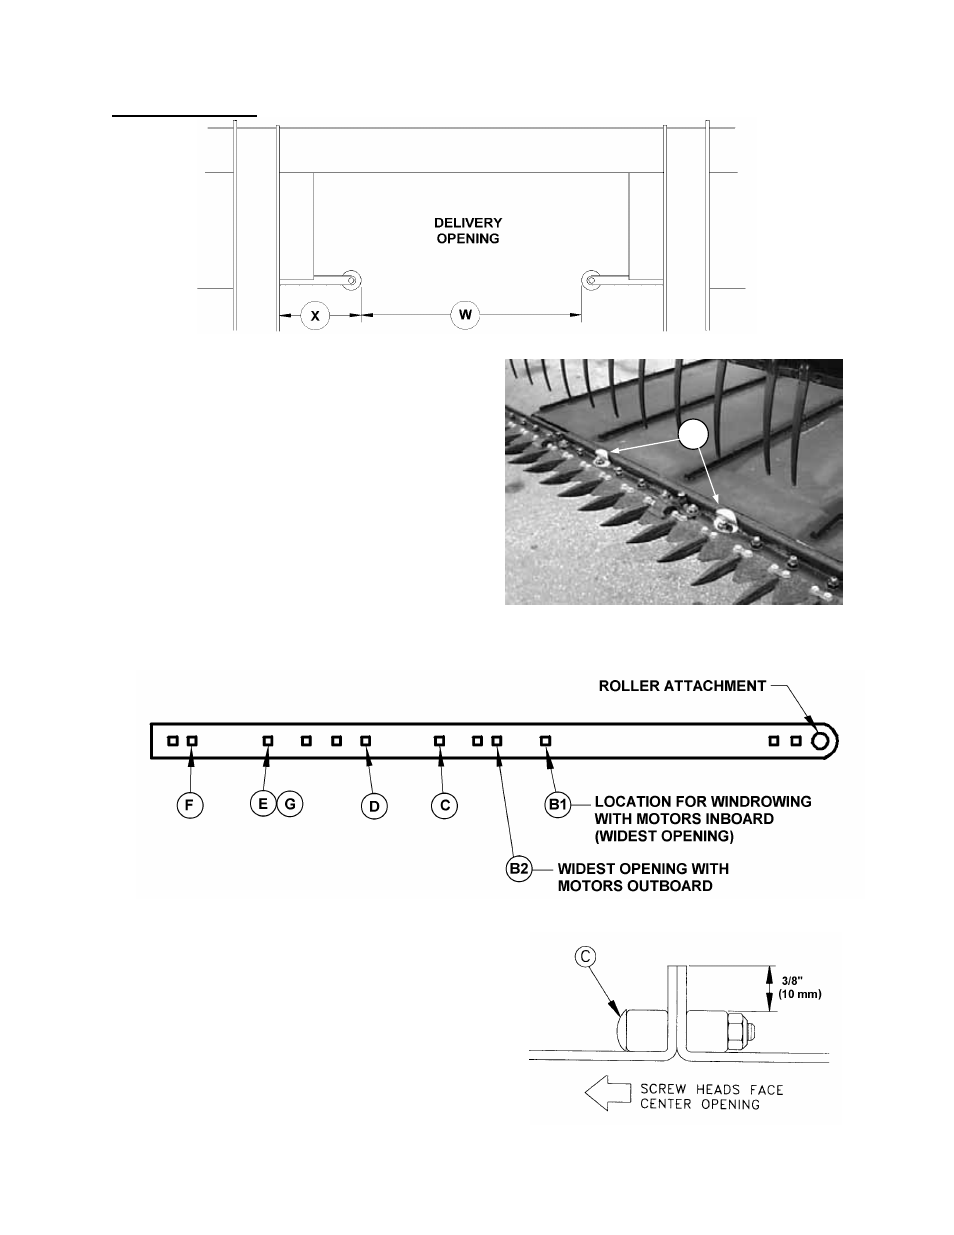
1. Use the chart on page 72 to position draper
connector tubes at the appropriate rows of
holes and position rollers at center opening for
the desired application.
NOTE: For combine applications with 38” feed
draper deck, prior to installing drapers, install
draper supports on idler roller bars as shown
on page 74, Step 3.
Bolt opening adjustment bars to deck at the
hole corresponding to the draper row. For
example if drapers are to be connected at row
E (from chart on previous page), move roller
until hole (E) aligns with deck mounting slot.
Use a carpenter’s square to ensure roller is
square to deck and tighten hardware.
NOTE: For access to bolt securing the
adjustment bar at cutterbar on L/H (moveable)
deck, remove retainer clips (G). Raise front of
deck for access to bolt.
2. Cut excessive flap off of draper, leaving 3/8"
(10 mm) extending above the connector. Trim
the new ends at the front corners as shown on
page 72. This allows draper to fit properly
under front draper seal to prevent tearing of
front edge. Use the cut-offs as a guide for
trimming. Keep the cut-offs for use as a splice.
3. NOTE: Place connector tube so holes closest
to end of tube are at the cutterbar.
Connect draper with screw heads (C) facing
center opening.
4. Apply draper tension. See "Draper Tension
Adjustment" in Maintenance/Service section,
page 47.
CONNECTOR SCREW HEADS
REMOVE CLIPS ON LEFT DECK
FOR BOLT ACCESS
G